 After winning Create A Smile’s “blue” challenge in with my very blue light-up ocean card, I was asked to be a Guest Designer for October’s challenge. The theme for this month is “embellish”.
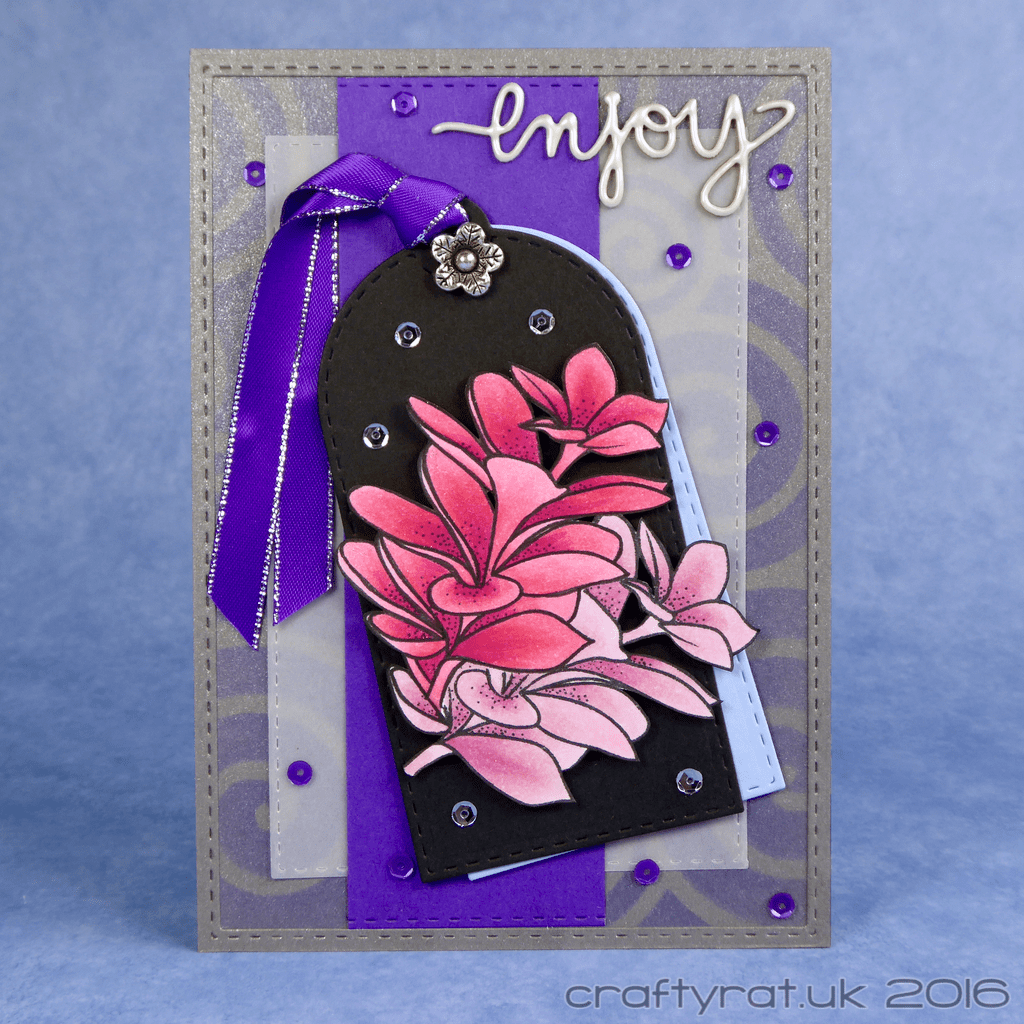
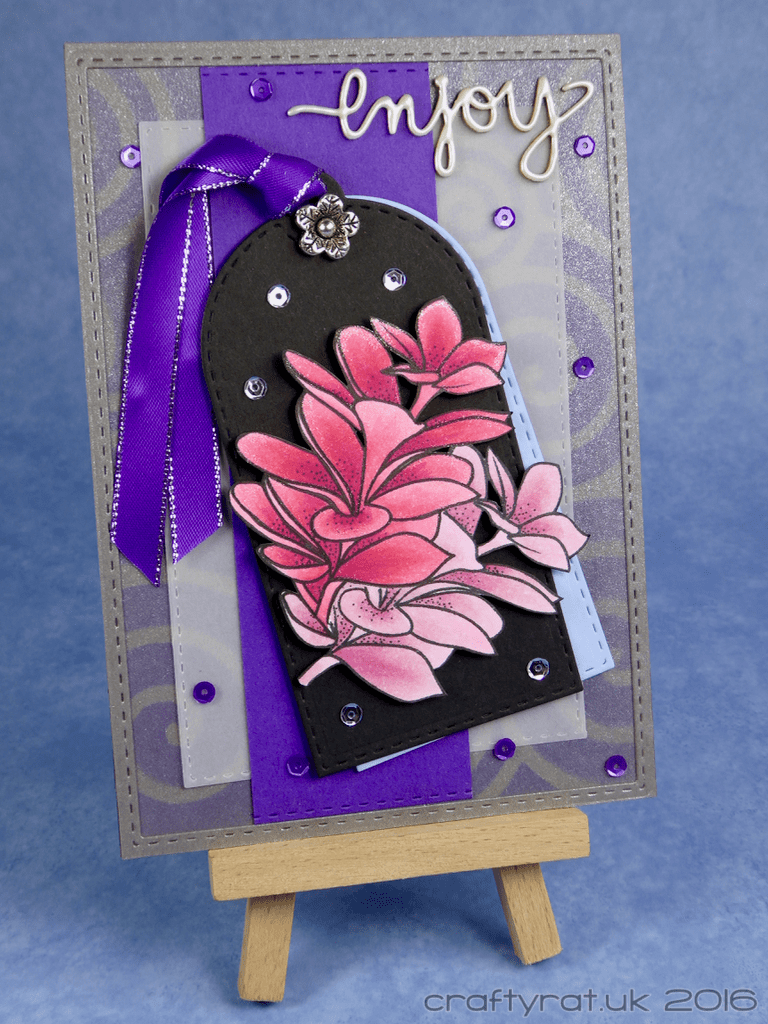
Now, embellishments are normally the last thing I think about when making a card, usually in a “what else does this card need” sort of way, so it was a novelty to have to consider them from the start. The only advice was “put on some sequins, enamels, ready”, but I couldn’t possibly bring myself to just do that — given a challenge, I like to do my utmost to really fulfil the brief.
So this card has sequins, ribbon, a chipboard and a charm, and a touch of Wink of Stella for that bit of extra sparkle. (Though I did forget the enamels!)
 How:
How:
I started by creating a card base from pearlised grey card and stencilling the swirls on it using a stencil brush and Distress ink. Next I added a narrow border; this is the piece leftover after die-cutting the largest on the Euro-sized double-stitched rectangles from an A6 piece of card. A smaller rectangle of parchment and a strip of purple card completed the base layers.
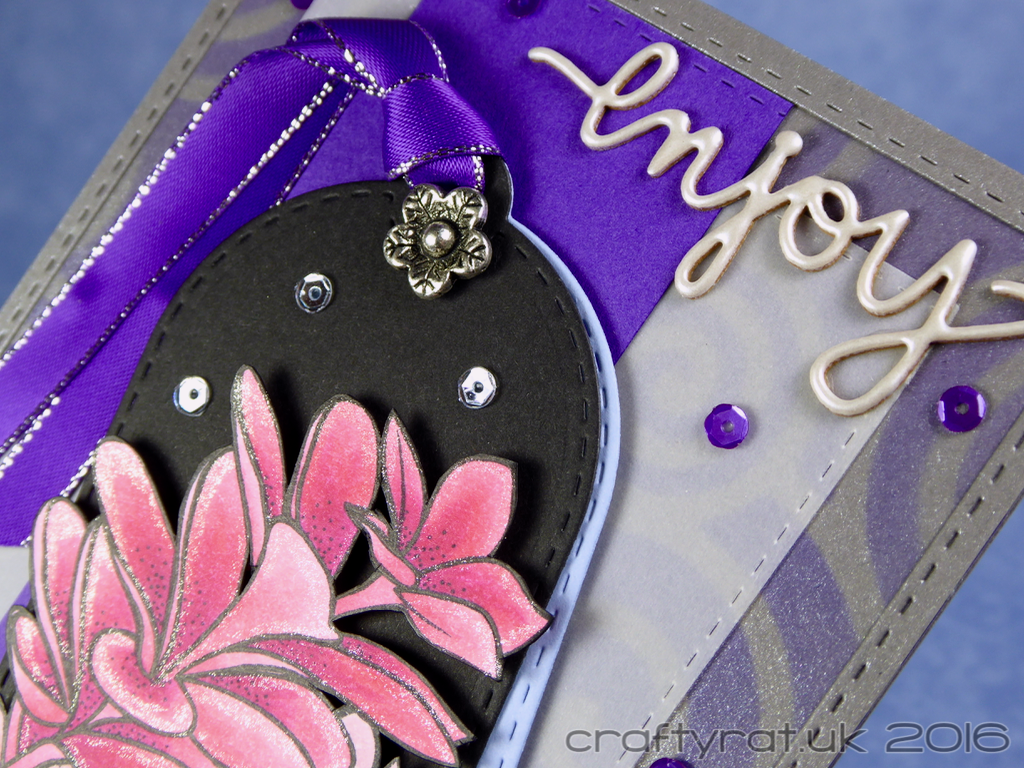
The flowers were stamped twice, masking the first one so that they appear layered over each other. I coloured them with Copic markers, making one darker than the other to stop them blending into one another. Then I added a little Wink of Stella around the edges of the petals of the darker flower. Finally I fussy cut them out, using a craft knife to cut out the enclosed areas.
I die cut two tags, fixed them together with some tape runner and tied a piece of ribbon through the loops. Then I glued them to the card base, fixing the ribbon in position with glue dots. The flowers were popped up on foam tape and added on top of the tags.
The chipboard sentiment was heat embossed by smooshing it on the Versamark ink pad and then dipping it in embossing powder while holding it with an old pair of tweezers (they can get quite hot when you use the heat gun to melt the powder). I gave it three layers of embossing for a nice rounded effect. When I took the tweezers away there was a bit of a rough dent in the embossing, but a quick blast with the heat gun soon smoothed that out.
I used Ranger multi-medium matte to fix all the embellishments in place: the embossed sentiment in the corner, the clear sequins on the tags, the purple sequins on the background, and the metal flower charm in the tag loop.
There’s a lot going on on this card, with far more layers and embellishments than I would usually use, but I am really happy with the balance I’ve managed to achieve across the whole card.
Supplies:
- stamps:
Create A Smile – aloha spirit - dies:
Create A Smile – double stitched rectangles
stencils:
Create A Smile – stencil – swirly - inks:
My Favorite Things – hybrid – black licorice
Versamark
Ranger Distress Ink – wilted violet - Copic markers:
darker flowers – RV23, RV13, RV14, RV09
lighter flowers – RV11, RV32, RV34 - embossing powder:
Wow! – silver pearl - embellishments:
Create A Smile – chipboard – enjoy
purple ribbon
Pretty Pink Posh sequins – 4mm – amethyst
Pretty Pink Posh sequins – 4mm – sparkling clear
metal flower charm
Wink of Stella – clear - paper and card:
Papermill Direct – pearlised – grey
Papermill Direct – plain – black
Papermill Direct – smooth – marine blue
Papermill Direct – plain – dark violet
Pergamano parchment
Discover more from Crafty Rat
Subscribe to get the latest posts sent to your email.
