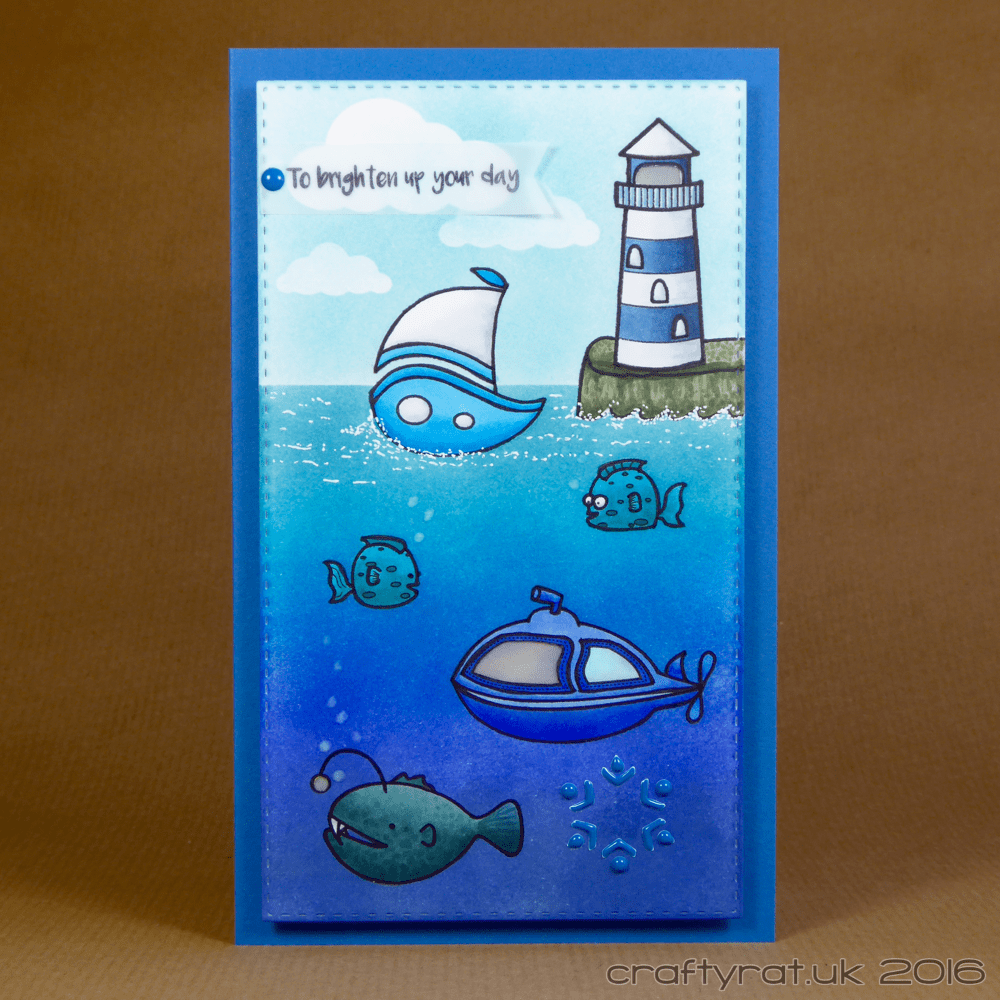
Another month, another Create A Smile challenge. This time the codeword is “blue” and, rather than just make the focus of my card blue, I decided to limit my palette to just blues and blue-greens and make the whole card blue. There is a bit of grey in there, but even that is a cool blue-grey. I combined two watery stamp sets to build a cross-section image, from the depths to the sky. I also decided to finally make use of the Chibitronics starter kit I’ve had sitting around for ages.
How:
I started by die-cutting a panel with a stitched rectangle die. I wanted it to be taller than the die so I had to do a bit of partial die-cutting to extend it, being careful to line up the stitching properly the second time through the Big Shot.
Once I’d worked out the layout, I stamped it in Copic-friendly ink on Neenah solar white. I also stamped the images on masking paper, fussy cut them out and die-cut some clouds. With everything masked, I blended a selection of Distress Inks to create the sea and sky.
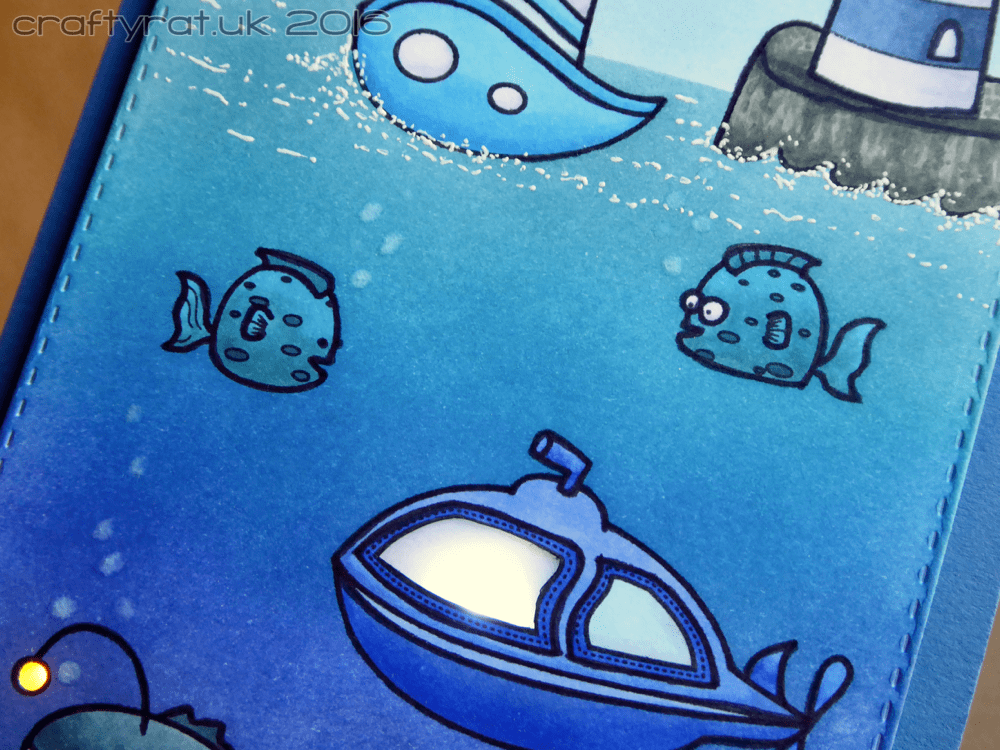
I coloured all the elements, choosing blue-greens for the fish and cliffs and blues for the sub, boat and lighthouse. Because the colour palette is so limited there was a danger of everything merging together, so I went over all the outlines with an ultra-fine black Sharpie. I added some white spray to the base of the cliffs and the tips of the waves with a white gel pen.
I cut out the window on the submarine, the lighthouse window and the glowy bit on the angler fish, and stuck some vellum over the back to mute the lights.
Then I had to build the circuit for the lights. After making the card base, I marked the positions where I wanted the lights to go, created a holder for the coin battery from a piece of folded card and glued that to the card base. I used some copper tape to lay out the circuit from the battery holder to each of the light positions and added the LED stickers; white ones for the lighthouse and sub and a yellow one for the angler fish. Two layers of foam around the edges of the battery holder put a large enough air gap above the battery to stop the circuit from being completed all the time and draining the battery, but small enough to make it easy to complete the circuit with a gentle press. (Next time I do one of these I shall take process photos, but I was winging it a bit this time and didn’t think about it until too late.)


I added more doubled-up foam tape around the edge to support the main panel and stuck it in place. I used some enamel stickers to mark the place where you need to press to turn the lights on and made a simple stamped vellum banner for the sentiment.
Challenges:
Create A Smile – August – codeword: Blue
Supplies:
- stamps:
Create A Smile – glowing seaside
Create A Smile – underwater love - dies:
Create A Smile – double stitched rectangles
Memory Box – puffy clouds - inks:
My Favorite Things – hybrid – black licorice
Ranger – archival – jet black - pens:
Sharpie – ultra fine point – black
Uni-ball Signo UM-153 – white - Distress ink pads:
sea – broken china, mermaid lagoon, blueprint sketch, stormy sky
sky – tumbled glass - Copic markers:
angler fish – BG72, BG75, BG78, C0, C3
submarine – B24, B26, B28, B29, C1, C3, B00
fish – BG05, BG07, BG09, BG78
boat – B02, B04, B06, C0, C1, C3
cliffs – BG93, BG96, BG99
lighthouse – C0, C1, C3, B95, B97, B99 - embellishments:
Create A Smile – enamel stickers - paper and card:
Papermill Direct – plain – azure blue
Neenah solar white 216gsm
Anita’s white vellum - miscellaneous:
Inkadinkado stamping mask paper
Chibitronics starter kit
Discover more from Crafty Rat
Subscribe to get the latest posts sent to your email.

This is such a great card!! Love it!!
LikeLike