
Another thing ticked off the “must-try techniques” list: creating a card using acetate for the base. I kept the design simple in the hope that it wouldn’t take too long to do, but I didn’t factor in all the fussy cutting that is needed to create not only the coloured elements, but also the plain white pieces that go behind them to hide the adhesive… So much fussy cutting…. But worth it as I do like the end result.
How:
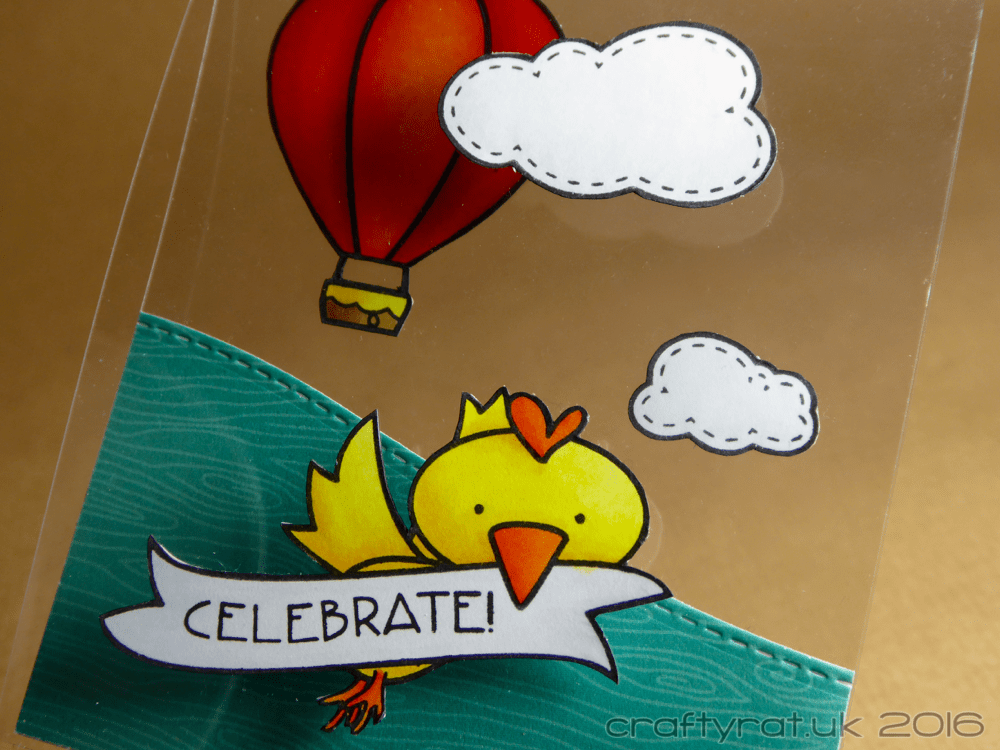
I chose the “uplifting” stamp set because it has elements that are perfect for placing in an acetate sky and also because it has been sitting in my “new stuff” box for a while and it is just too cute to stay there any longer.
Once I had stamped, coloured and fussy cut out the images I wanted to use I used them to plan out the layout of the card; deciding which should go on the front of the card and which on the inside, and also working out what size the card needed to be.
For the hill in the background I found a suitable patterned paper and trimmed it, and a piece of white card, to the width of the card. Then I temporarily taped the two pieces together so that I could die cut the hillside slope from both at the same time.
I trimmed a piece of acetate to the right size (21cm x 9cm) and scored it to make a top-folding mini card. I wasn’t sure how easy it would be to make the fold — the extra thick acetate is pretty substantial — but a little extra effort making the score and a little extra care folding it back and pressing in the crease and it worked perfectly.
I used Tombow tape runner to stick the elements in place and then stamped all of the images again on white card and cut them out. These, and the white die-cut hillside, I glued behind the coloured images to cover up the adhesive that was visible through the acetate. The white hillside also creates a small space to write a quick message to the recipient.


Lesson learned:
The white edges visible on the photographs are not the result of rubbish fussy cutting, they are the edges of the white pieces covering up the adhesive. Next time I make a card like this I will try, very carefully, running a black marker around the edges of the white pieces as well as the coloured ones.
Class:
Online Card Classes – Clear and Sheer
Supplies:
- stamps:
Create A Smile – uplifting
Create A Smile – mini birthday - dies:
Mama Elephant – landscape trio - pens:
Memento – dual marker – tuxedo black - Copic markers:
clouds – N0, C00, 0
bird – Y02, Y06, Y08, Y19, YR04, YR07
bird’s banner – N0, C00
balloon – R17, R27, R46, YR04, YR07, YR09
balloon basket – Y06, Y08, E55, E57 - paper and card:
Stix2 – extra thick acetate
Doodlebug – paper pad – kraft-in-color: color
Discover more from Crafty Rat
Subscribe to get the latest posts to your email.

Super cute card!!!!
LikeLike
Thanks! I was really pleased with how it turned out.
LikeLike
What a fantastic card. Have loved seeing what you’ve made on this course. This one is very clever indeed, and my hat’s off to you for all the fussy cutting! xx
LikeLike
Luckily I quite enjoy fussy cutting, but I’d thought it was going to be a simple design and so I was desperately trying to get it finished before I had to go make tea 🙂 I have a couple more ideas for cards I want to make from the class; there will be more!
LikeLike