
I finally came up with a design for the wedding card! I had been pondering ideas ever since we were told that my other half’s niece was having a Harry Potter themed wedding. Should I go the mixed media route and create a bouquet around a wand, should I do a card with patronuses, or winged keys or… or… or… so many possibilities.
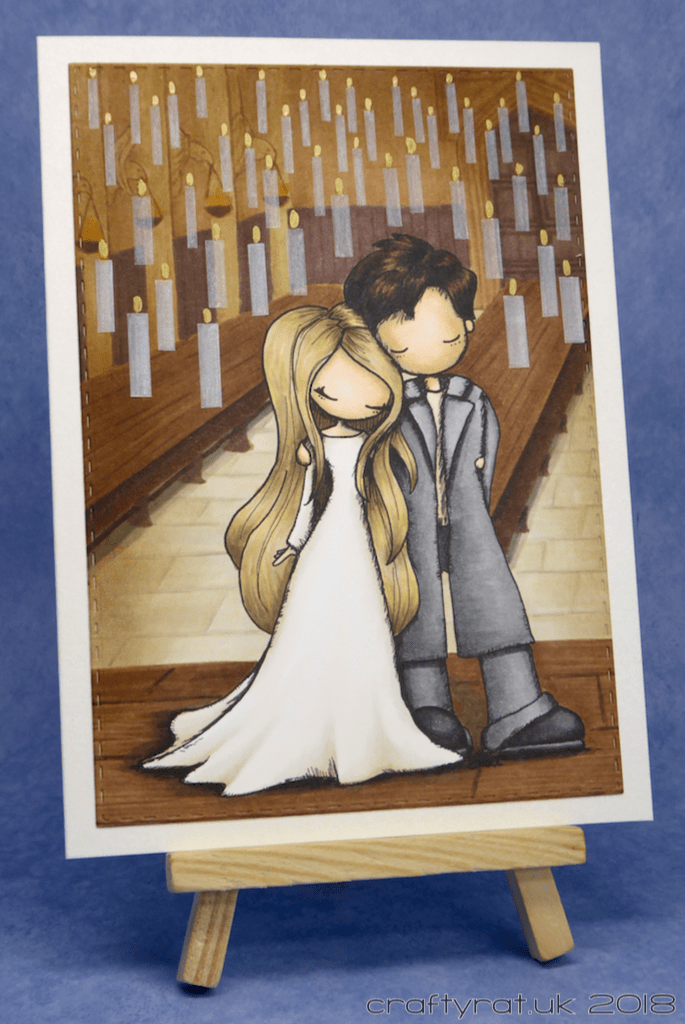
I’ve used Tiddly Inks images before on a wedding card and I adore their couples. I’d had my eye on this particular image but couldn’t decide how to use it. Then, as I was browsing random Harry Potter images, it came to me: I could stand them in the Great Hall at Hogwarts complete with floating candles.
This is, of course, fully in keeping with my habit of “not making it easy” 🙂
So, I found myself a couple of reference photos of the hall, decided what size I wanted to make the card (5”x7”) and printed out the couple with a suitably sized frame around them as a guide.
Then it was just (hah!) a case of sketching out the room using a light Copic marker (pencil shows through Copic colouring and cannot be erased once it’s been coloured over). Once I was happy with the layout I worked my way through colouring the individual elements: raised stage, tables, flagstone floor, doorway, walls, and finishing up with the couple.
And then I went over much of it with Distress ink to create a vignette effect.
For the candles, I put Stick It on a piece of white vellum and cut strips of varying widths. Then I cut the strips down into individual candles and arranged them on the card. I never want to have to peel the backing off nearly fifty small pieces of anything ever again. That was fiddly and, at times, frustrating even with a particularly pointy pair of tweezers!
And once the adhesive had settled in, I realised that the candles really didn’t stand out well enough. So I went over each of them with a white pencil. And then tested out every yellow or gold marker I had until I found one that would work for adding flames.
I didn’t want to add a sentiment over the top of all that hard work, so I created a small banner for the inside of the card instead with a handwritten “always” on it.

Copic markers:
skin – E000, E53, BV00
bride, hair – E42, E43, E44, Y21
groom, hair – E44, E47, E49, C9
wedding dress – YR0000, E40, E41, E42
suit – T3, T4, T5, T7
shoes – T4, T6, T8, T10
background – E23, E51, E55, E57, E59, E42, E49, E77, E81, YR23
Supplies:
- digital stamps:
Tiddly Inks – you and me baby - stamps:
Clearly Besotted – mini basic banners - dies:
Card Making Magic – card and box die set
Clearly Besotted – mini basic banners - inks:
Distress ink pad – walnut stain
Versafine – smokey gray - pens:
white coloured pencil
Artline 990XF gold 1.2mm
EK Tools – elegant calligraphy pen - paper and card:
Neenah solar white 216gsm
Papermill Direct – pearlised – natural white
Anita’s – white vellum - miscellaneous:
ClarityStamp stencil brush
Stick It
Discover more from Crafty Rat
Subscribe to get the latest posts sent to your email.

What a cute card! I love that image! 🙂
LikeLike