
It’s just as well I got all caught up with the backlog of card write-ups otherwise I would be really stressing about the stack of cards that are waiting to be blogged right now. But that’s what happens when I take a class with Online Card Classes — so many fun ideas that just have to be turned into cards!
I have had a pot of Stamp n’ Bond in my craft drawer for (checks email archive) two and a half years, but I’ve only tried crafting with it once before and I wasn’t very happy with the results. So when it was a main supply in the first lesson, I was happy to be using an unloved bit of stash, but also sceptical of how well it would turn out…
But, I love it! I’d work on getting the colour transitions a bit smoother when I do it again, but other than that it worked like a dream.
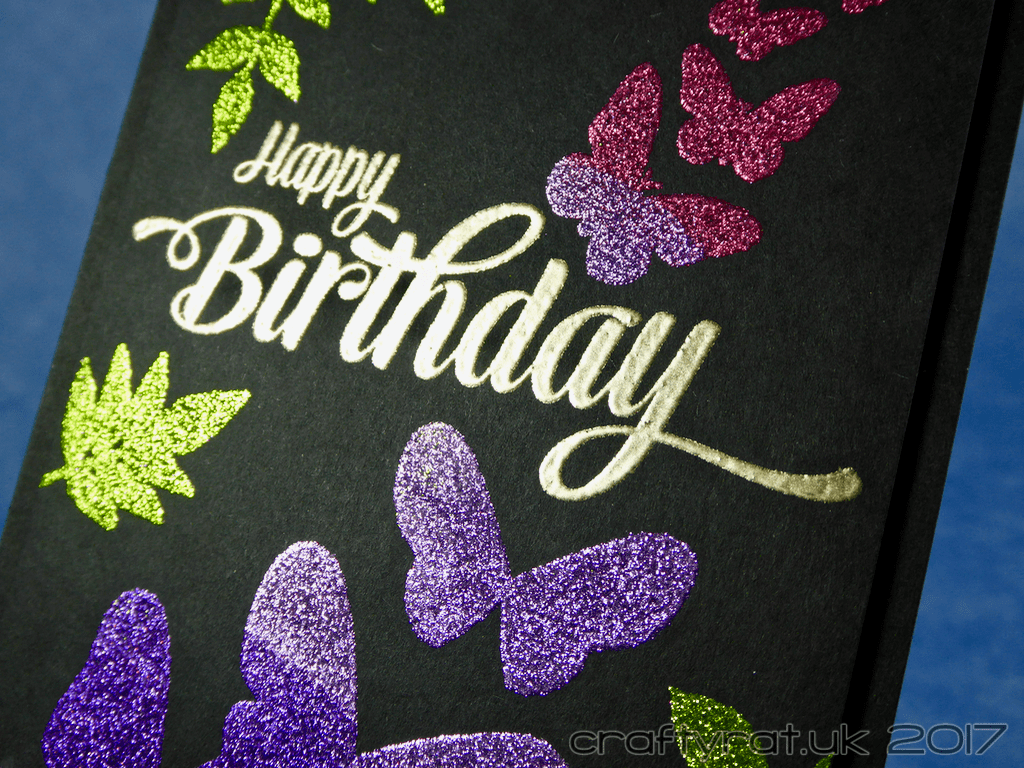
You just stamp in Versamark as though you’re doing regular heat embossing, add the Stamp n Bond and heat until it just melts. Add the glitter on top, tap it gently into the adhesive and shake off any excess. And that’s it done.
Do check the instructions for whichever bonding powder you use; there are at least a couple around and they do work differently. The Stamp n Bond just needs heating once, whereas Wow! bonding powder needs heat setting again after you’ve added the glitter.
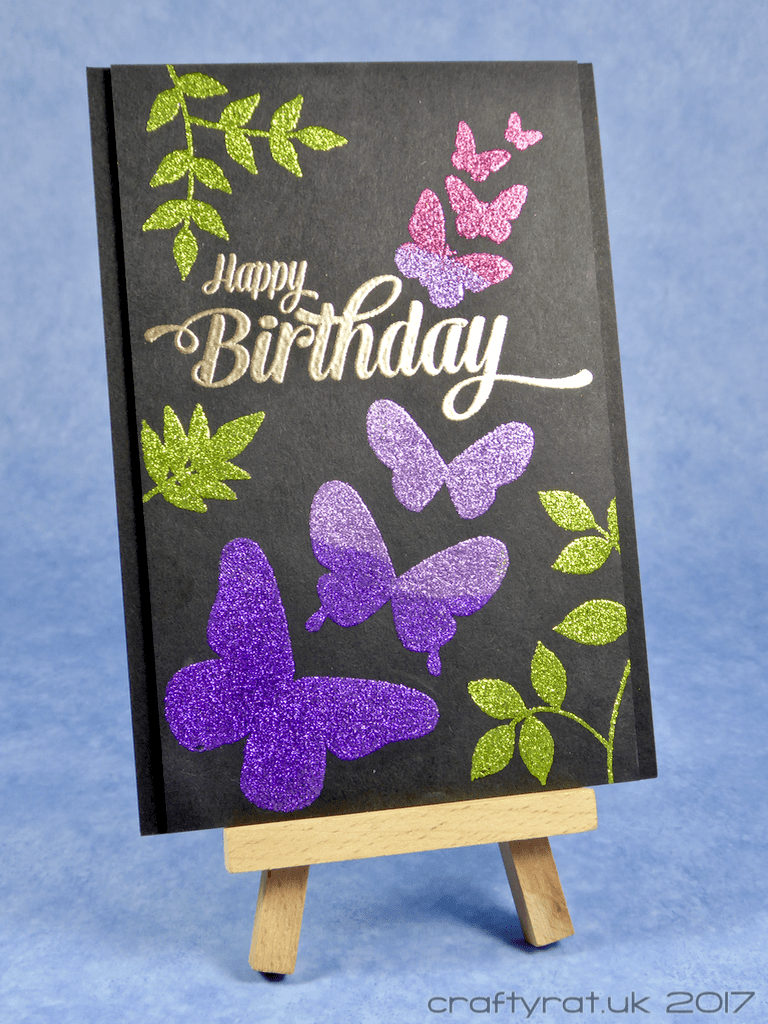
I paired the glittery butterflies and foliage with a bold heat-embossed sentiment on a black panel and popped it up on the card base using fun foam. Really pretty and shiny and — with careful use of coffee filters to catch the glitter — not even messy!
Supplies:
- stamps:
Hero Arts – color layering butterflies
Clearly Besotted – leafy accents
Clearly Besotted – full of surprise
Justrite – extra grand sentiments - inks:
Versamark - Elizabeth Crafts silk microfine glitter:
spring peridot, ruby, amethyst, lavender - embossing powder:
Ranger – liquid platinum - paper and card:
Papermill Direct – plain – black - miscellaneous:
Stampendous – Stamp n Bond
fun foam
Class:
Online Card Classes – Sparkle & Shine
Discover more from Crafty Rat
Subscribe to get the latest posts sent to your email.

So much shine and sparkle. I loved seeing all the inspiration for this card class, and I really think I need o get some coffee filters to try to get over my glitter aversion. Love all the colours!! Also very pleased you managed to use up some stash. I think I should keep more in case it comes in handy 🙂 xx
LikeLiked by 1 person
Coffee filters to catch any spillage, a wet wipe to clean your fingertips after rubbing it into the adhesive, and either a soft brush or a bit of swiffer cloth to remove any excess… I find that microfine glitter is actually a lot less messy to use than regular glitter.
LikeLike
Oh this turned out gorgeous! I love the colors…so pretty, especially with the shine! Love it! 🙂
LikeLiked by 1 person
Thanks! The microfine glitter gives a really nice, almost velvety, shine (and comes in so many pretty colours!)
LikeLiked by 1 person