I had a load of ideas for different ways to interpret the “circle” theme for this month’s Create A Smile challenge, but in the end I decided to do something a bit different and make a card with no stamping at all. A bit of an odd choice when coming up with a design for a challenge run by a company known for their stamp sets, but luckily they also have some really nice chipboards as well, some of which have been sitting unused in a drawer for far too long. And of course, they also sell Pretty Pink Posh sequins. And yes, this is stretching the challenge guidelines to breaking point, but the challenge is what inspired this card and I just had to make it once I’d had the idea…
So, armed with chipboards, sequins, embossing powder, lots of glossy accents and even more patience, I set about making some Christmas baubles.

How:
Let me start by saying that, if you are the sort of crafter who is completely incapable of leaving glossy accents to dry on its own without sticking your finger in it at least once, this is probably not the technique for you. I had to make sure that putting the glossy accents on was the last thing I did before leaving my craft room for the evening and then resist the temptation to check on it before going to bed, otherwise there would have been fingerprints…
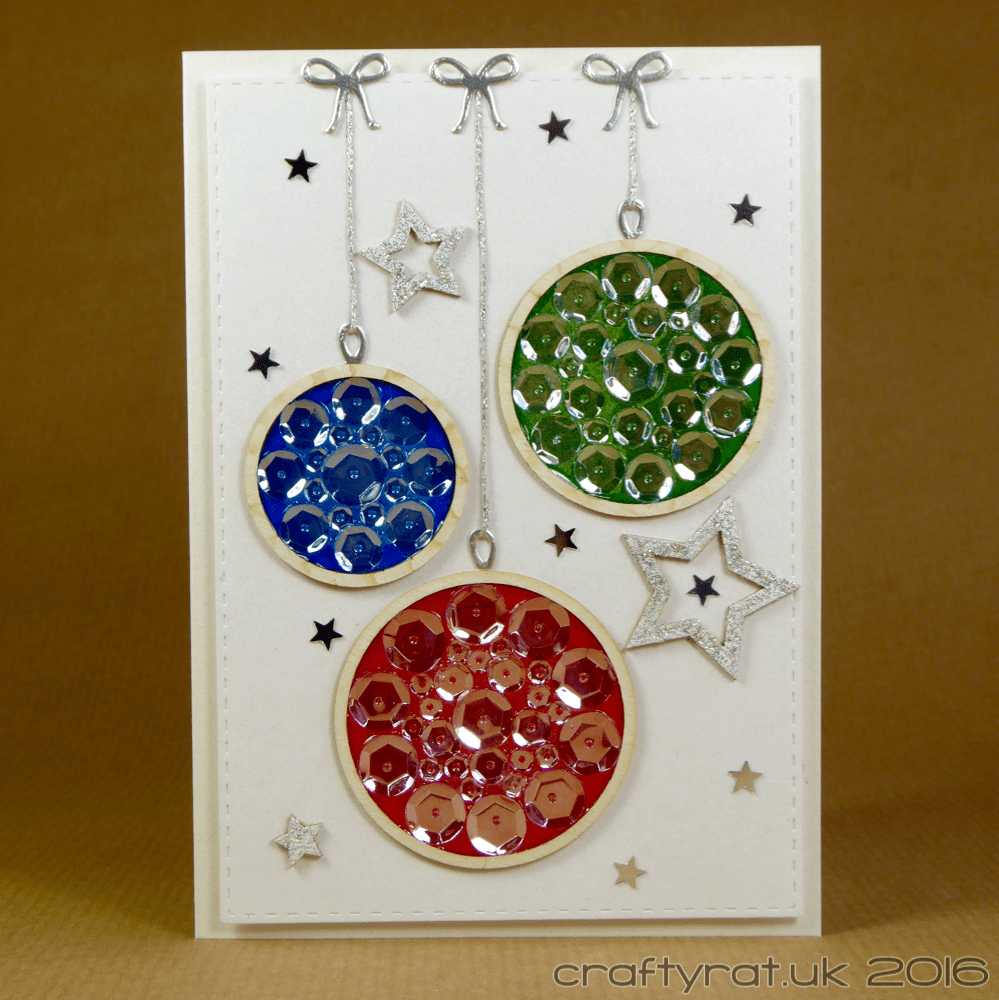
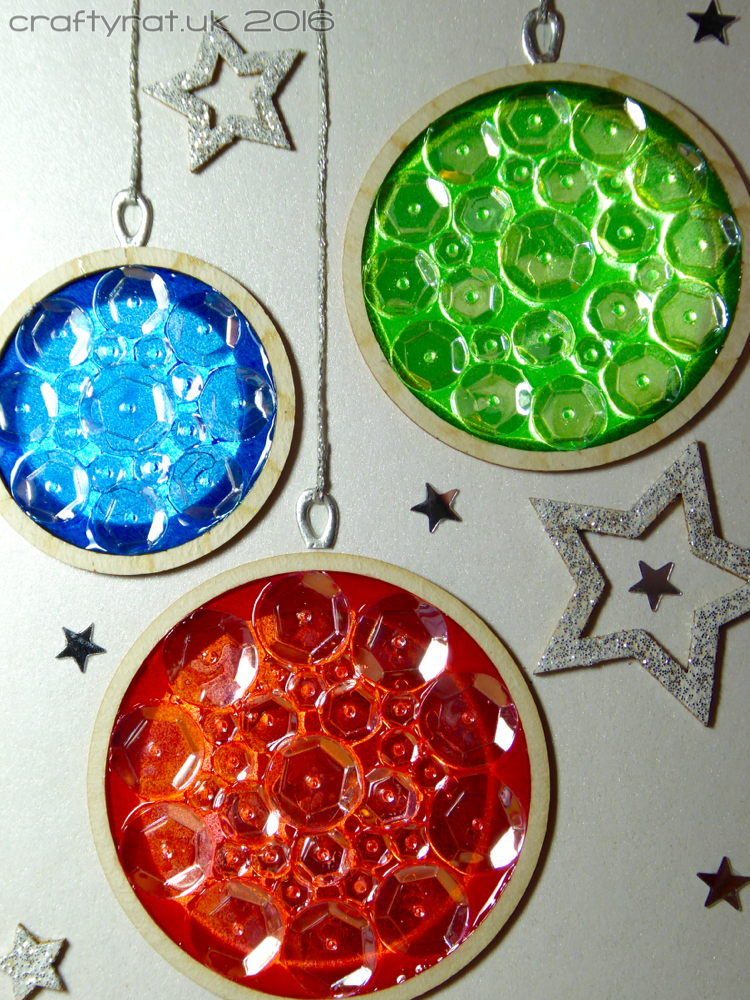
I started by heat embossing patches of translucent embossing powder on heat-resistant acetate. I cut them down to the size of the chipboards I had chosen and glued them to the back of the circles. When they were dry, I covered the heat embossing with a layer of glossy accents and arranged clear sequins over it, finishing off with another layer of glossy accents over the top. And then I left them overnight to dry completely.
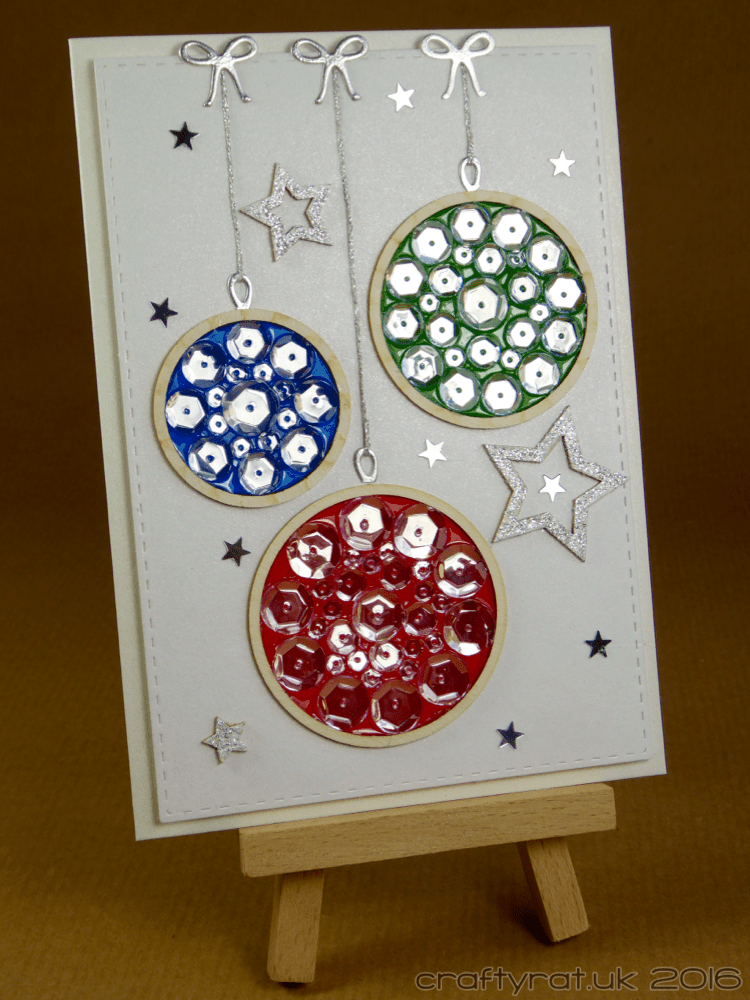
I die-cut a panel of pearlised card with the largest stitched rectangle die and cut three circles in to go behind the baubles. I didn’t have dies that matched perfectly but I decided that I was quite happy to have an opaque border around the inside of each. I die cut matching circles in the card base before gluing the baubles in place over the holes in the panel.
The tiny bows were die-cut from silver card; I cut a couple of extra bows and trimmed them down to create the hanging loops for the baubles. For the strings, I used some silver thread coated in multi-medium matte.
The large stars are more chipboards, this time coated in Versamark and heat embossed. A scattering of tiny silver stars finished off the panel, which was then popped up on fun foam (with matching holes cut in it, of course) on the card base.
The finished card is wonderfully shiny — glossy accents over sequins works really nicely — and the baubles glow with the light behind them.
Challenges:
Create A Smile – September – circle
Supplies:
- embellishments:
Create A Smile – chipboards – nested circles
Create A Smile – chipboards – nested stars
Pretty Pink Posh – sequins – sparkling clear mix
Ranger – glossy accents
small silver stars
silver thread - dies:
Create A Smile – double stitched rectangles
Sizzix – framelits – circles 2
Avery Elle – hanging banners - inks:
Versamark - embossing powder:
Wow! – white twinkle
Wow! – apple red
Wow! – evergreen
Wow! – blue tang - paper and card:
Papermill Direct – pearlised – ultra white
Papermill Direct – pearlised – ivory
Crafter’s Companion – heat resistant acetate
Papermill Direct – sandgrain – silver - miscellaneous:
Ranger multi-medium – matte
Discover more from Crafty Rat
Subscribe to get the latest posts sent to your email.
