
Another thing checked off my “things to try” list: my first box card. The latest challenge from The East Wind is to create a project with some movement in it; including either something that actually moves or a representation of movement. I chose to go with the first one and, after running through various options, decided to create a box card with elements supported on strips of acetate, which will wobble.
How:
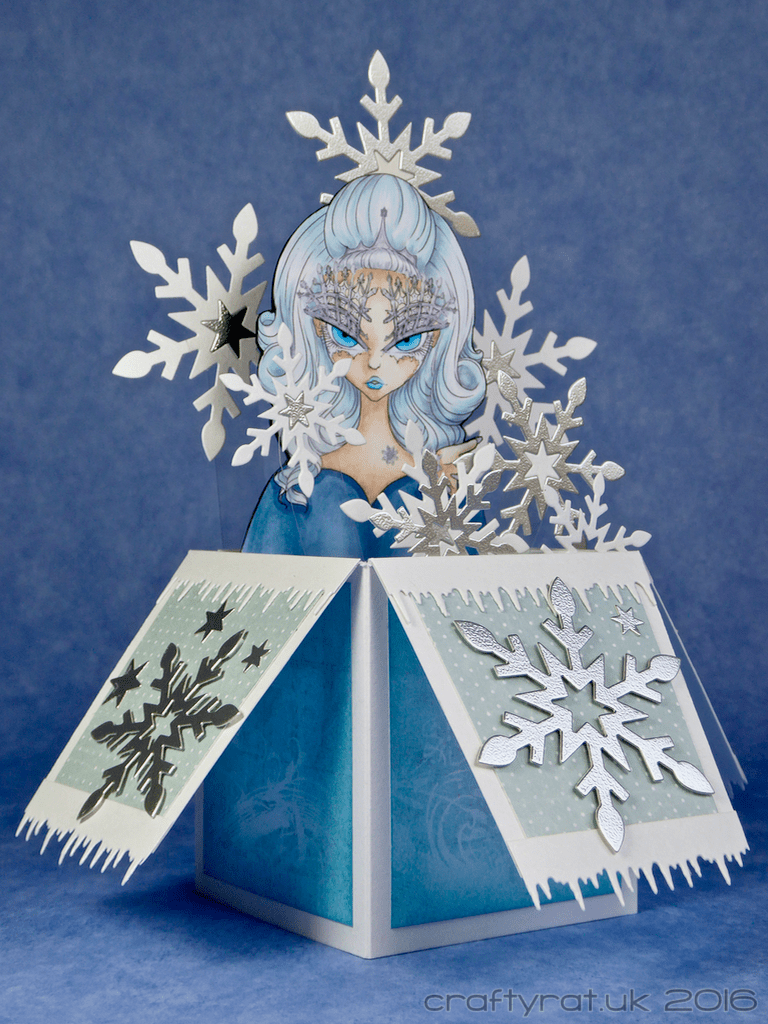
I printed the snow queen digi stamp out on Neenah solar white, coloured her with Copic markers and then fussy cut her out.
I wasn’t sure exactly how I was going to arrange the card so I ended up die-cutting far too many snowflakes from pearlised white and textured silver card. I trimmed some patterned paper to fit both the box base and the flaps and added a bit of ink blending around the edges of the ones for the base. I also die-cut some icicle border strips to decorate the flaps.
Most of the card templates you find online are based on US paper sizes, so the easiest thing to do was create my own A4 version; luckily the maths is easy and you end up with a box that is 7cm on each side with almost 2cm left over for a tab to hold it together. I made the base box 8cm tall and the flaps that fold down are 7cm so they don’t reach all the way down. I also added a bit of tapering to the flaps — I’d like to say that was a deliberate decision but I slipped slightly with the craft knife and, rather than start again from scratch, I changed the shape. I cut two strips from the leftover piece of the A4 sheet and mounted them inside the box.
 With the box assembled, I added the patterned paper panels on each side of the base and on each flap and then taped the icicle border in place. I used tiny bits of thin foam tape to add a little dimension to the larger snowflakes on the flaps and glued the smaller ones flush. And that’s the outside of the box complete.
For the inside, I mounted the snow queen on the rear of the two cross strips and then attached a selection of snowflakes to acetate strips and arranged them around her.
I’m really pleased with the finished card, in the end it came together a lot more easily than I expected. It’s not perfect, some of the snowflakes overlap the edges when the box is folded flat, but I can make a custom envelope for it. And I’ve learned a lot; the next one will go more smoothly.

Challenges:
The East Wind – #63 I like to move it… move it
Supplies:
- digital stamps:
The East Wind – Lucy Loo snow queen - dies:
Clearly besotted – snowflake trio
My Favorite Things – icicle border - colour:
Distress ink pad – broken china - Copic markers:
skin – BV000, E21, E00, E000, E0000
hair – C00, C0, C1, C2, C3, B0000, B00
eyes – B0000, B00, B02, B04
lips – B00, B04
ice jewellery – BV0000, BV000, BV00
cloak/dress – B91, B93, B95 - embellishments:
Irresistible pico embellisher – shimmer - paper and card:
Neenah solar white 216gsm
First Edition – paper pad – silent night
Papermill Direct – pearlised – ultra white
Papermill Direct – sandgrain – silver
Stix2 – extra thick acetate
Discover more from Crafty Rat
Subscribe to get the latest posts sent to your email.

Absolutely amazing – something I have never tried. I don’t think on a first attempt that my card would look quite so good!! Love your colouring on the Snow Queen. Super impressed!! Xx
LikeLike
Thank you! I was surprised how well it all came together; like so many things, thinking about it was harder than actually doing it 🙂
LikeLike
What an absolutely cool card! Gorgeous colouring and the design is outstanding. Well done! Thanks for playing along with our I Like to Move It Challenge at The East Wind. Thanks also for the fabulous tutorial. I want to try this!
LikeLike
ahhhh this is just GORGEOUS. Love all the snowflakes. I haven’t made one of those in the longest of times.
Thanks for joining our fortnightly challenge here at The East Wind. Hope you will join us next time DT Crafting Vicky.
LikeLike