
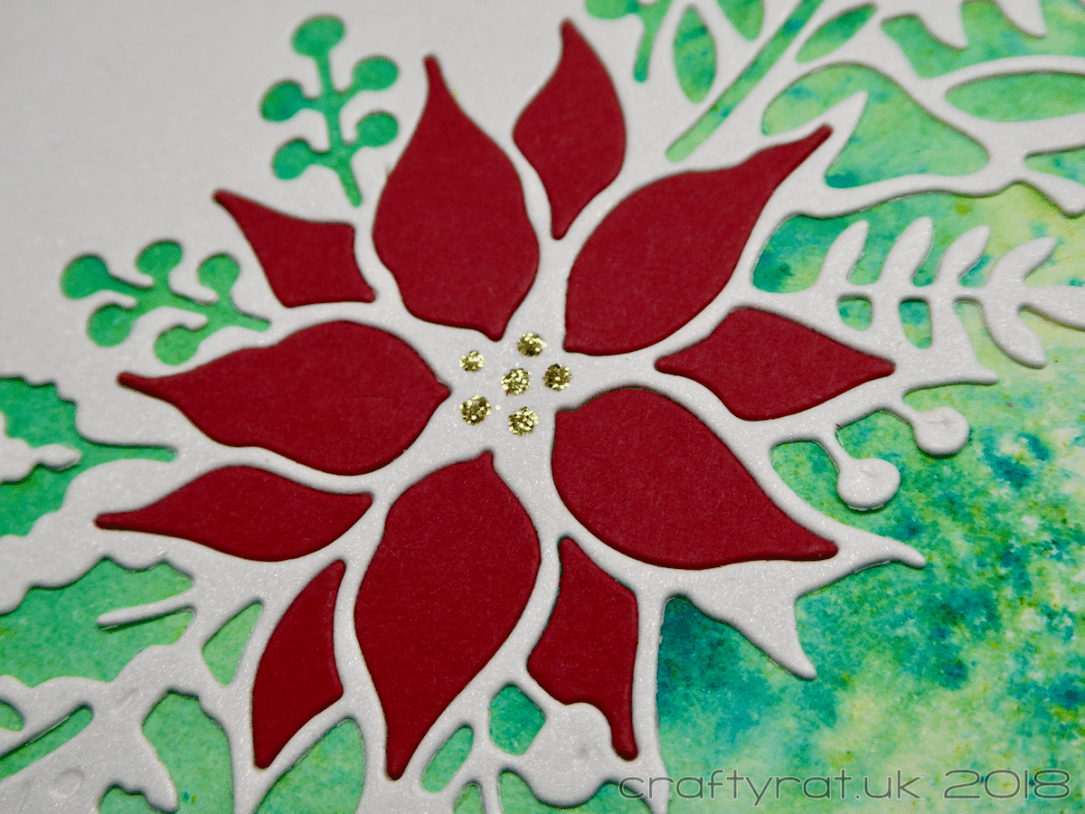
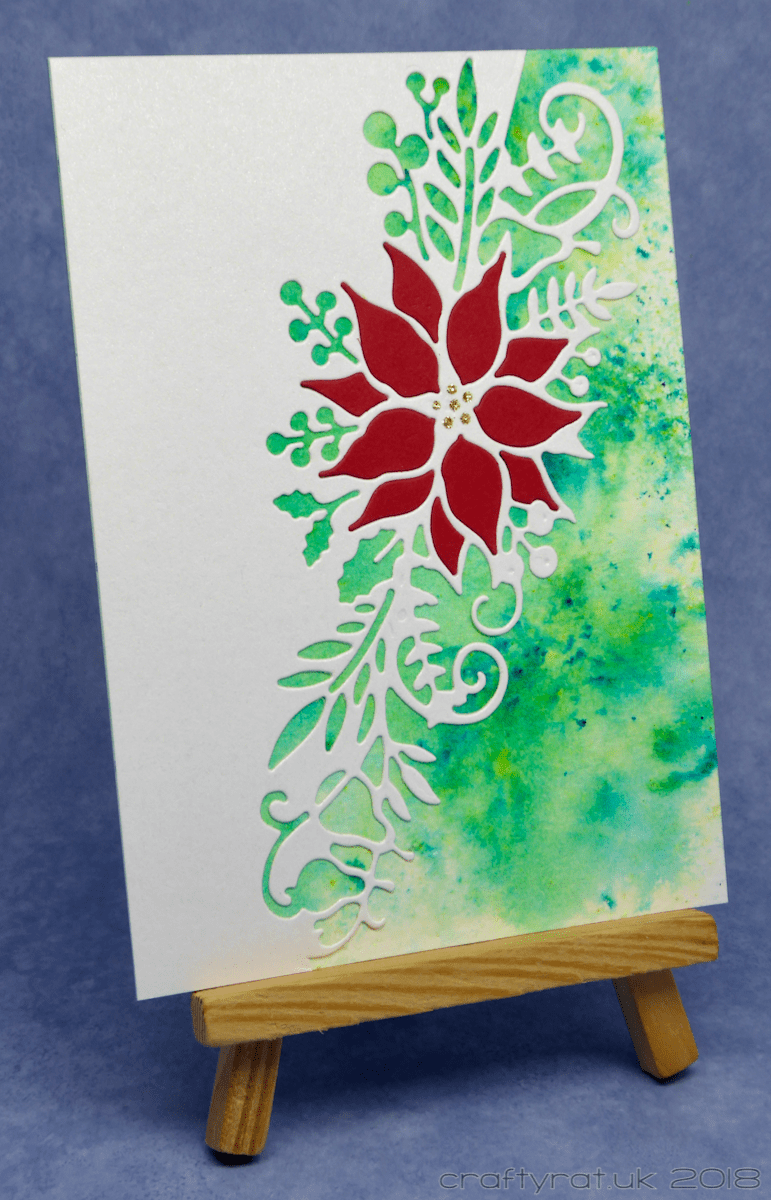
This is probably my favourite of the batches of cards I’ve made so far this year. When I saw the poinsettia edger die I just couldn’t resist picking it up and I knew exactly what I wanted to do with it. It’s a simple design, though inlaying the poinsettia flower was a bit fiddly and time-consuming.
I started by creating the background panels by sprinkling Brusho pigment powder onto watercolour card and spritzing with water. It’s a fun and unpredictable technique, but you can always dry it off and repeat the process if you don’t have enough coverage.
To make sure that I got the edger die lined up the same way each time, I created a simple guide for myself. I drew an A6 rectangle (the size of my card) on a sheet of paper and marked the points on the top and bottom edges where the die should cross. That way I could lay my pearlised card down, position the die and then tape it in place.
I glued the die-cut over the background panel and then die-cut just the flower part out of red card, being careful to keep all the pieces in the same order when I took them out of the die. Then I just had to work my way along the five cards, inlaying eleven “petals” in each of them.
For the finishing touch, I added tiny dots of glitter to the centre of each poinsettia.
Supplies:
- dies:
Creative Expressions – poinsettia edger - colour:
Brusho – emerald green - embellishments:
Imagination Crafts – detail sparkle – gold gilt - paper and card:
Canson Montval watercolour paper
Papermill Direct – pearlised – ultra white
Papermill Direct – plain – Christmas red
Discover more from Crafty Rat
Subscribe to get the latest posts sent to your email.

Beautiful!! I keep meaning to give the Brusho’s a try, they look so neat!
LikeLike
Such a pretty card!
LikeLike
Oh this is so pretty! I love the pop of red with the white and green background. It really makes the Poinsettia pop! Love it! 🙂
LikeLike