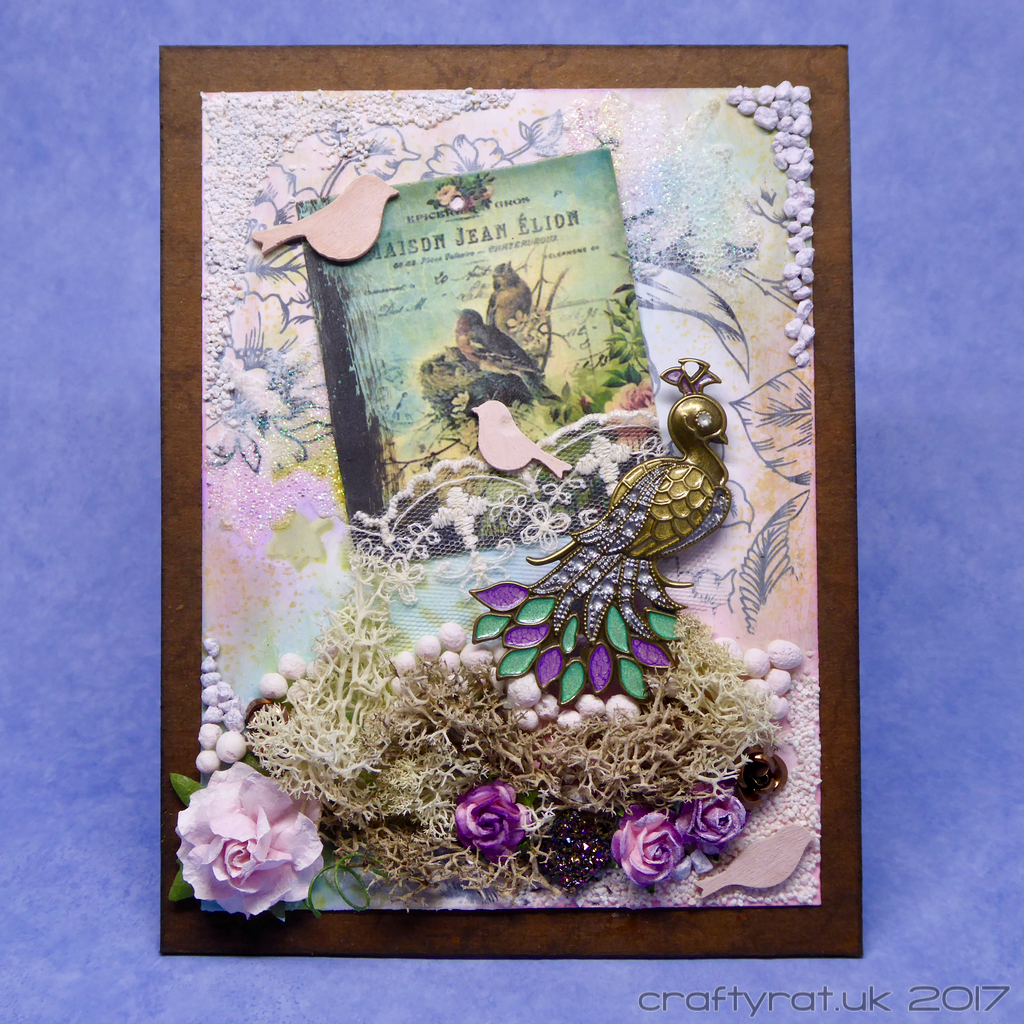
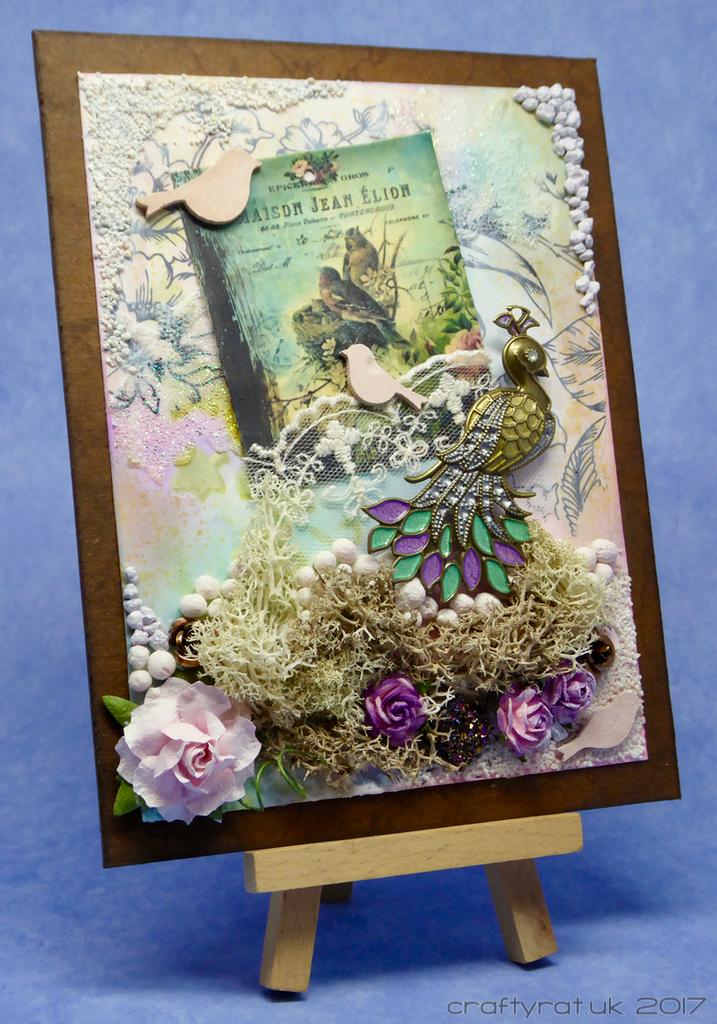
This is a bit of a “throwback Thursday” post. I made this panel, photographed it and even processed the photos when I made it last year; the one thing I didn’t do then was write up the blog post… This was only the second mixed media panel I had created. After the darker feel of the first, I wanted to make something lighter, with a more pastel palette. This metal peacock had been sitting in my stash, waiting for the right project to come along and I thought it would make a good starting point.
And this is why I should write these things up as soon as I make them: leave it a few months and — surprise, surprise — it’s tricky to remember exactly what I did. Especially when I made this before I started keeping track of the products I used for mixed media projects…
So… here goes… it’s good to exercise your memory every now and again…

Start by painting the peacock with Pebeo moon and prisme paints.
Base layer: floral tissue paper over heavyweight cardstock. Splotches of pink, green and blue Distress ink blended over it. Large leaves stencilled using glass bead glitter gel. A little extra colour interest added around the edges with a spatter texture stamp and some yellow ink.

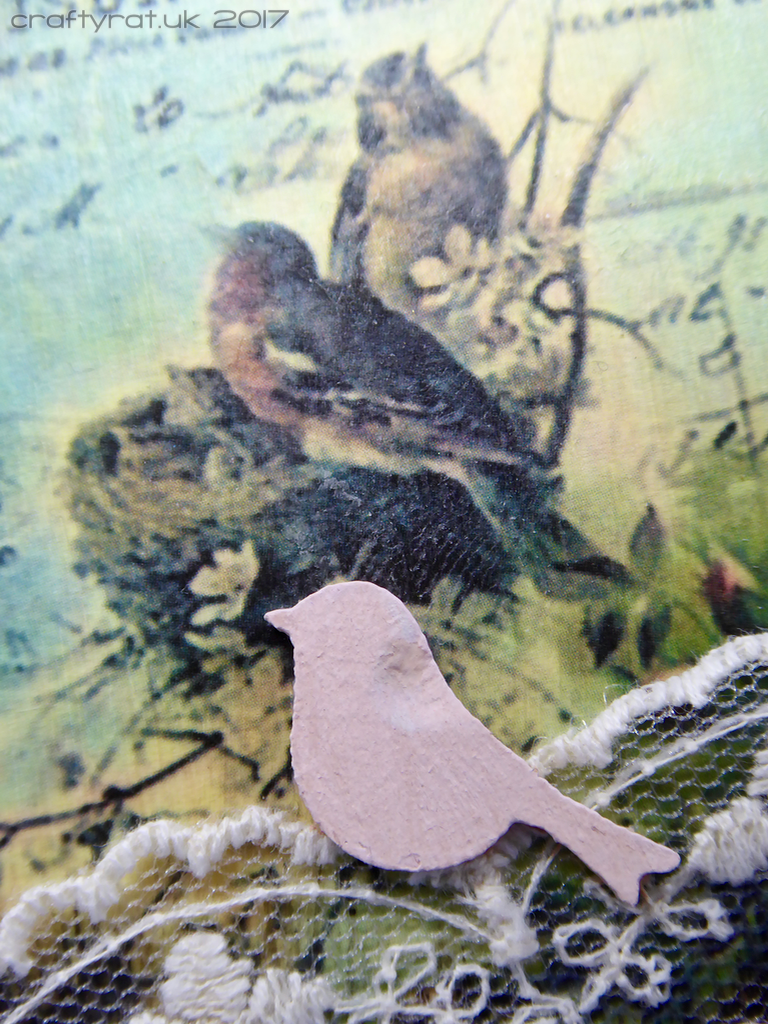
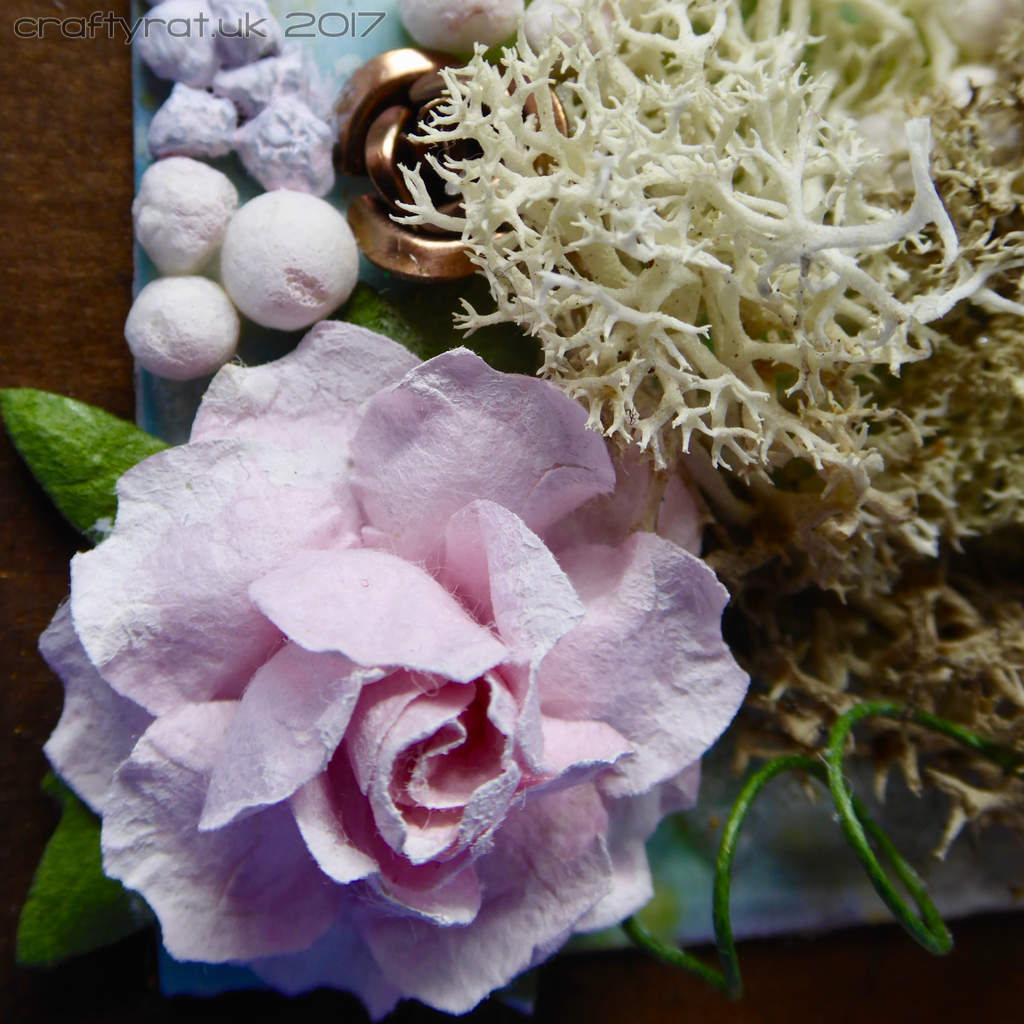
Raid stash for other elements: tiny wooden birds, the bird’s nest card, paper flowers, faux druzy, small metal roses, art stones and gravel in various sizes, lace, and moss.
Spend ages fiddling with the layout. Decide on the layout and stick the card in place. Glue the lace down and mentally reserve the space for the peacock.

Paint the wooden birds and glue two onto the card. Add fine gravel to two diagonal corners and put the third bird in the bottom one.
Build the nest with the moss and art stones. Add the paper and metal flowers and the druzy below the nest. Add more gravel and art stones the fill out the corners. Give the stones a light coat of white with a hint of pink. Dry brush the edges of the paper flowers.
Mount the peacock over the top using foam squares to give it some height off the panel.
Finally, cut a piece of thick cardboard a bit larger than the panel, colour it with Distress inks and stamp some marbling lines for texture around the edge, and glue the panel to it.
I think that covers about everything…
This panel was created and photographed in August 2017.
Discover more from Crafty Rat
Subscribe to get the latest posts sent to your email.

Oh this is gorgeous! Love it! Thanks for sharing! 🙂
LikeLike