My other half asked me to make him something with a rocket. The idea was that he would find a rocket design he liked and 3D print it and then I could paint it and create a background for it.
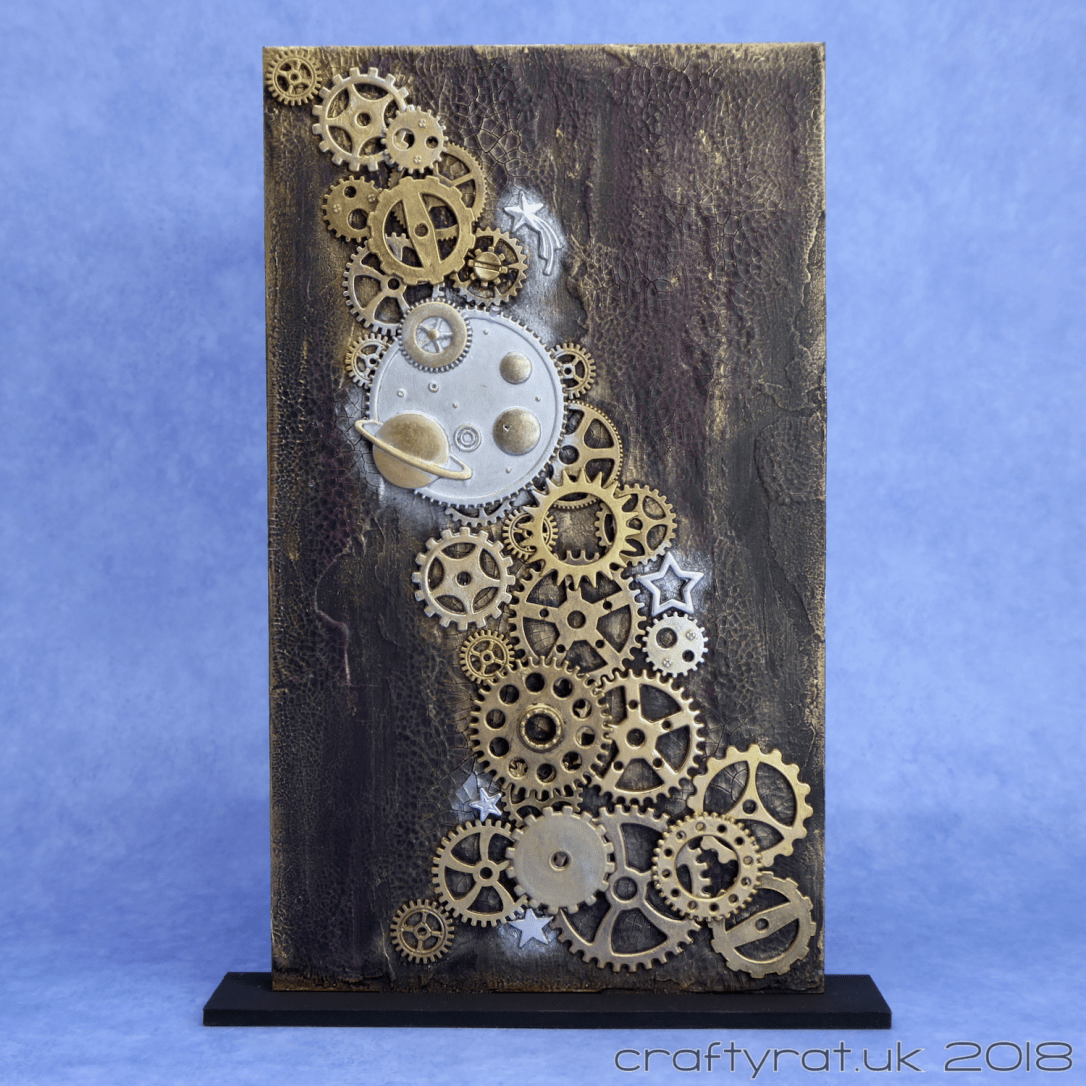
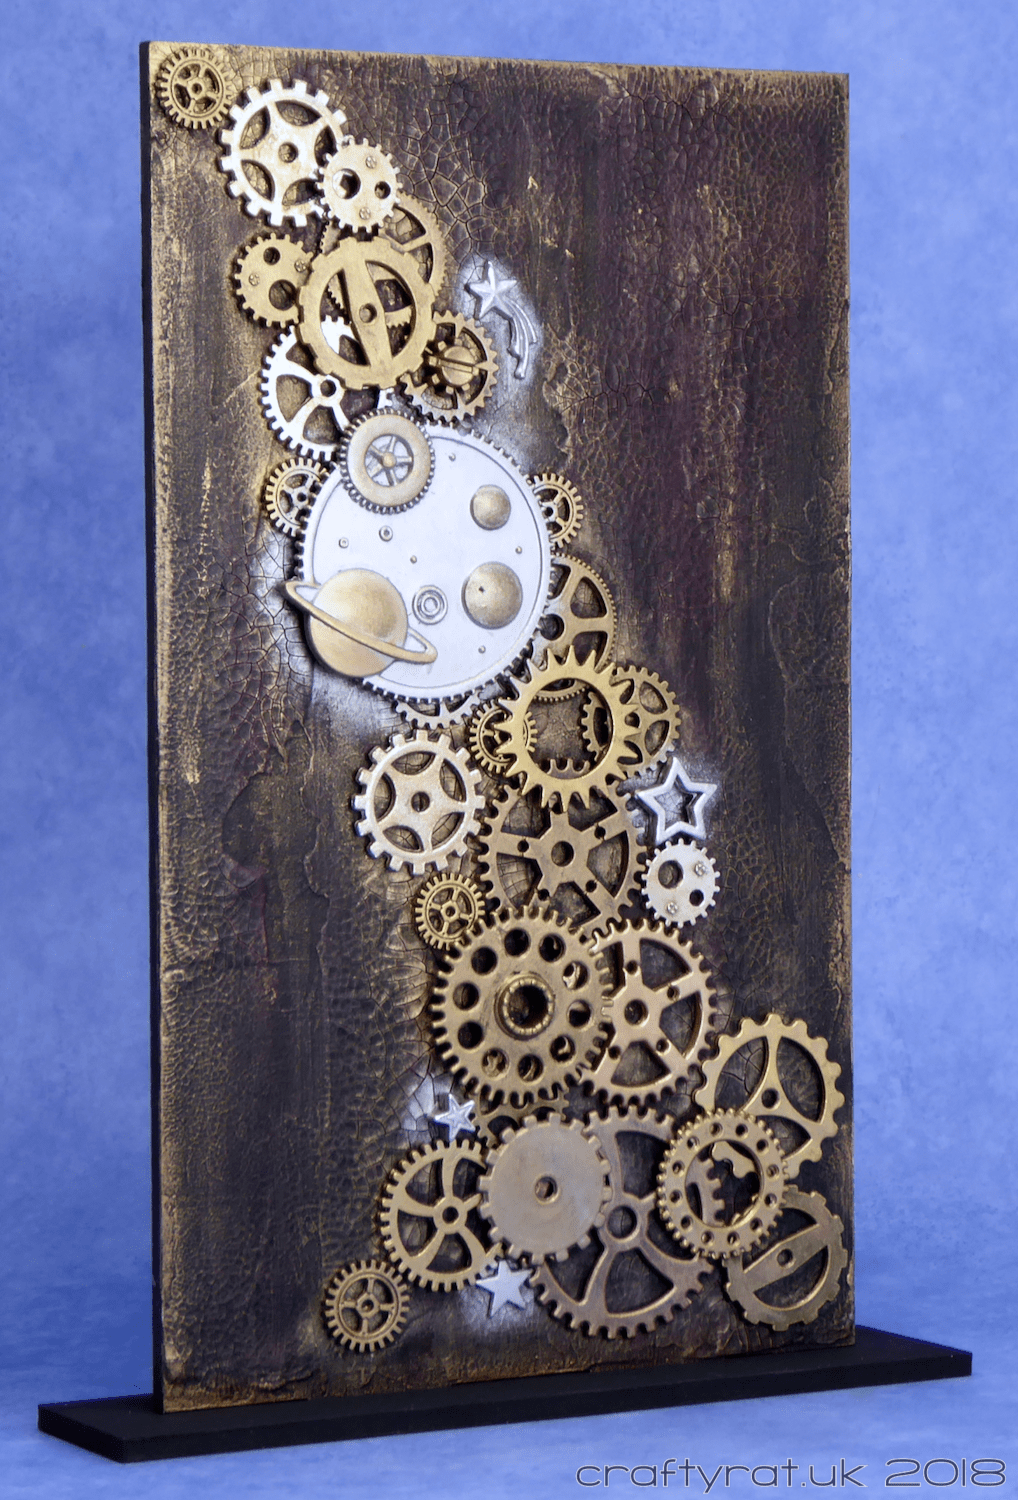
I decided to use one of the MDF monoliths in my stash; that way he could stand it on his desk or wherever he wanted and wouldn’t have to find wall space to hang it up. Of course, monoliths have two sides so, while I was waiting for him to find a rocket design, I made a start on the back side.
In theory, I could have just painted the back black or even continued the galaxy background I had planned for the rocket. But that would have felt unsatisfying. A monolith has two sides so it should have two different projects. The rocket was definitely going to be the main event, so I needed to come up with something that would stand alone, but not upstage the rocket.

So… gears. This is the kind of design I originally planned to create on the altered jar before getting sidetracked onto buttons and flowers, and I had a pretty good idea what to do.
I prepped the whole of the monolith with black gesso. Then I smeared varying thicknesses of crackle paste across one surface and left it to dry.
The crackle paste is white so I used some slightly thinned black gesso to cover it without hiding the crackles. I tried spraying some Dylusions ink sprays over it — it added some nice subtle colour variation but, as I later discovered, is very easily reactivated with water… even a slightly damp finger will lift colour from the surface.

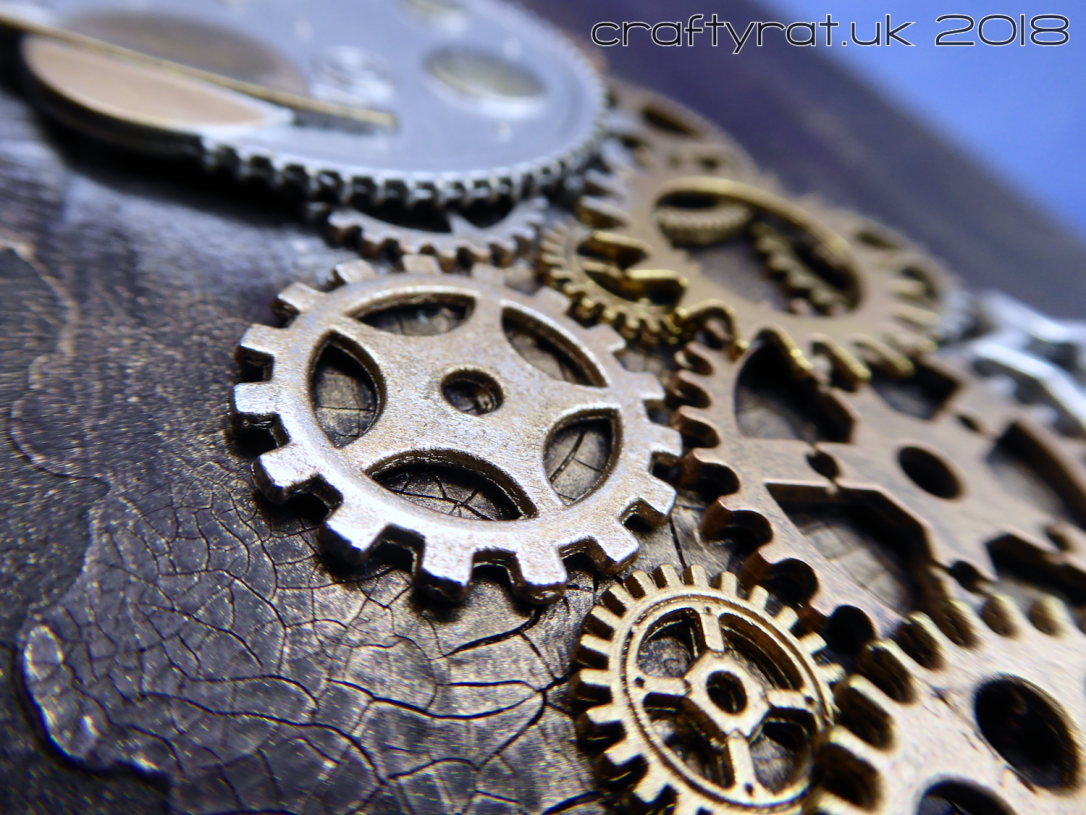
But I didn’t know that then so I carried on. The next stage was to grab a handful of gears from my stash and start arranging them. I also found the large planets gear, which I used as a focal point, and a few stars to continue the space theme that would later decorate the front of the monolith. When I was happy with the arrangement I glued everything down with 3D gel, which is very effective but does take a while to fully dry.
I used a selection of waxes on the cogs, mostly applied using a dry brush, with some thicker application done using a finger. I used the same waxes, along with a little acrylic paint, on the background.
Later on, when I realised the issue with the inks, I lifted some of the colour with a damp baby wipe. If it’s still a problem, I will give it a coat of spray varnish.
To avoid this becoming a too-long overly image-heavy post, I’ll stop now and show you the rocket tomorrow.
Challenges:
- That’s Crafty – going round in circles
Supplies:
- Base:
Visible Image MDF monolith - Prep & Stick:
Ranger black gesso
Finnabair 3D matte gel - Texture:
DecoArt white crackle paste - Colour:
Finnabair metallique waxes – aged brass, old silver
Creative Expressions metallic gilding wax – golden light
Finnabair metallique paint – dark velvet
Dylusions ink spray – London blue, crushed grape - Embellishments:
metal gears and stars
Discover more from Crafty Rat
Subscribe to get the latest posts sent to your email.

Fabulous upright panel piece, love that crackle effect. Thank you for sharing over at That’s Crafty. Best wishes in the Going Round in Circles Blog Challenge.
Tracey DT
LikeLike
This is so gorgeous, amazing crackle ,and the golden gears on top looks wonderful.
Thank you for adding it to That`s Crafty Challenge .
Greetings , DT, Dorthe
LikeLike