The obvious thing would have been to make a Valentine card with this bunny and its big heart, but it didn’t really feel like the sort of image I’d use for a card for my other half (see this year’s Deadpool Valentine). So I decided to leave it without a sentiment because my card stash is already way too large and I know at least one person who would appreciate a random bunny card.
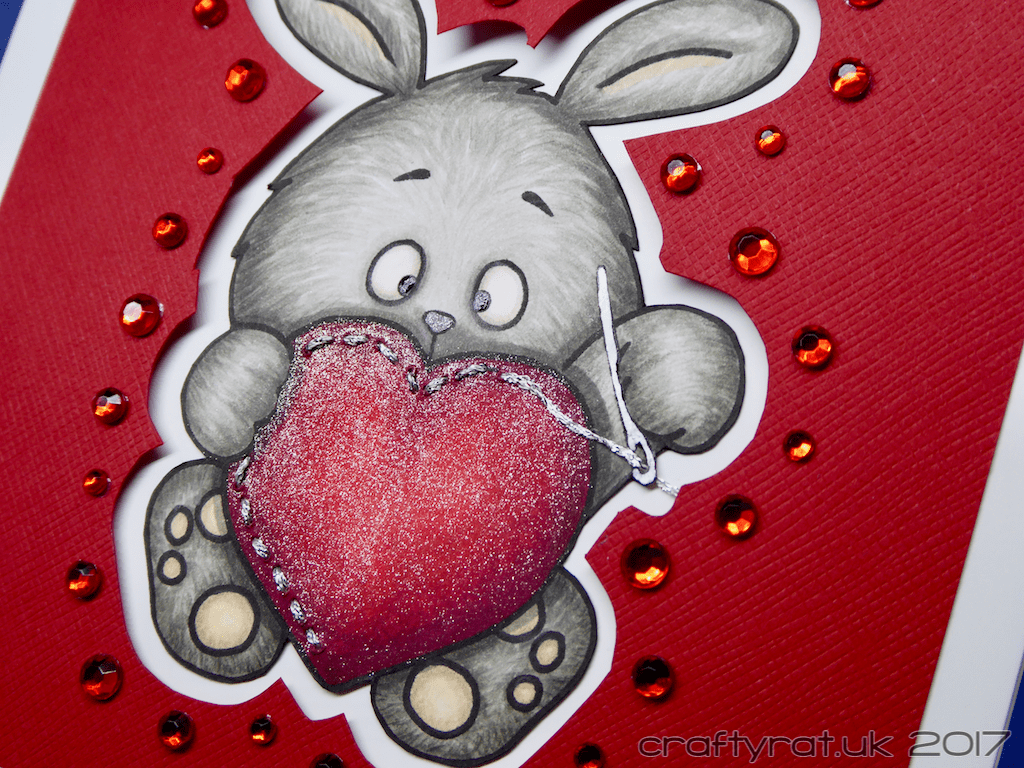
I did my usual Copic colouring, but then added detail to the fur with some well-sharpened Polychromos pencils; that extra texture makes a big difference, especially on relatively large areas like this bunny’s face.
I could have mounted the finished colouring straight on a card base, but I do like to push myself a bit further when I make things specifically for a challenge.
The first thing I did was to turn the printed stitches into real ones by sewing over them with some thin silver thread. Because the stitches were quite close together I pierced the holes before sewing to put less stress on the card. (Actually, the first thing I did was add a coat of Wink of Stella to the heart — much easier to do that before the stitching than after.)
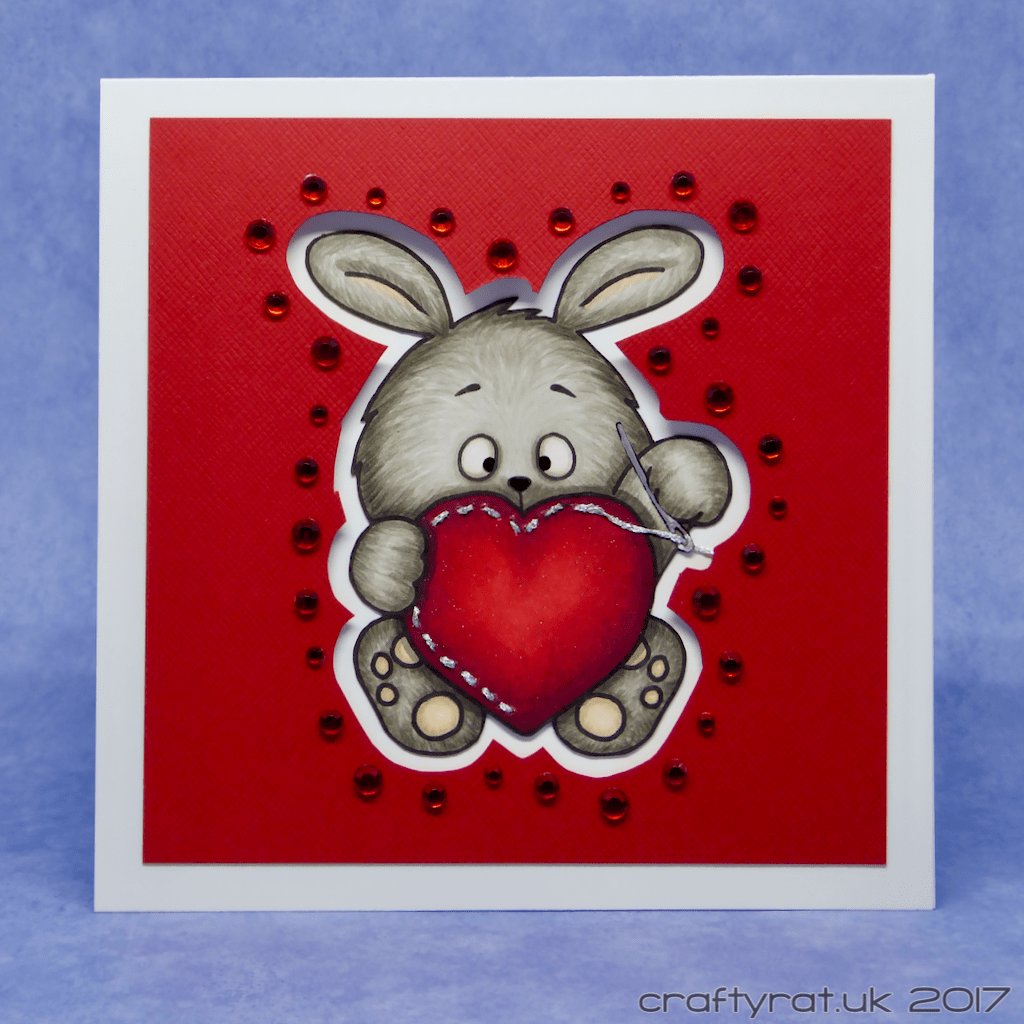
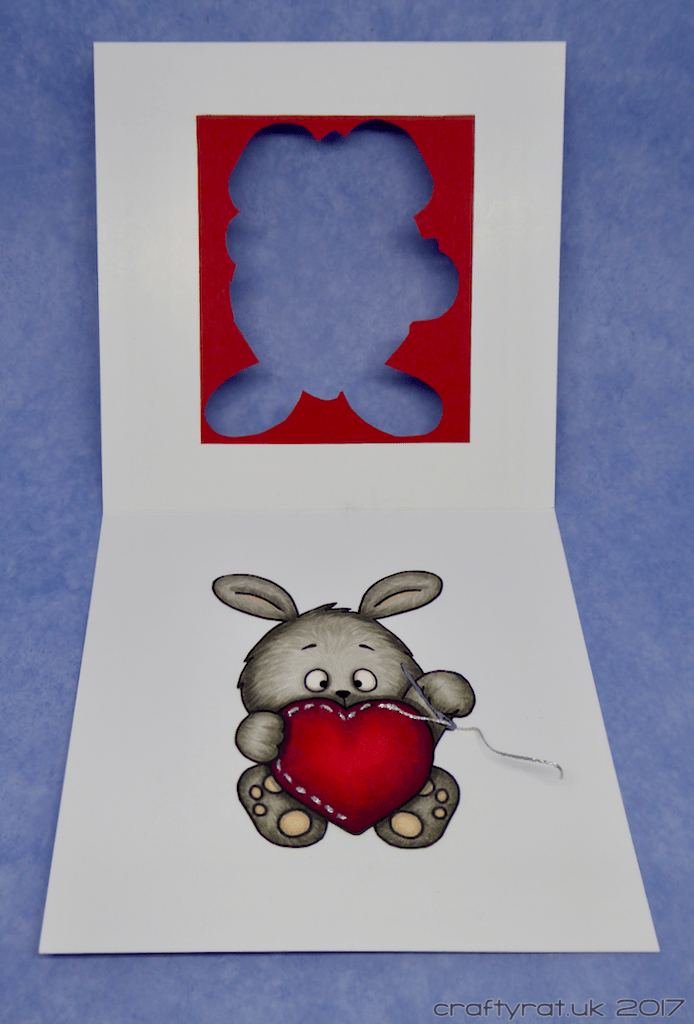
After rejecting a couple of designs which were a bit too Valentine-y, I came up with the idea of gluing the bunny on the inside of the card and cutting a bunny-shaped window in the front of the card.
My first thought was to cut the window directly into the card base. My second thought was to remember that the card I use for bases is quite tough and the chance of being able to cleanly cut that shape out of that card was minimal.
So I cut a square of lightweight red card, traced around the fussy-cut bunny, added a small border and cut it out with a craft knife. I lined that up on the card front and traced around the window, drew a rectangle around that and cut it out. I traced the outline of the rectangle onto the back of the red window panel; that helped me avoid putting adhesive anywhere where it might get stuck to the inside of the card.
After carefully lining up the red panel using the pencil lines as a guide, I could then close the card and position the bunny inside through the window.
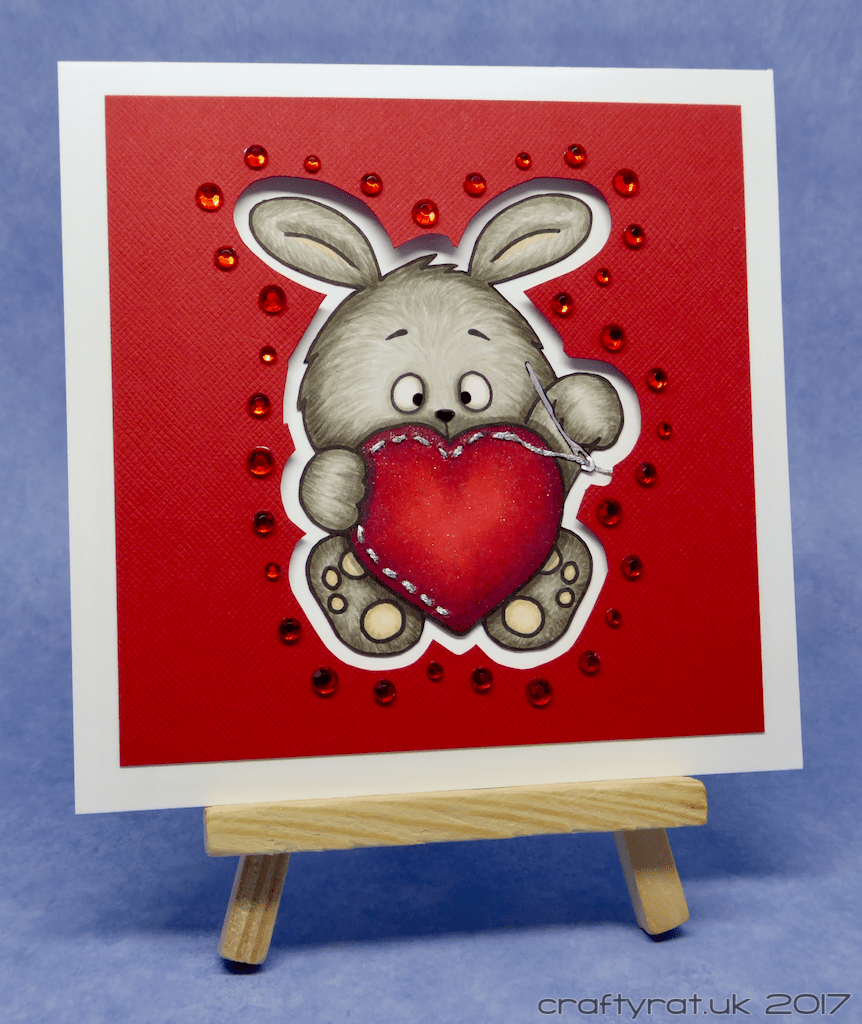
To finish it off, I wanted to outline the window with a bit of bling. I raided my embellishments stash and decided to use up most of a pack of red adhesive stones that have been lurking in there for ages.
Challenges:
- Gerda Steiner Designs progressive challenge – December
Copic markers:
heart – R35, R46, R59
bunny – W1, W2, W3, W4, W5, W7, E21, E51, E0000
Polychromos pencils:
fur detail – 272 warm grey 3, 273 warm grey 4, 274 warm grey 5, 275 warm grey 6
Supplies:
- digital stamps:
Gerda Steiner – love you sew much bunny - pens:
Sakura – glaze – black - embellishments:
Papermania – adhesive stones – red
silver thread
Wink of Stella – clear
Wink of Luna – silver - paper and card:
Neenah solar white 216gsm
Hunkydory Adorable Scorable – cotton white
Bazill Basics – ladybug trio
Discover more from Crafty Rat
Subscribe to get the latest posts sent to your email.

Such a cute card! Love that you used “real” thread! Just adorable! 🙂
LikeLike