
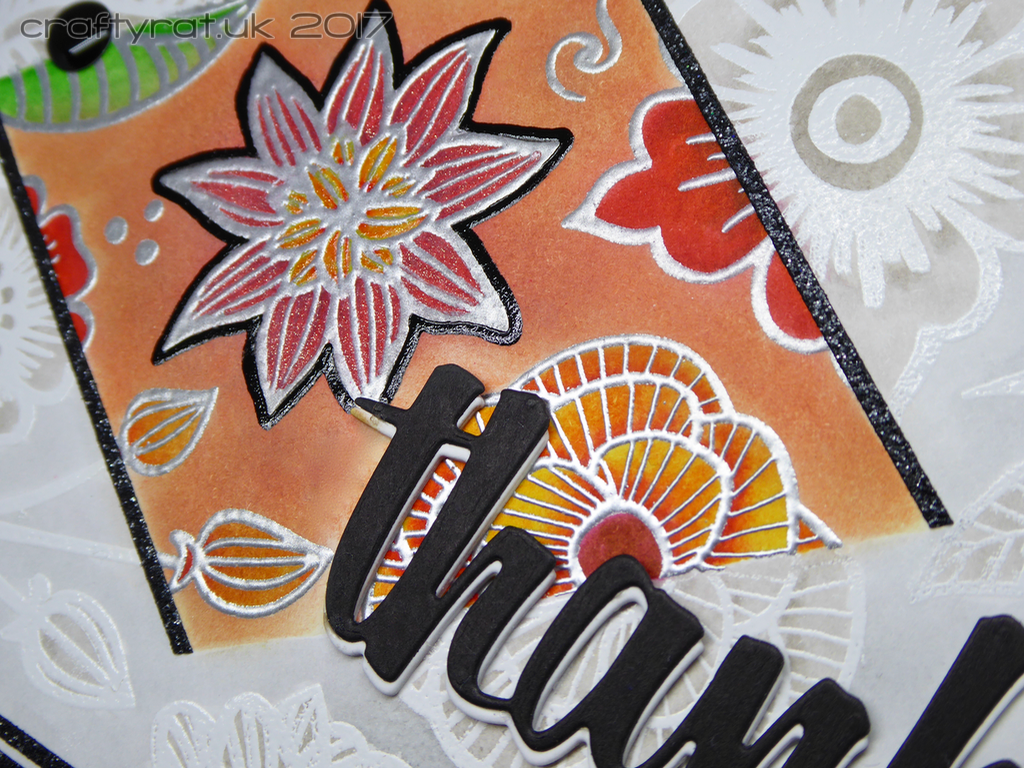
Inspired by Seven Hills Craft’s September challenge, I thought I would have a go at spotlighting not only the colour but also the embossed outlines. Technically, this turned out pretty much how I hoped it would. If only I had remembered to keep my hand out of the still-damp marker, which meant I had to adjust my colour choices. I would have started over, but I’d already done that once because I forgot to use the powder tool before heat embossing. Not one of my better days…
And that wasn’t all. I discovered that the two stamps sets I was using to build the background were slightly different thicknesses — even though they were from the same company — so that made getting a clean impression rather tricky.
What you need:
- a background stamp or enough stamps to cover your card panel
- a stamp positioner (some people can line up stamps by hand, I am not one of them)
- a mask large enough to cover your card panel with a window cut out of it for the spotlight area
- a powder tool
- Versamark or other sticky ink
- two colours of embossing powder
- colouring medium of your choice
If it had gone smoothly the process would have been:
- arrange stamps on stamp positioner
- lay the main part of the mask over your card
- use your powder tool on the exposed area
- stamp with Versamark and heat emboss with your chosen spotlight colour
- lay the window part of the mask over the heat-embossed area
- use your powder tool on the exposed area
- stamp with Versamark and heat emboss with your chosen background colour
- colour the spotlight area with bright colours
- colour the background with greys
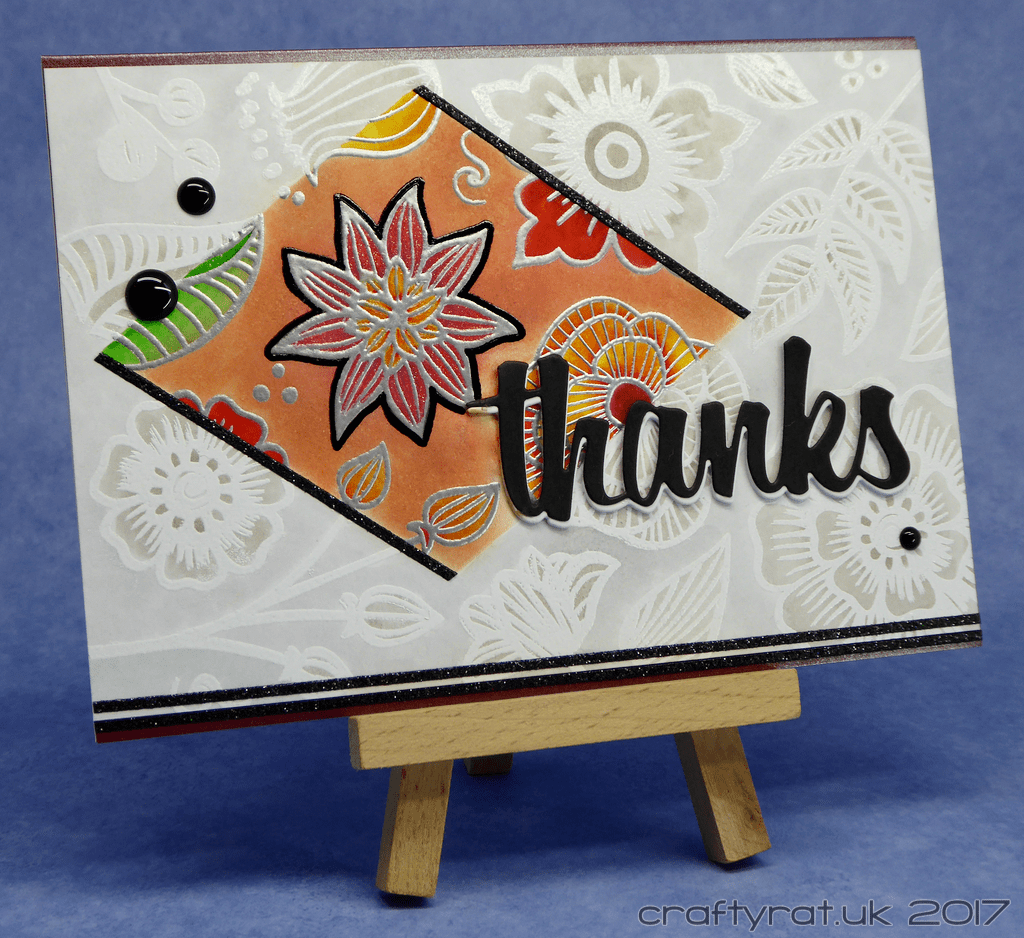
My original thought was to use a light background colour for the spotlight, but smearing red marker over it really put the end to that plan. I found a colour that worked with the rest, but it was a bit bright so I went over it with some Distress ink to tone it down. That ended up reducing the impact of the main flower – cue some barely visible Wink of Stella and a much more effective black outline.
Some glitter strips, enamel dots and a stacked thanks die-cut rescued it enough that I no longer dislike it quite as much as I did 🙂
I am really happy with the technique though and will definitely try it again. With a dry colouring medium next time though…
Challenges:
- Seven Hills Crafts – September spotlight challenge
- The Daily Marker 30 Day Colouring Challenge
Supplies:
- stamps:
Altenew – henna elements
Altenew – striped florals - dies:
Lil Inker – thanks - inks:
Versamark
Distress ink pad – tea dye - pens:
Gelly Roll – glaze – black - Zig Clean Color Real Brush Markers:
spotlight – 045 pale green, 047 may green, 020 red, 022 carmine red, 024 wine red, 050 yellow, 220 tea rose
background – 900 warm gray 2, 901 gray tint, 099 cool gray 1 - embossing powder:
Wow! – superfine – bright white
Hero Arts – silver - embellishments:
Doodlebug – sprinkles – beetle black
Papermania – glitterations – border – black
Wink of Stella – clear - paper and card:
Strathmore smooth 200
Hunkydory Adorable Scorable pearly shimmer
scraps of black and white card
Discover more from Crafty Rat
Subscribe to get the latest posts sent to your email.

Well I think your card turned out beautifully… what a creative way to use stamps and masks! I love the burst of colour in that diamond shape 🙂 Thanks for playing along with our challenge this month at Seven Hills Crafts x
LikeLiked by 1 person
Thanks! It always good to get positive feedback on those projects that not only don’t turn out how you envisage them, but also give you technical grief along the way 🙂
LikeLike
What a cute card! I love the monochrome with the splash of color! 🙂
LikeLiked by 1 person
Really pretty card =)
LikeLiked by 1 person