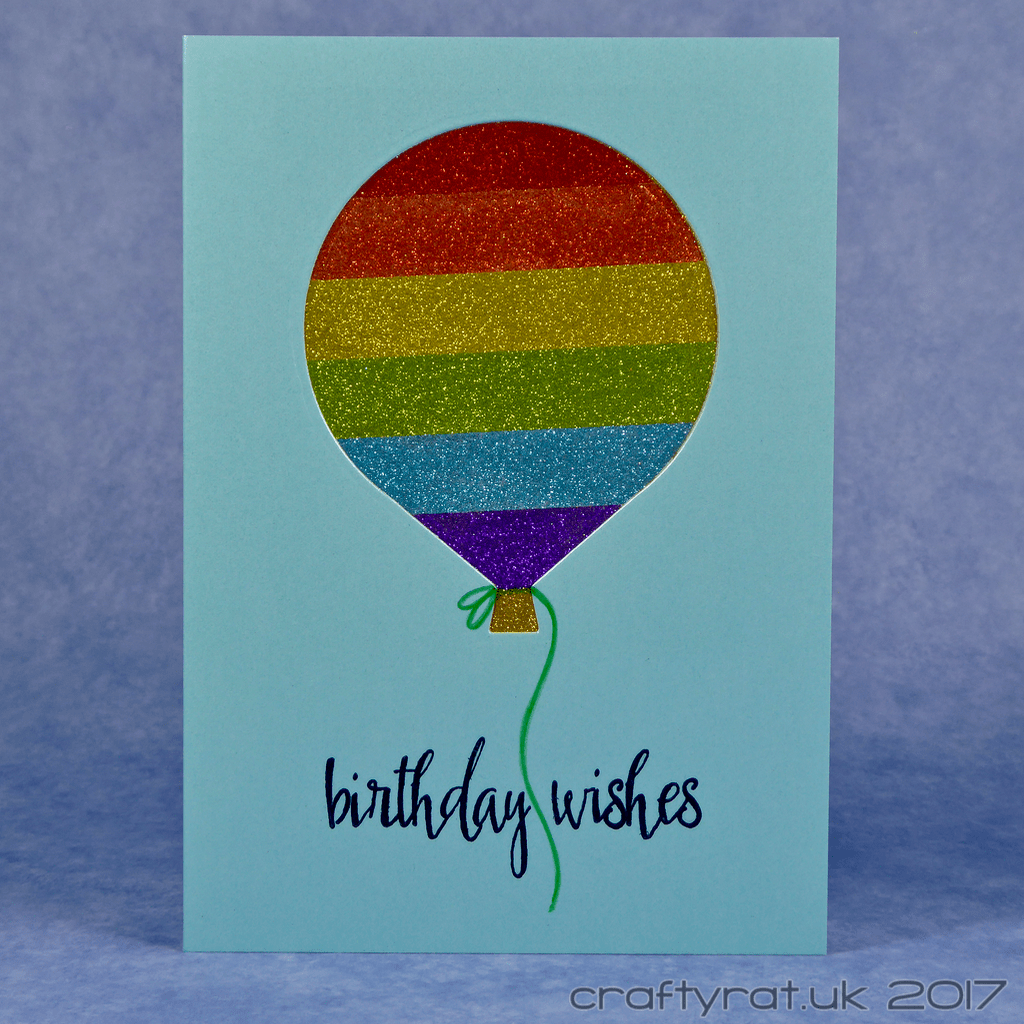
I’d forgotten how much I like microfine glitter. It gives a subtle shine that you can actually photograph without glare or reflections. It sticks remarkably well without shedding all over the place. And it’s not even that messy to work with as long as you pour it over coffee filters and have a wet wipe to hand to clean it off your finger after rubbing it into the adhesive.
With an open die like this balloon, this technique is really simple, but it will work equally well on more detailed window dies; you’ll just need a bit more patience when it comes to lifting the release paper off the tape.
The really really simple method would be to stick strips of tape on a piece of card covering an area that is slightly bigger than your die-cut and then peel the release paper off one strip at a time and add the glitter. Then you could just glue or tape it behind the die cut window.
The slightly more fiddly but much neater method requires a little experimentation to get the right amount of cut with your die-cut machine. The theory is that the combination of the card and tape will be thick enough that the die will cut through the release tape, but not all the way through the card. I think I should have used thicker card though, because it was a very close thing when I did it and I ended up sticking a piece of a large mailing label over the back just to be on the safe side — I didn’t want the balloon falling out of the card!
Once you have a piece of card covered in tape with the shape die cut into it then you can remove the bits of release tape that won’t be visible and stick the panel behind the die-cut window. Then you just remove one strip of release paper at a time, add glitter, rub it in well, clean up the excess, and repeat until finished.
Written down, that sounds way more complicated than it actually is!
In fact, the hardest part was figuring out how to finish the card off — everything I tried looked too fussy or just didn’t hang together as a design. Eventually I found this sentiment in my stash, stamped it in archival ink and used a Sharpie to draw the string on the balloon. And I really like the end result.

Supplies:
- stamps:
Altenew – birthday greetings - dies:
Jus Cutz – balloon - inks:
Ranger – archival – jet black - pens:
green Sharpie - Elizabeth Craft silk microfine glitter:
true red, orange, yellow, spring peridot, sky, amethyst, solar gold - paper and card:
Hunkydory Adorable Scorable pearly shimmer - miscellaneous:
Scor-tape
Class:
Online Card Classes – Sparkle & Shine
Discover more from Crafty Rat
Subscribe to get the latest posts sent to your email.

This is so pretty with the glitter. I’ve never made any cards with glitter but have always admired them. 😀
LikeLike