I made this card for my brother’s girlfriend’s birthday (there really ought to be a better word than girlfriend when a couple have been together for more than thirty years). I never get any feedback on my cards for her so I make something that I believe she will like and use the opportunity to try out something I want to do.
I used one of her own photos on Facebook as inspiration and combined that with a technique I’d seen recently in my online wanderings. A technique that I now discover I didn’t bookmark anywhere, but have since managed to find again by searching in my browser history.
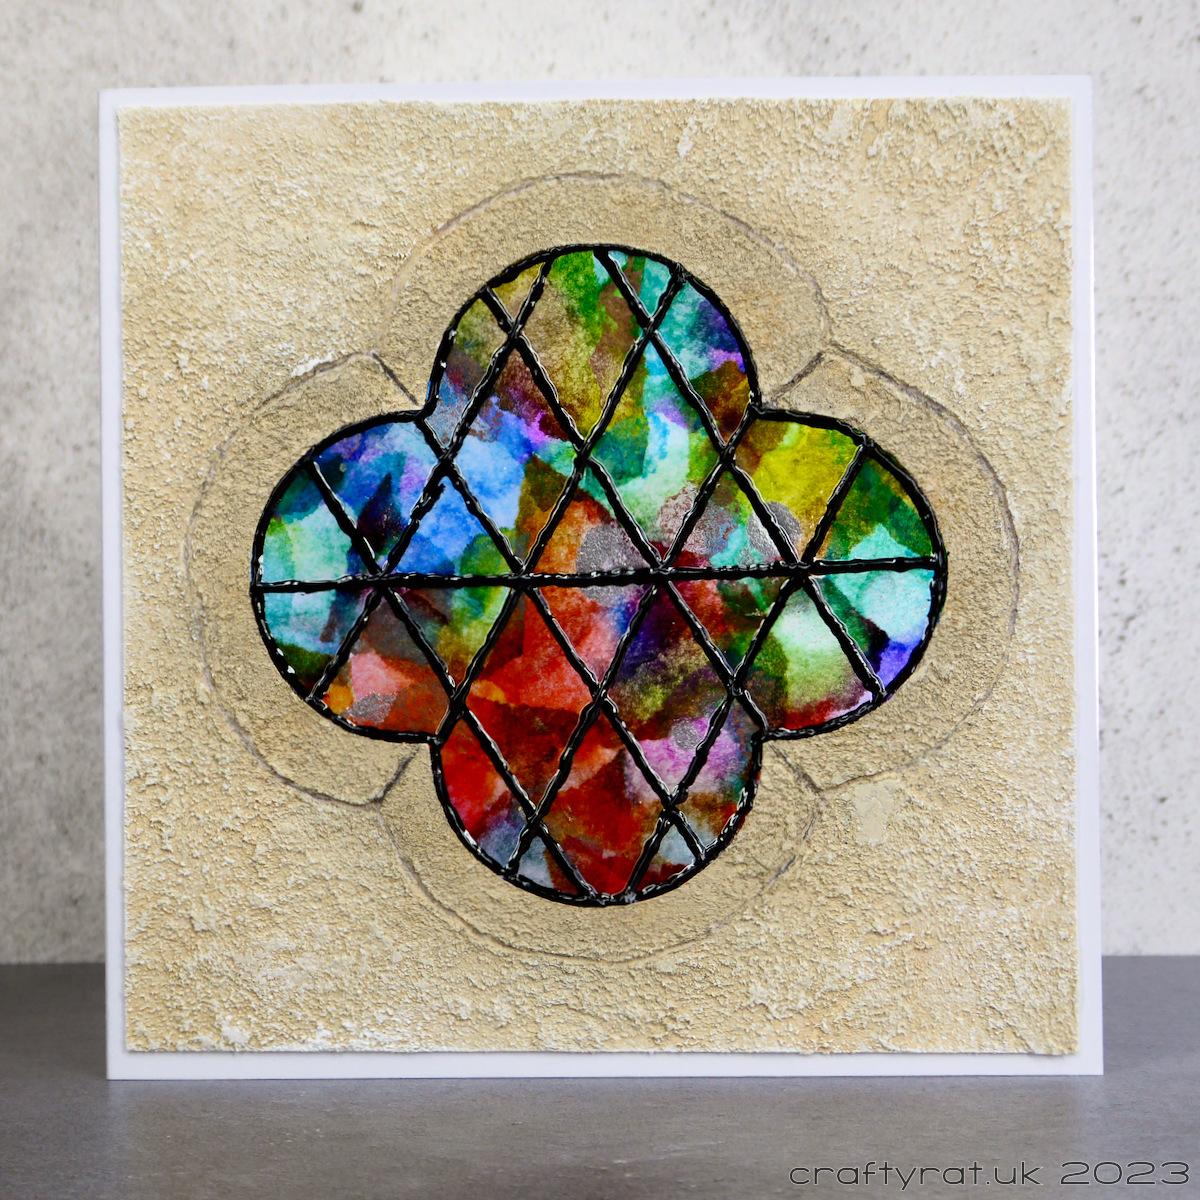
The first thing I did was create the window shape with the leaded strips in Affinity Designer on the Mac, sized it to fit on a roughly 5″ square card — not that I was influenced at all by the size of square envelopes that I have in my stash — and printed it out to use as a template.
I used my light pad to trace the window shape onto a card base and cut it out with a craft knife. I could have used the Cricut Maker, but sometimes it’s just easier to grab the nearest knife… I also cut the window shape out of a second piece of card, slightly smaller than the card front.
I added texture to that second piece using paste from the stone effect creative set. The set had two different coloured pastes in it and, given that the last time I used it was the summer of 2018, I’m seriously impressed that only one of the pots had dried out. When it was dry, I added some colour variation using the glazes that came with the set and a little titan buff acrylic paint. I had marked the border using a pokey tool while the paste was still wet and I finished off the front panel by emphasising it with a little ink and a brush.
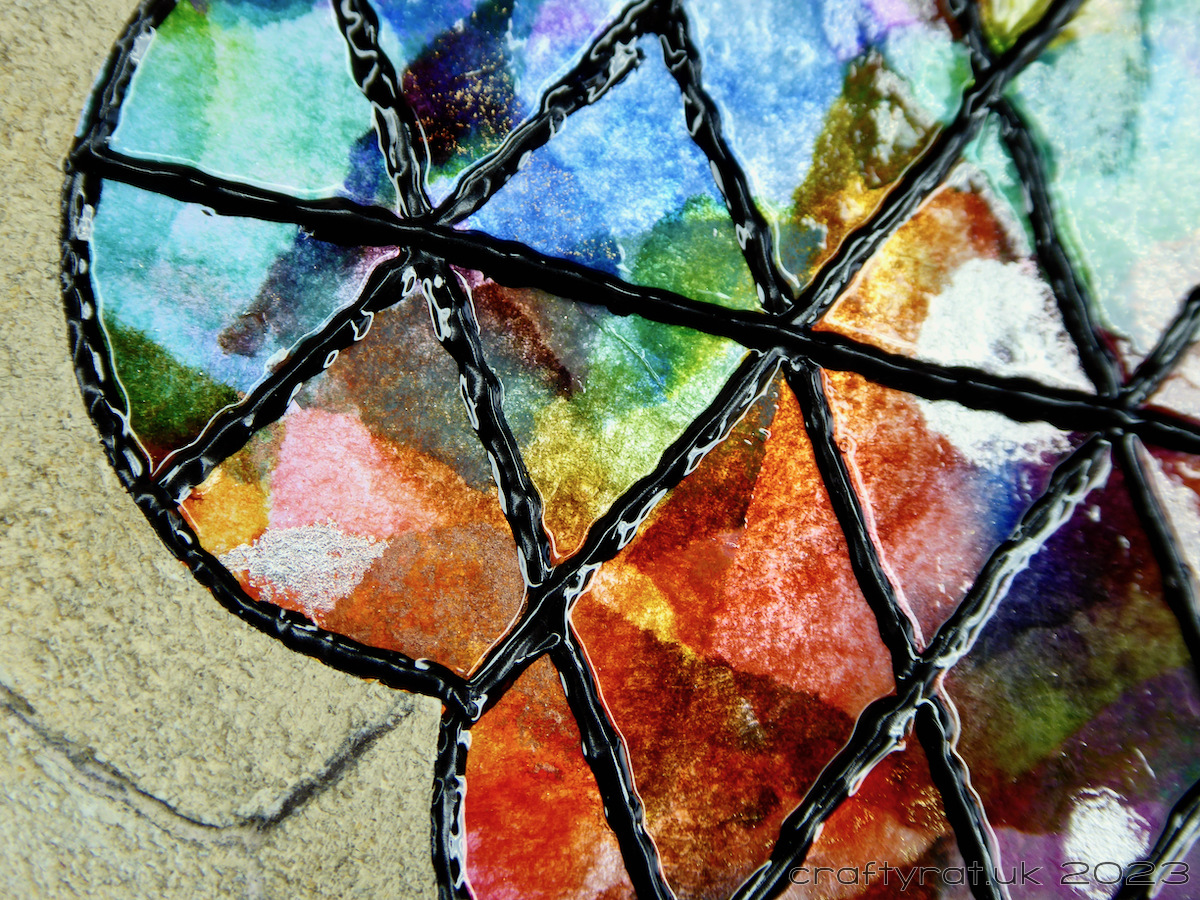
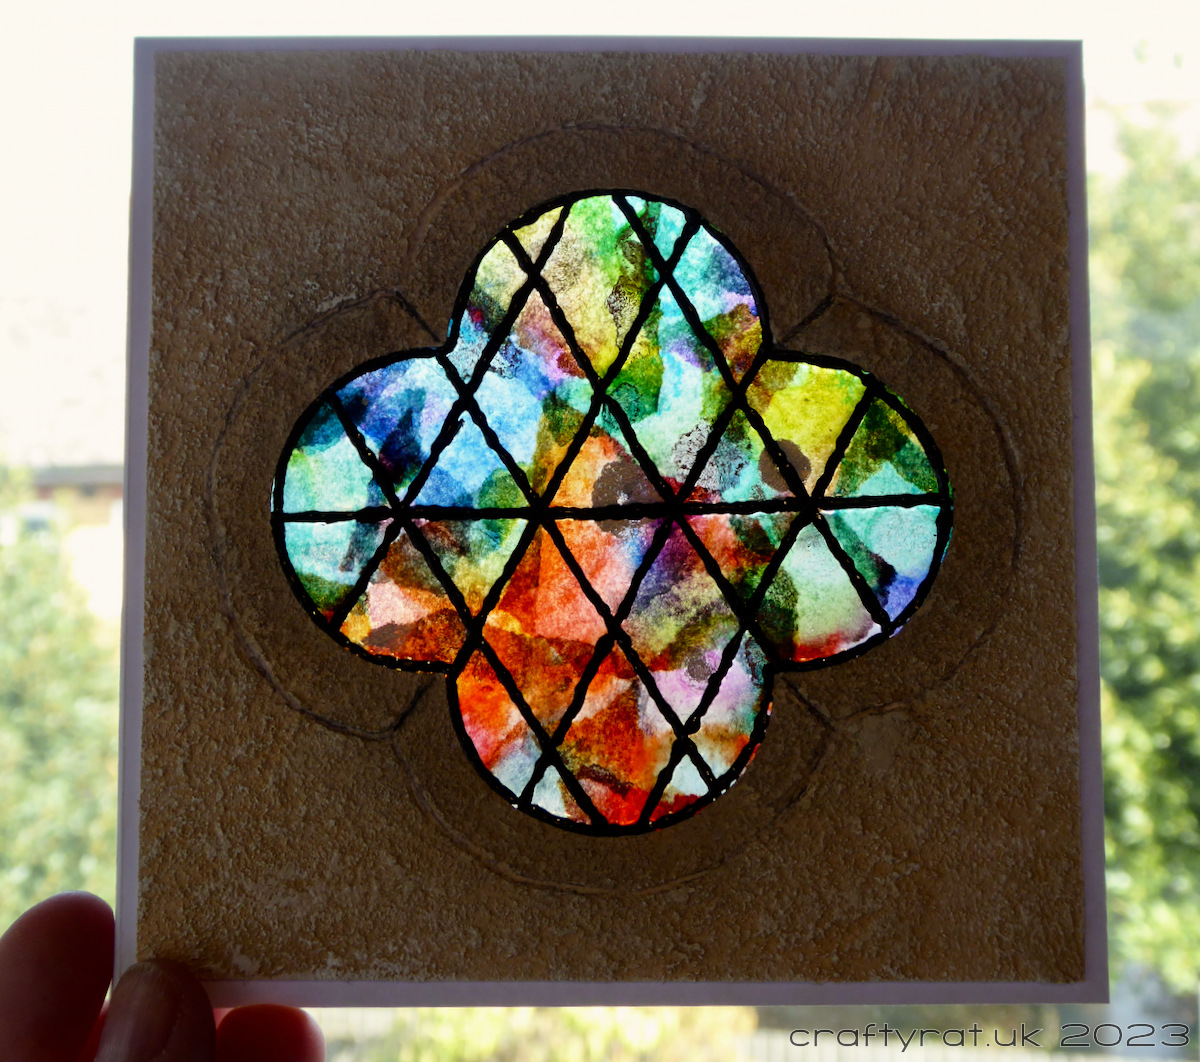
For the window itself, I started out creating a colourful sheet by dripping alcohol inks onto a sheet of tissue paper. Once it was dry, I tore it into small pieces and glued them to a piece of acetate slightly larger than the window I planned to make. I used gloss medium as a glue to avoid the haziness that can occur with matte medium; I wanted this to be as translucent as possible.
The next step was to create the window leading. Out with the light pad once more and the template I had printed at the start of this process. I taped the coloured acetate over the template and traced the criss-cross of lines with relief outliner.
When it was dry (I really ought to just put a disclaimer at the top to say “I wait for everything to dry unless otherwise specified”), I assembled the card. I used double-sided tape to stick the coloured window to the back of the textured panel. Thin foam tape then mounted this panel to the card base, carefully lining up the apertures.
Two more things to do before it was complete. First, now that the window was mounted in the textured panel I could go around the outside edge of the window with the relief outliner and second, once that was dry I could add a thin layer of glossy accents to each of the window panes for some extra shine.
And done. No idea if she liked it. No idea if it even survived the trip through the postal system — I did add a thin sheet of foam in the envelope to try and add a little protection. But I enjoyed making it and it looks pretty with the light shining through it.
Supplies:
- colour:
alcohol inks
Golden titan buff acrylic paint - texture:
Viva Decor Venezia Bianco stone effect creative set - paper and card:
tissue paper
white card - miscellaneous:
Pebeo Cerne Relief – black
Ranger glossy accents
Discover more from Crafty Rat
Subscribe to get the latest posts sent to your email.

Very interesting how you did this one! Thanks for sharing!
LikeLike