
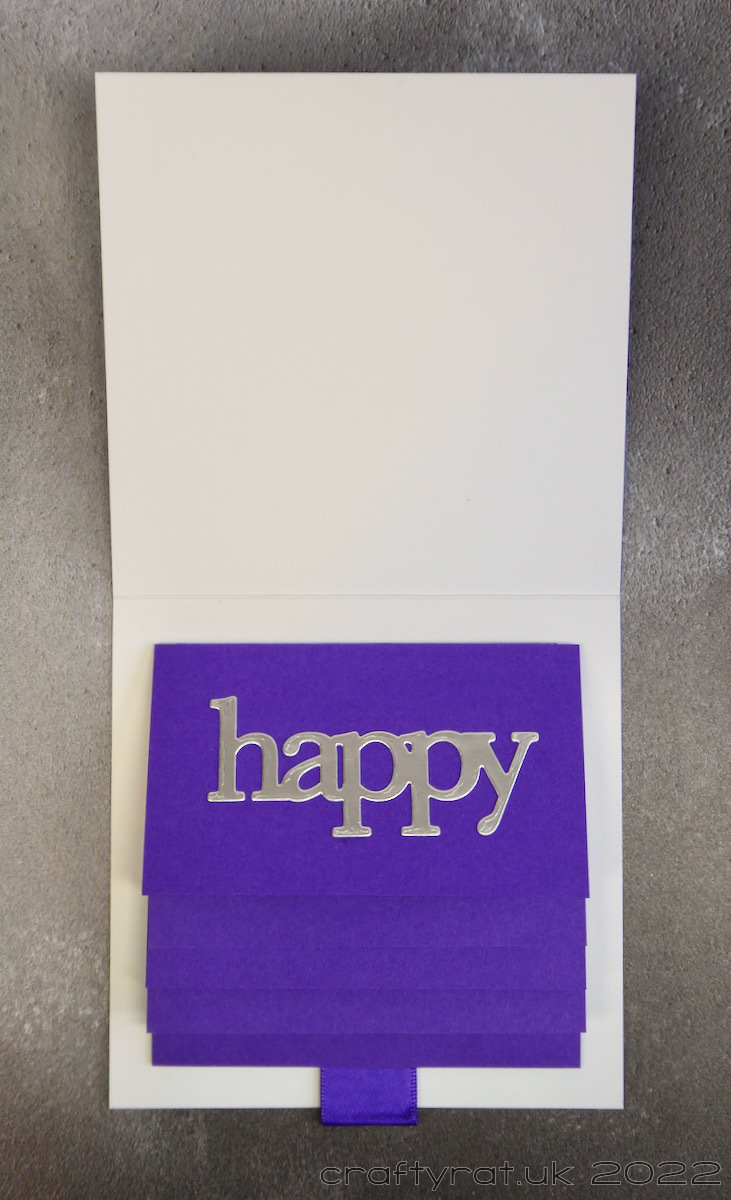
By some weird effect of the passage of time, my youngest nephew is now 18 years old. Rather than try to find an appropriate image (not sure what that would even be) and do my usual Copic colouring, I decided to go down the engineering route and create an interactive card instead.
After much browsing of blogs and Instagram accounts and watching YouTube videos in search of inspiration, I eventually came across a nice, clear video tutorial for making a waterfall card by Sam Calcott of Mixed Up Craft.

I very nearly messed it up though. I had assembled the pages and just had to fix it in place on the card base; then I realised that, by making the pages shorter, I had barely left myself enough room for the sliding mechanism at the back! Square panels would have been much more forgiving.
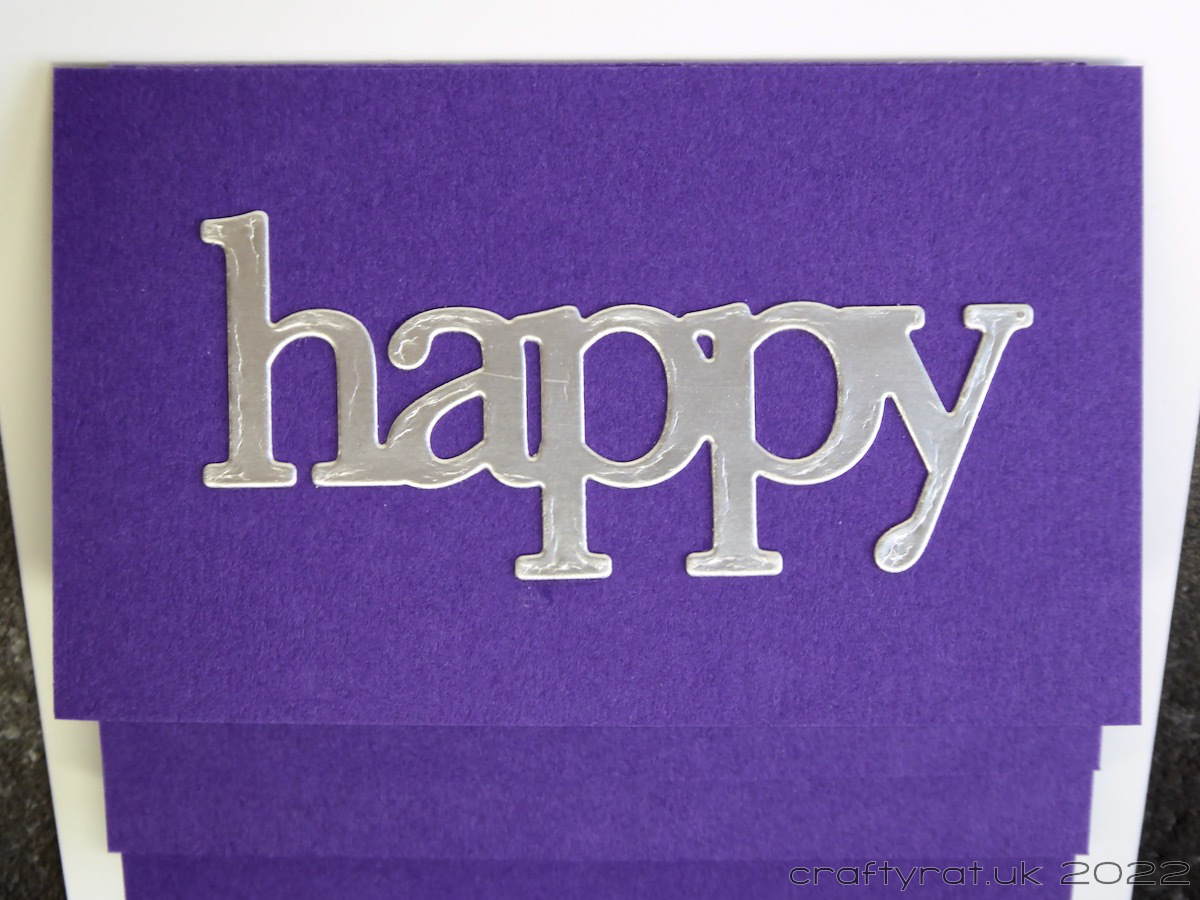
For the front panel, I used a piece of card that I created when I was trying out the black ice technique for this year’s Valentine card. I cut out the numbers by hand and mounted it over a piece of shiny red card.
I die-cut the words and numbers for the inside from various scraps of card and carefully glued them in position so they wouldn’t peek out from underneath the previous flap when the waterfall was closed.


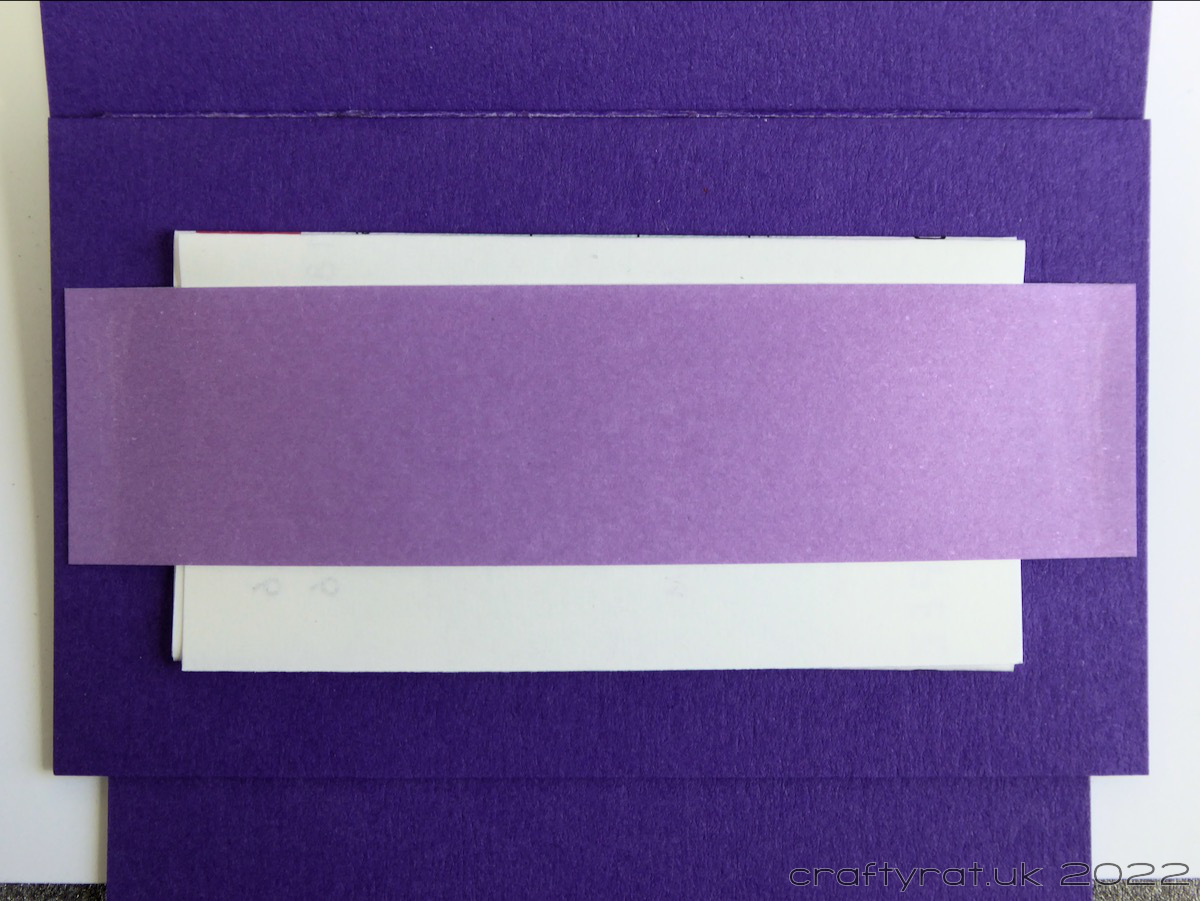
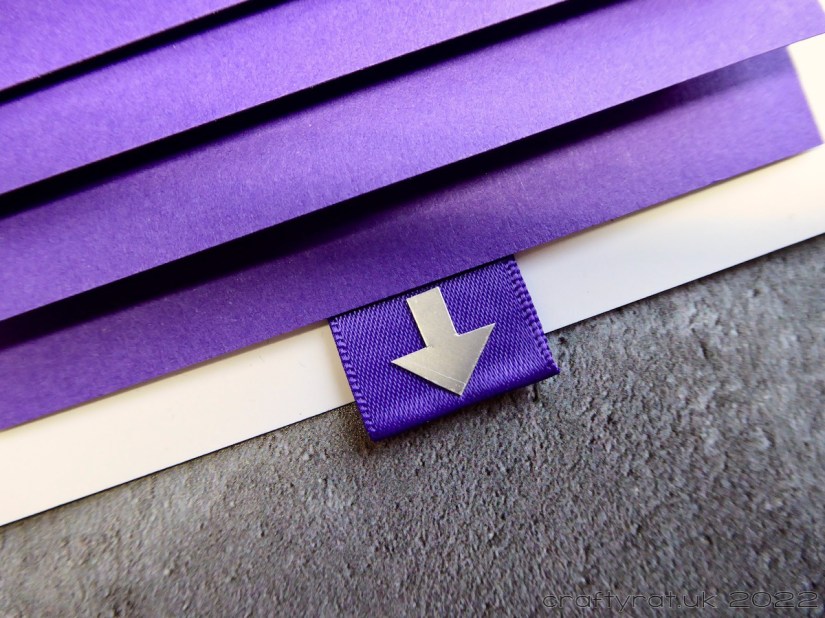
I added a piece of folded ribbon as a pull tab. I was just about to seal the card in the envelope when I suddenly thought “is it obvious that you have to pull the tab?”, “would an 18 year old with no interest in card-making actually realise what this is?”. And that was the point at which I went back, cut an arrow out of the silver card and glued it to the ribbon. The cheque I folded up on the last panel has since been cashed so it did work 🙂
Supplies:
- dies:
WPlus9 – happy trio
Concord & 9th – double cut numbers
Lawn Fawn – Finley’s ABCs
Fuzzy Lemon – happy birthday
Discover more from Crafty Rat
Subscribe to get the latest posts sent to your email.

I’ve never made a waterfall card but keep saying I’m going to give it a try. Thanks for sharing this!
LikeLike