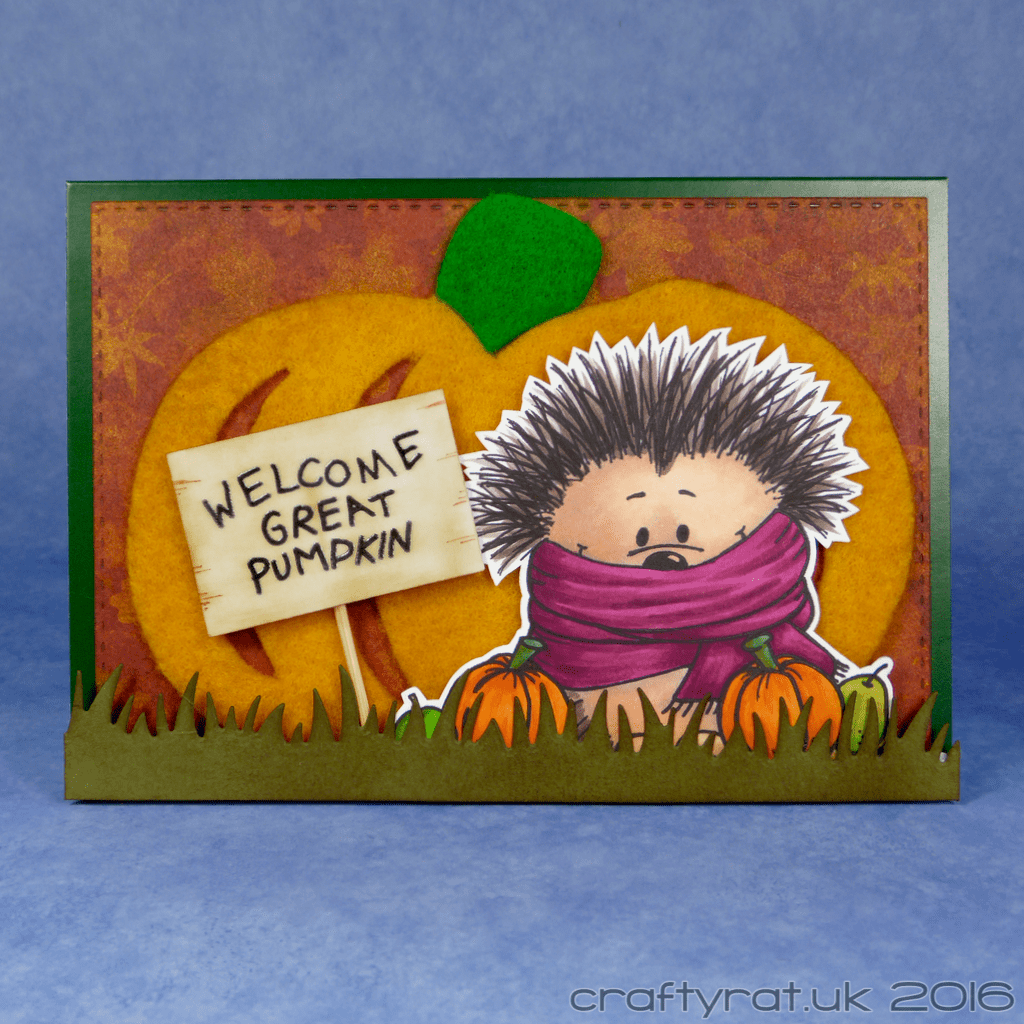
This cute hedgehog wrapped up warm in his chunky scarf is the image for October’s progressive challenge from Gerda Steiner Designs. I have to give credit to my other half for coming up with the great pumpkin idea; I love how it turned out.
How:
I printed the hedgehog on Neenah solar white and coloured him with Copic markers. I wasn’t sure what colour I wanted to make his scarf so I referred back to the colour wheels I created when I did the Copic Jumpstart class; this combination is taken directly from my blended colour wheel. I fussy cut the finished image out, leaving a narrow border.
Originally, I was going to create a Distress ink blended background for him, but then I found these great autumn leaves while flicking through my stash of infrequently used patterned paper. It was a little too bright though, so I gave it a light coat of Distress ink to tone it down before die-cutting it out with a large stitched rectangle and adhering it flat to the card base.
The great pumpkin was cut from felt using a template that I created in Affinity Designer on the Mac. I’m not sure what the best adhesive to use with felt is — I didn’t like using wet glue last time I tried, so I used some double-sided tape instead. I used thin foam tape to add the hedgehog on top of the pumpkin.
The grass was die-cut from a scrap of green card. As with the patterned paper, I gave it a coat of Distress ink to tone down the colour. The I popped it up on a couple of layers of thicker foam tape to make sure that there would be a bit of clearance between it and the felt pumpkin.
For the sign, I started by writing out the message on scrap paper. Once I’d got it looking how I wanted (like Linus’s sign in It’s the great pumpkin, Charlie Brown) I traced it onto a piece of vellum using a black embossing pen and then heat-embossed with clear powder. I wrapped the vellum around a scrap piece of white card and added a bit of Distress ink to stop it being quite so bright. I taped a cocktail stick to the back of the sign, added some foam tape and positioned it next to the hedgehog.
Challenges:
Gerda Steiner Designs progressive challenge – October
Supplies:
- digital stamps:
Gerda Steiner Designs – cold hedgehog - dies:
Lawn Fawn – grassy border
Create A Smile – double stitched rectangles - pens:
Tsukineko – Emboss dual pen II – black - colour:
Distress ink pad – gathered twigs - Copic markers:
hedgehog body – E11, E00, BV01, BV000
hedgehog quills – E74, E77
scarf – RV69, R39, RV17
pumpkins – YR15, YR16, YR18
apple – G14, G46, G99
pear – YG03, YG06, YG09, E53 - fabric:
dark yellow felt
green felt - paper and card:
Neenah solar white 216gsm
Bo Bunny – paper pad – autumn song
Hunkydory adorable scorable – evergreen
Anita’s white vellum - miscellaneous
cocktail stick

Discover more from Crafty Rat
Subscribe to get the latest posts sent to your email.

your card turned out amazing!!!!
LikeLike