Series: Stitch Club #3
Stitch Club from TextileArtist.org
Workshop: Water Ways with Paint and Stitch
Host: Monique Day-Wilde website – Instagram
Aim: Experiment with watery paint on fabric and add stitching in response to the paint.
With the first of these painted fabrics I painted directly onto the dry cotton, adding a spritz of water here and there to soften a few edges. That left me with a lot of contrast and hard edges to fight with when it came to adding the embroidery.
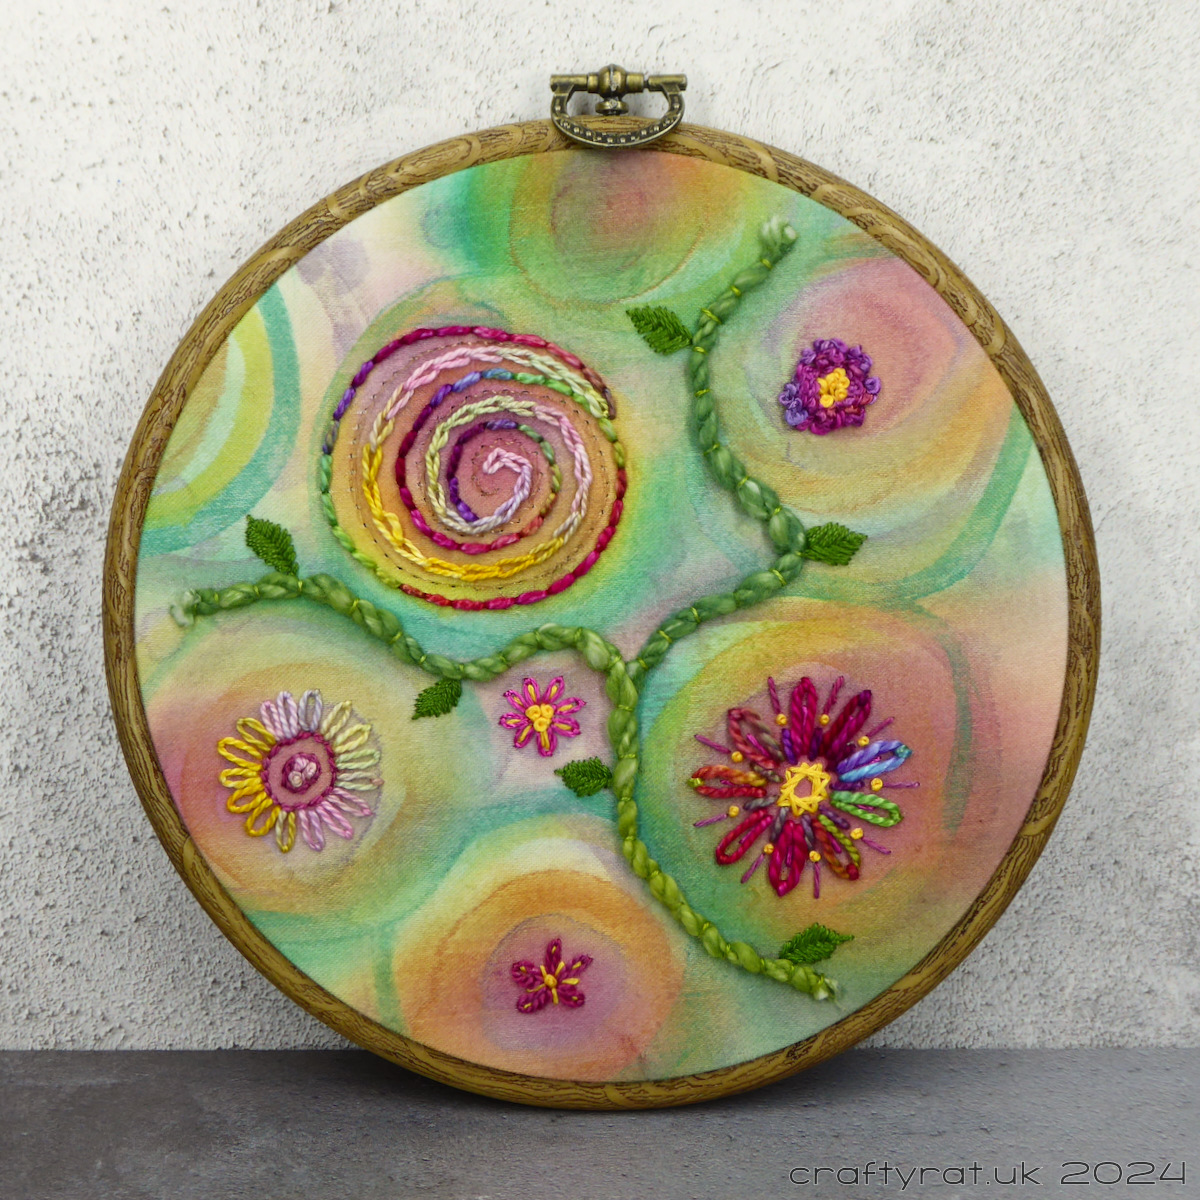
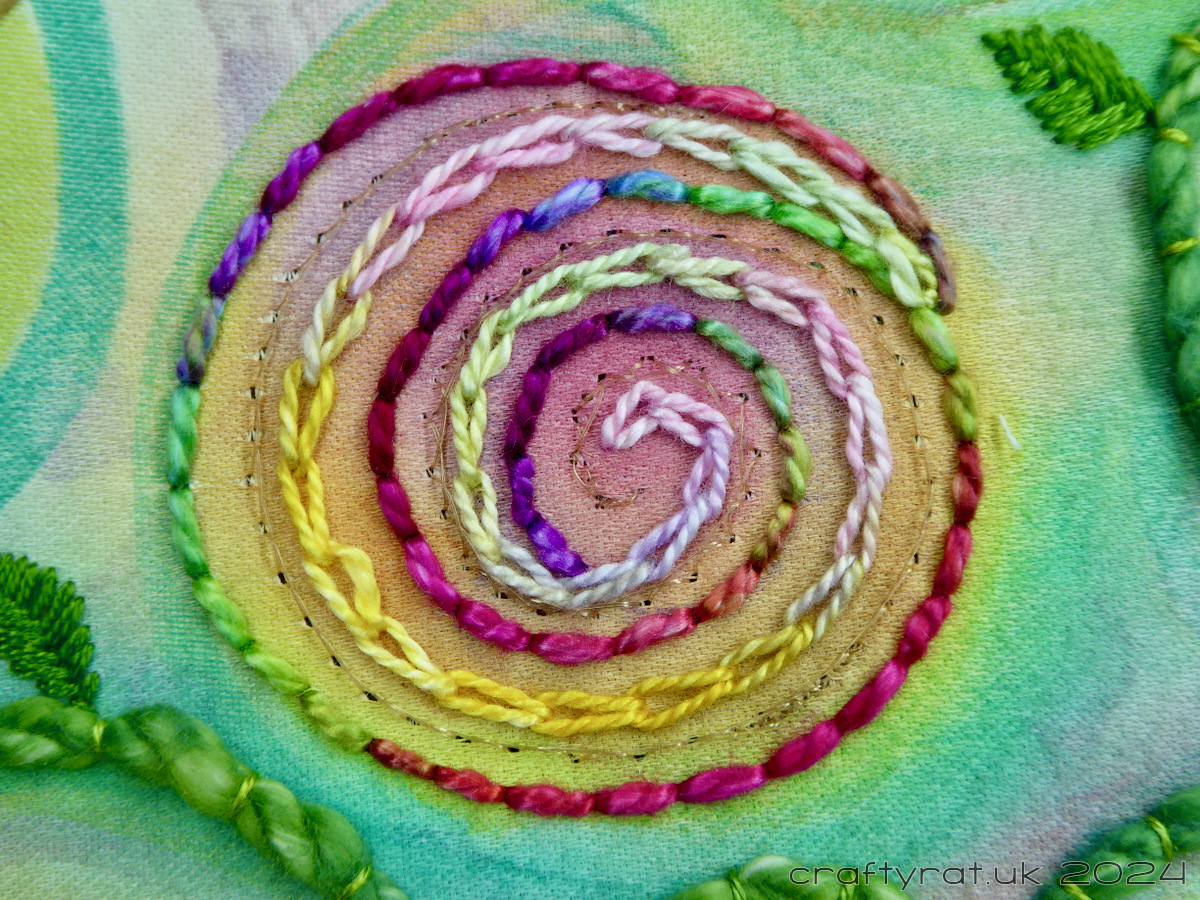
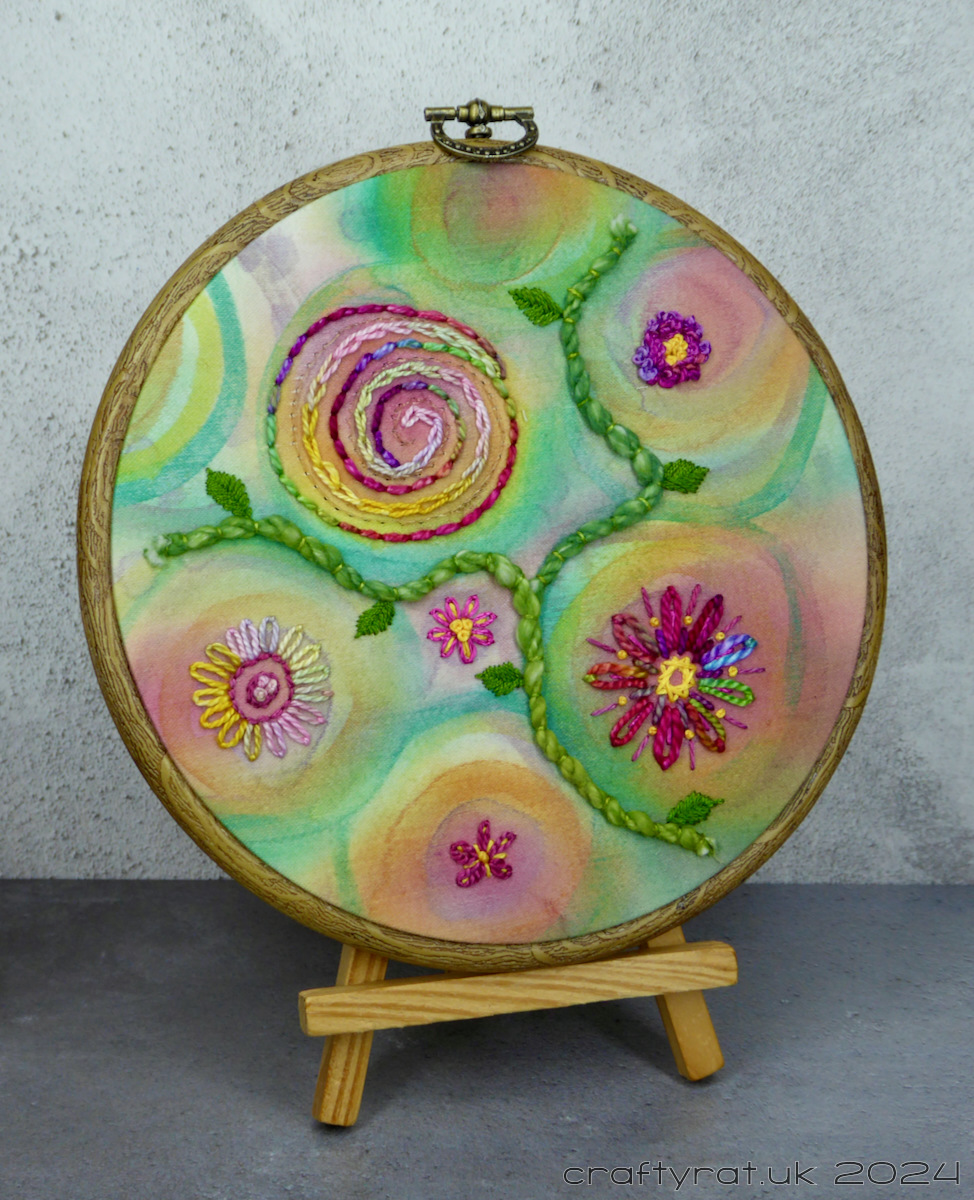
For this one, I started by wetting the fabric and thinning down the acrylic paint, almost like watercolour. I even ended up with some watercolour-style edges on some of the circles and, overall, it created an interesting mix of blended colours that looked really pretty even before I started stitching.
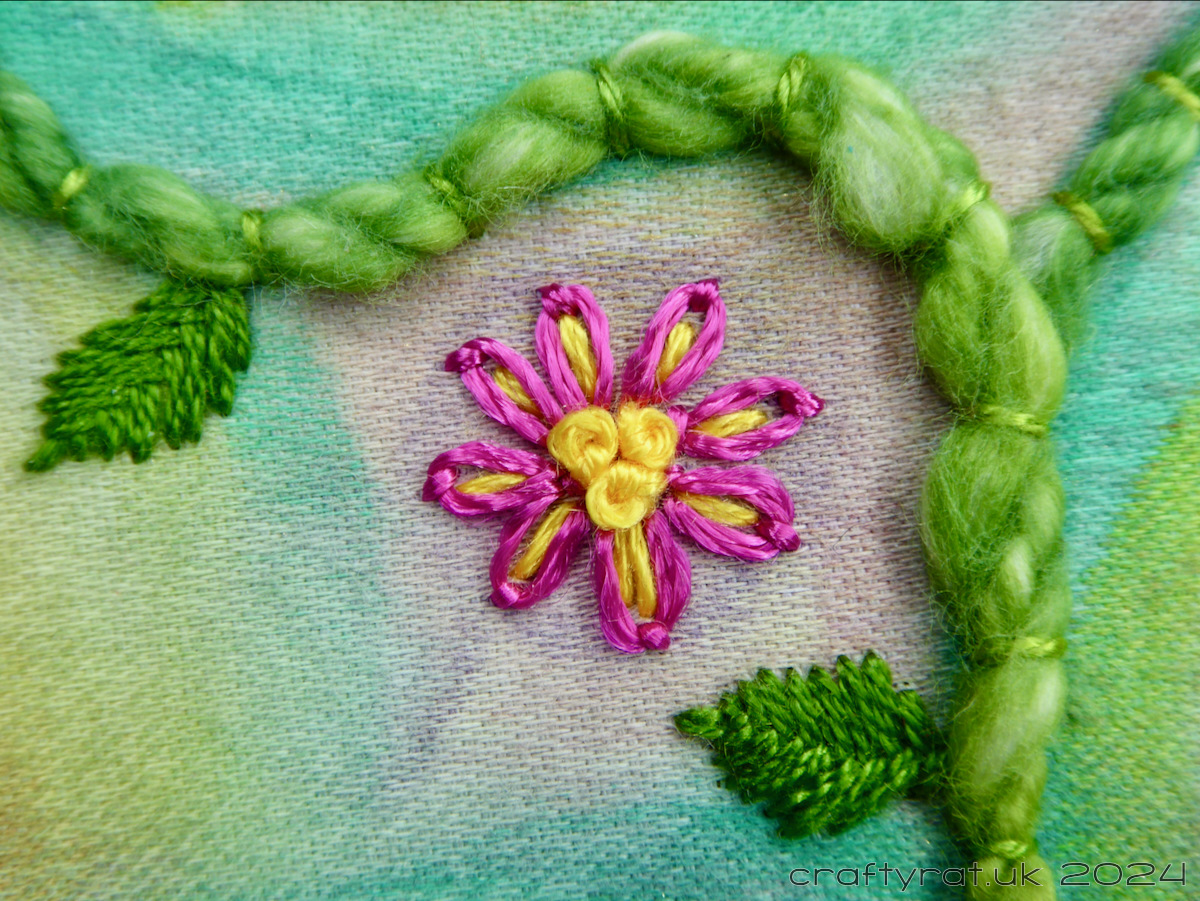
I didn’t do any planning, preferring to respond to the base pattern and make it up as I went along. The paint created some obvious spots to add floral motifs, but I decided that I wanted something extra to add a bit of structure to the design. So, I started by grabbing a length of chunky green wool that I’d got in a thread sampler pack and couching it onto the fabric, dividing it into three around the painted circles.
I had a couple of different variegated threads in my stash, both with plenty of pink in them, which I thought would go nicely with the paintwork. I started by stitching the spiral: backstitch in one thread, and chain stitch in the other. There was a little gap left and, in the spirit of experimentation, I added a line of stitch using some “invisible” thread which is, quite honestly horrible to sew with. But it did add an extra textural element to the spiral.
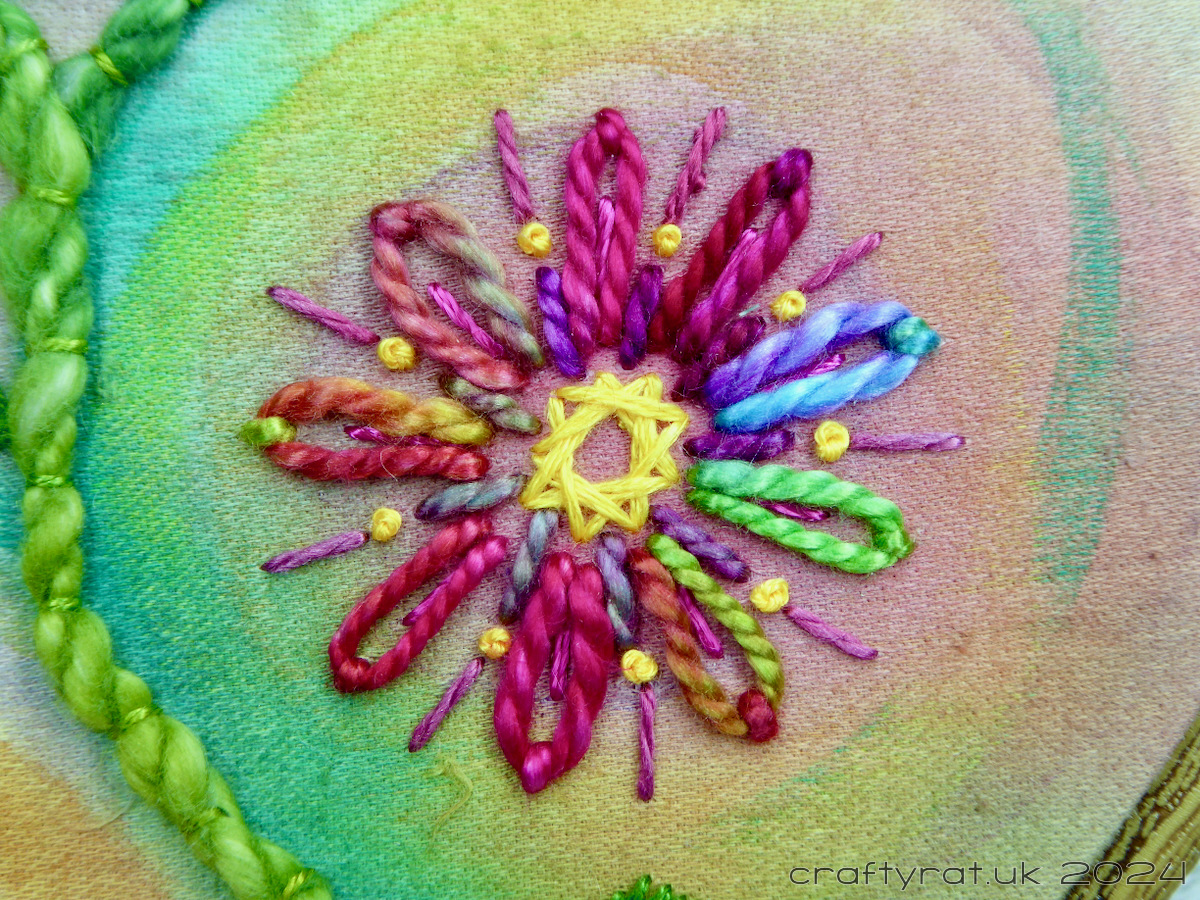
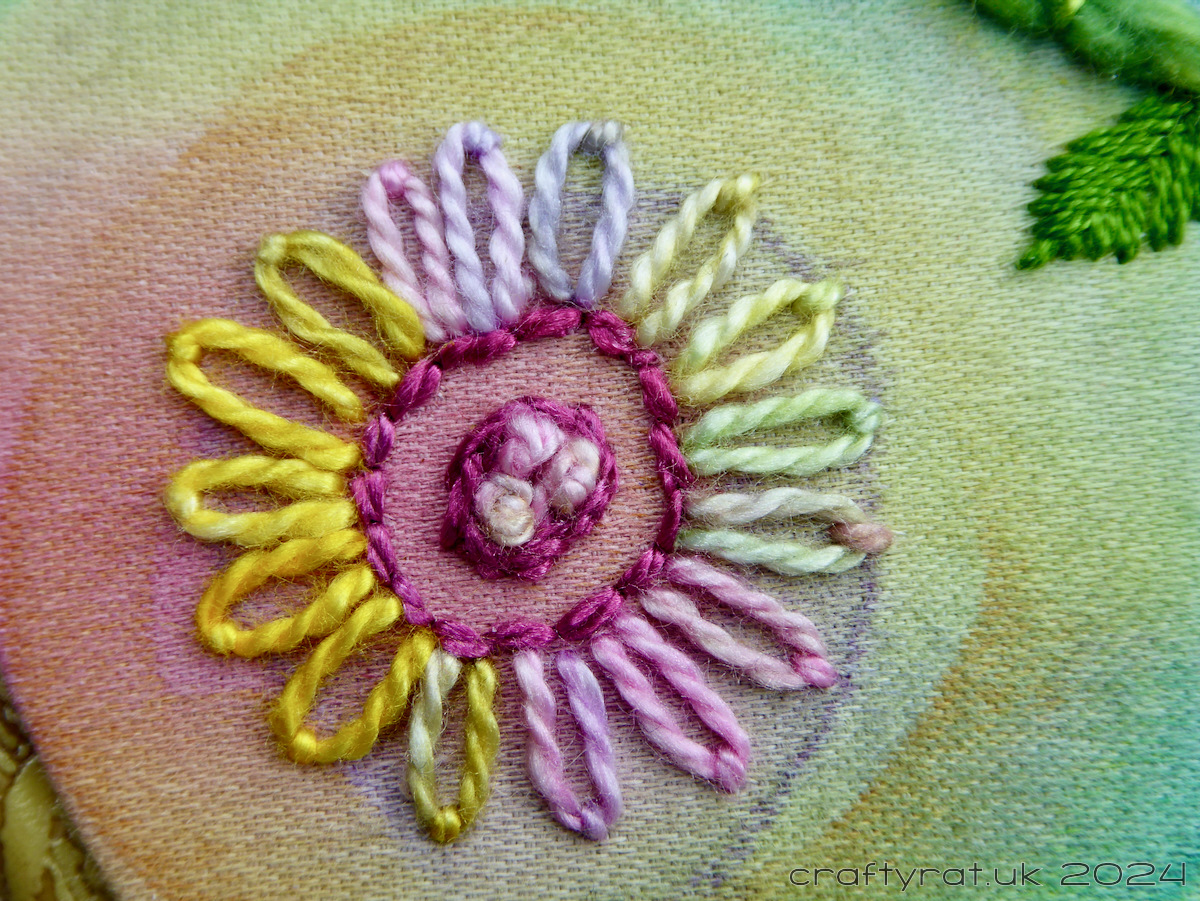
Apart from the small purple flower, which was a crinkly thread tightly couched around a few French knots, the rest of the “flowers” were done in a mix of lazy daisy and straight stitches, with some French knot details. The last thing I added were the tiny leaves, this time using fishbone stitch.
My one regret with this piece is that I made it before learning about “plunging”, which is how you take chunky elements from the front of a piece of embroidery through to the back. That would have given me much tidier ends on the green wool, rather than the cut ends I have now. But, this is all a learning process and I am still really happy with how this turned out.
Discover more from Crafty Rat
Subscribe to get the latest posts sent to your email.

Very pretty! You should be happy with this!
LikeLiked by 1 person
I definitely am. I can see things I could do differently but that’s just the learning process…
LikeLiked by 1 person