One of the problems with trying out a new craft is that you can seriously misjudge how long it will take you to create something. This card is the perfect example of that. I haven’t done any embroidery of any sort since I was a child — mum used to do quite a bit so I had a go too — and the nearest I’ve come to doing any cross-stitch was making a decorated pencil case when I was still in junior school.
But I discovered the existence of perforated paper a while ago and had picked up a cheap bag of embroidery floss to go with it, so I had all the things I needed to make a cross-stitch card — other than the motivation!
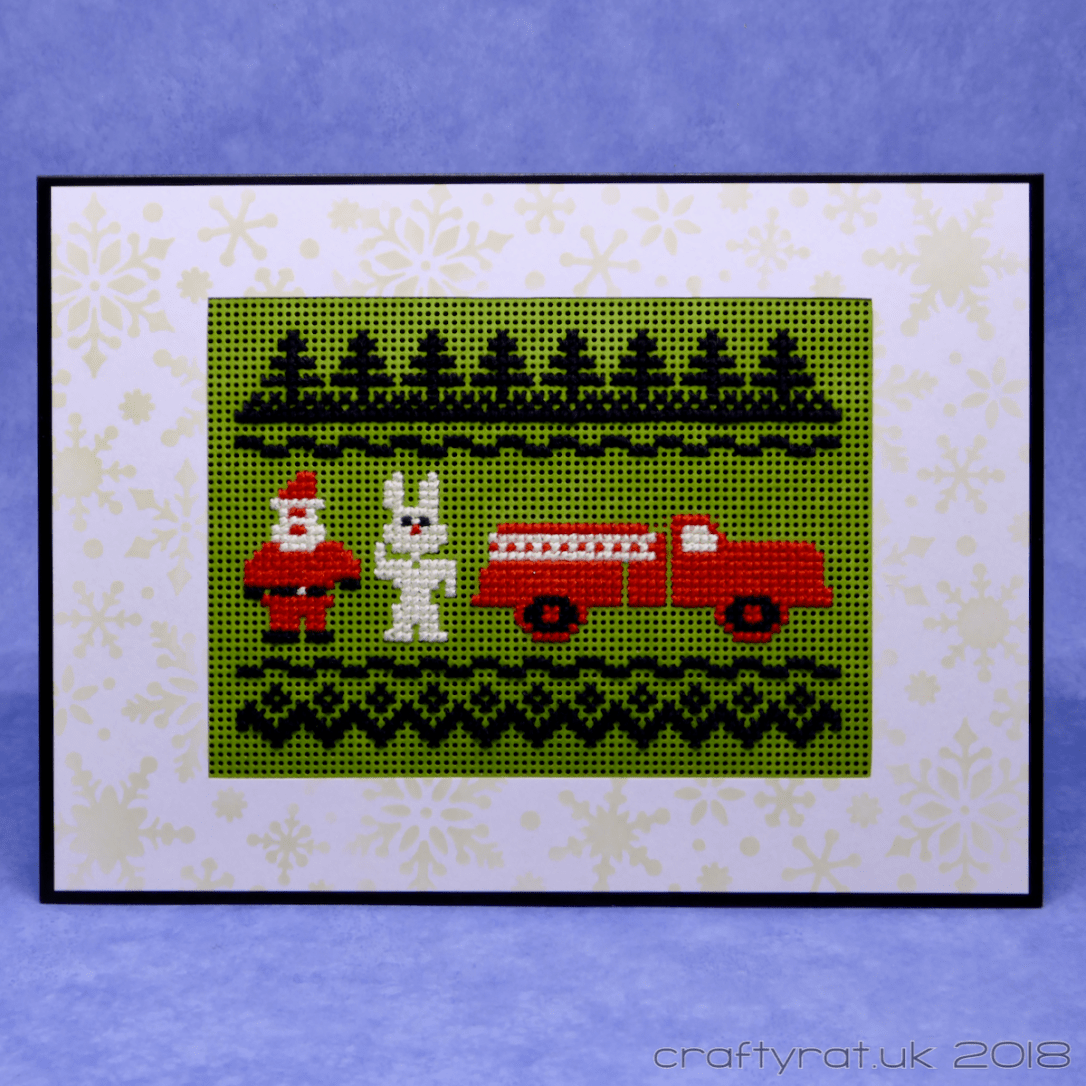
Then I was browsing Christmassy things and trying to come up with an idea for a card for my other half and my mind wandered onto all things MST3K and I vaguely remembered seeing a RiffTrax-themed Christmas jumper design… A quick search and I found this “ugly sweater” t-shirt. Inspired by Santa and the Ice-cream Bunny. Perfect.
So I set to work converting it to a cross-stitch pattern, choosing just enough of the design to fill a square card. And that’s when I discovered that the fake cross-stitch on the t-shirt isn’t all at the same scale, but I fiddled around and came up with a design that would work. Now all I had to do was actually sew it.
After one evening of sewing in front of the telly, I looked at how far I’d got and realised that I was going to have to revise the design to stand any chance of getting the card finished before Christmas… Cross-stitch is not a quick process! So I simplified it a bit and it only took another three evenings of work to finish.

I had coloured the perforated paper with archival ink before starting so that the bunny wouldn’t blend into the background. To tidy up the back and make sure that no thread ends showed through, I cheated and glued them down (most had been woven into the stitching, but there were a few loose bits floating around). I created a simple frame of pearlised card and stencilled some snowflakes on for interest. Then I had to work out how I was going to put it all together.
Tape or wet adhesive could show through the holes in the perforated paper and I didn’t really want to permanently fix it to anything anyway — just in case we want to reframe it at some point.
That’s when I remembered I had a pack of large photo corners. I mounted the cross-stitch onto a card base using the photo corners and then had to a) put a piece of black card behind it to hide the white of the corners and b) snip a triangle out of the front of the corners so they wouldn’t poke out from behind the frame. With that done, I mounted the frame over it using narrow strips of foam tape just around the outside edge so it wouldn’t stick to the cross-stitch panel.
And finished.
I gave him the card a few days ago and he tweeted it. Not only did the RiffTrax guys “love it”, but the guy who came up with the design I cribbed from liked it too!
Supplies:
- stencils:
Hot off the Press – snowfall - inks:
Ranger archival – leaf green
Distress oxide – old paper - paper and card:
Mill Hill 14-count perforated paper
Hunkydory Adorable Scorable black
Papermill Direct – pearlised – ultra white - miscellaneous:
embroidery floss
Transparol photo corners (extra large)
Discover more from Crafty Rat
Subscribe to get the latest posts sent to your email.

What a cute card. I haven’t cross stitched in years….it does take time and I’m a little impatient these days (LOL!) This turned out very cute!
LikeLike