
I’ve been thinking about alternative uses for my colouring – I enjoy making cards but I do have rather a large stash and if I’m not careful it will spill over into a second box. So I’ve been thinking about making things to be framed instead.
My main concern with doing this is that Copic markers are not an archival medium. They are not colourfast so they won’t survive long periods of exposure in bright light. A couple of the colours are particularly bad: they stand out as light spots on the hex chart reference that I coloured [goes to check] two years ago. Having said that, people do sell Copic art on Etsy and there don’t seem to be any complaints so…
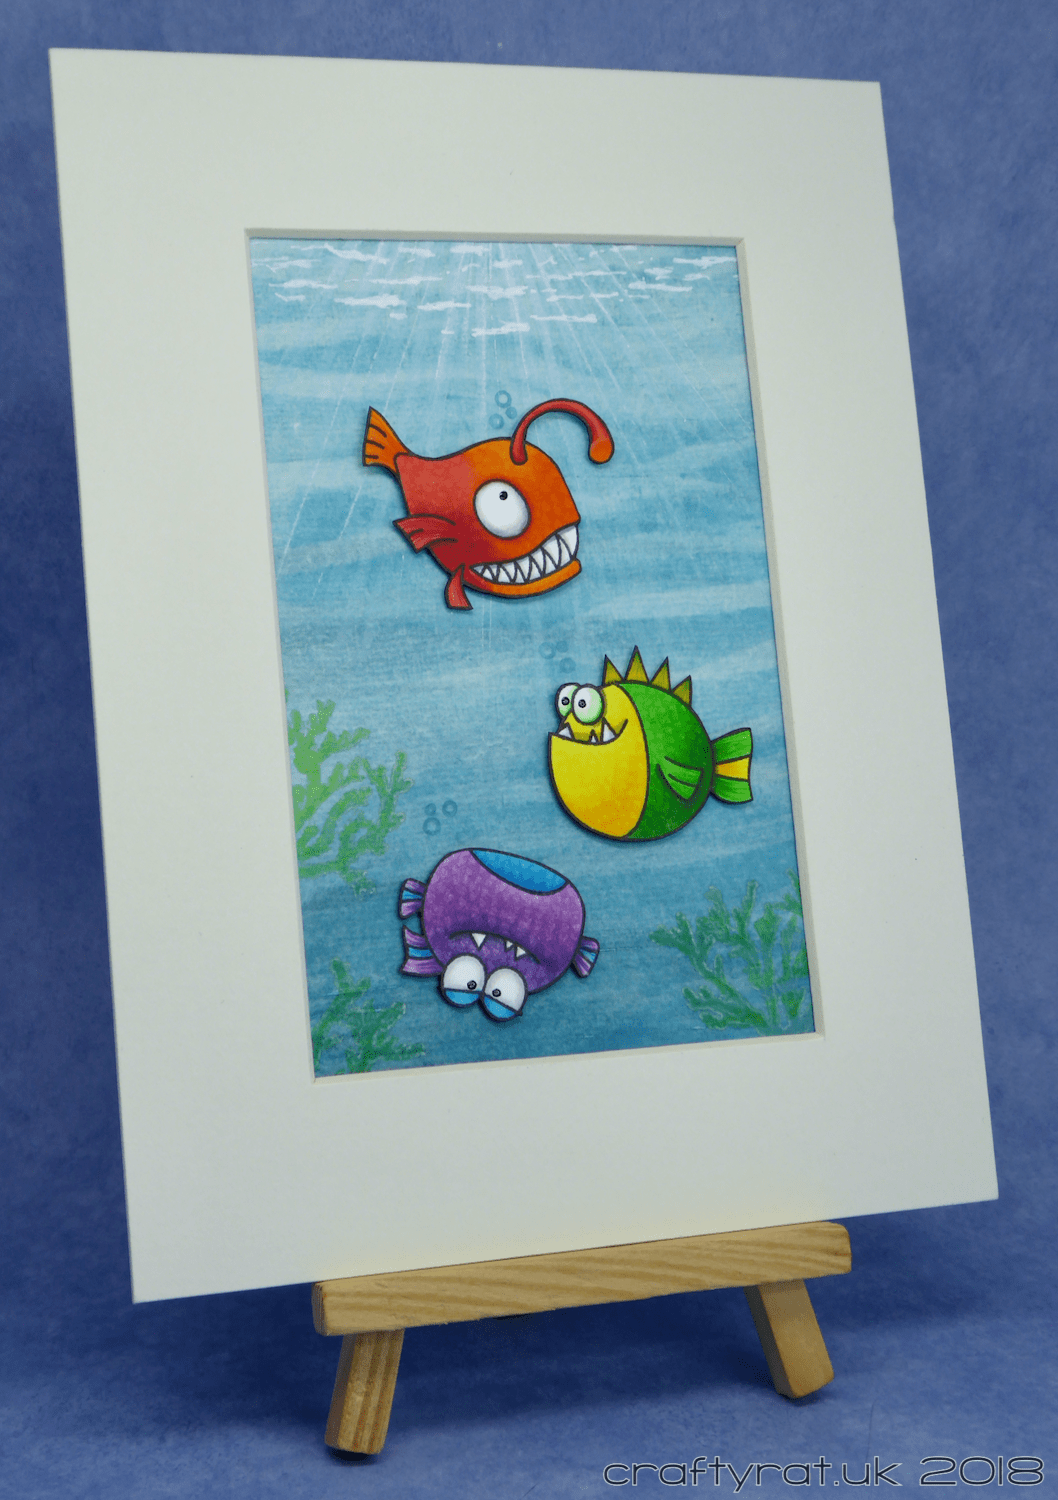
I coloured this little shoal of rainbow fish — red/orange, yellow/green and blue/violet — with Copic markers, adding texture with the colourless blender and detail shading with coloured pencils. Then I fussy cut them out and coloured the cut edges with black marker.

For the background, I started with a piece of handmade cotton rag paper; it’s another of those things was bought out of curiosity and then never used, but I figured it should give a nice bit of texture.
I had a hunt online for underwater images and found one that was looking up from the dark water to the light sparkling on the surface — all I had to do was recreate it…
I started by layering acrylic ink over the whole area, making it darker at the bottom and thinning it with water at the top. I was actually quite pleased with how that looked but wanted more texture.

Next, I got out a waves stencil and used a couple of different blue Distress oxides through it, moving the stencil so the effect was more organic and broken up.
Although it is quite thin, the seaweed stamp is actually an outline stamp, so I stamped it in Distress oxide ink and used a Zig real brush marker to fill it in.
For the light — the trickiest bit — I used the chunkier PITT artist pen to lay down the background to the rays of light and then added delicate highlights with the white Sharpie. I also used the Sharpie to create the squiggles of light on the surface.
I laid the fish in place and stamped the bubbles above each of them before popping them up on extra strong glue tabs (it would be embarrassing if they fell off).
And finally, rather than adding it onto a card base, I taped it to a frame mount.

Challenges:
Copic markers:
red-orange fish – YR04, YR07, R14, R27, C1, C3, C5, 0
yellow-green fish – Y06, Y19, G07, FYG2, C3, C5, C7, 0
blue-violet fish – BG05, B06, V15, V17, C1, C3, C5, 0
Polychromos pencils:
red-orange fish – 101 white, 115 dark cadmium orange, 223 deep red, 272 warm grey 3
yellow-green fish – 107 cadmium yellow, 112 leaf green
blue-violet fish – 101 white, 137 blue violet, 144 cobalt blue-greenish, 273 warm grey 4
Supplies:
- stamps:
Avery Elle – that bites
Marianne Designs – fish in the reef - stencils:
Create A Smile – waves - colour:
Liquitex ink – muted turquoise, muted green
Distress oxide – broken china, salty ocean, bundled sage
Zig Clean Color Real Brush pen – 045 pale green - stamping inks:
My Favorite Things – hybrid – black licorice - pens:
Faber-Castell PITT artist pen – white
Sharpie extra fine point paint pen – white
Sakura – glaze – black
Tombow dual brush – black - paper and card:
Neenah solar white 216gsm
Paperchase – handmade cotton rag paper - miscellaneous:
Tombow xtreme tabs
The SAA cream mount
Discover more from Crafty Rat
Subscribe to get the latest posts sent to your email.

How cute! I wish I had more time to make cards! I am so far behind, and with a rather large family, I go through cards as fast as I make them.
LikeLike