Another “let’s try out a product” project. The product in question being the Viva Venezio stone effect kit. And I have to say, I’m really rather happy with how it turned out, especially for a first try.
I gave the jar a coat of white gesso to give the paste something to stick to and then added a thin layer of embossing paste.

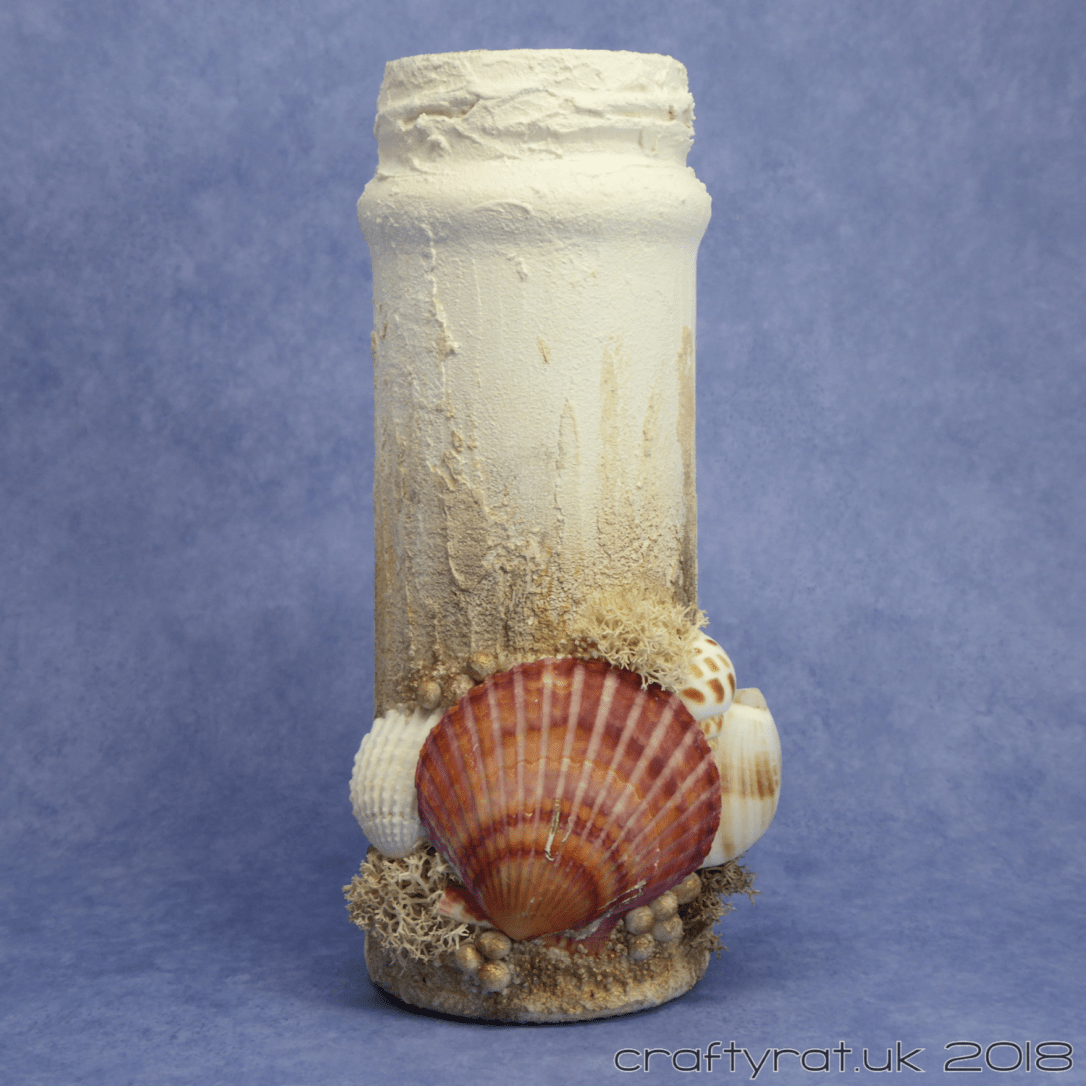
There are two colours of stone paste and two glazes in the kit. I alternated between the two pastes to build up the stone texture.

When that was completely dry, I sanded off any particularly spiky bits and then lightly sponged on the two glazes. I really didn’t expect it to work so well. It takes a while because you have to let it dry, but I love the effect.

The jar is only 5cm (2 inches) wide, so it’s tricky arranging large embellishments around it. I fiddled around with the shells until I came up with a simple layout that I liked and which worked on the curvature of the jar.

I glued the largest shell (which is almost as wide as the jar) in place using some stacked fun foam squares as support and plenty of 3D gel. Then I tucked the other shells in position, filled the gaps with the moss, stones and gravel, and left it to dry.
The last thing I did was add some wax to the rope texture and the stones and gravel.

Supplies:
- Prep & Stick:
Liquitex – white gesso
Finnabair 3D matte gel - Texture:
Dreamweaver embossing paste – white
Viva Venezio stone effect – bianco - Colour:
Finnabair metallique wax – aged brass - Embellishments:
shells
Knorr Prandell Icelandic moss
Cadence art stones – x-large
Colorall decoration gravel – white

This jar was created in March 2018 during my month of mixed media experimentation.
Discover more from Crafty Rat
Subscribe to get the latest posts sent to your email.

This is so clever! Thanks for sharing!
LikeLike