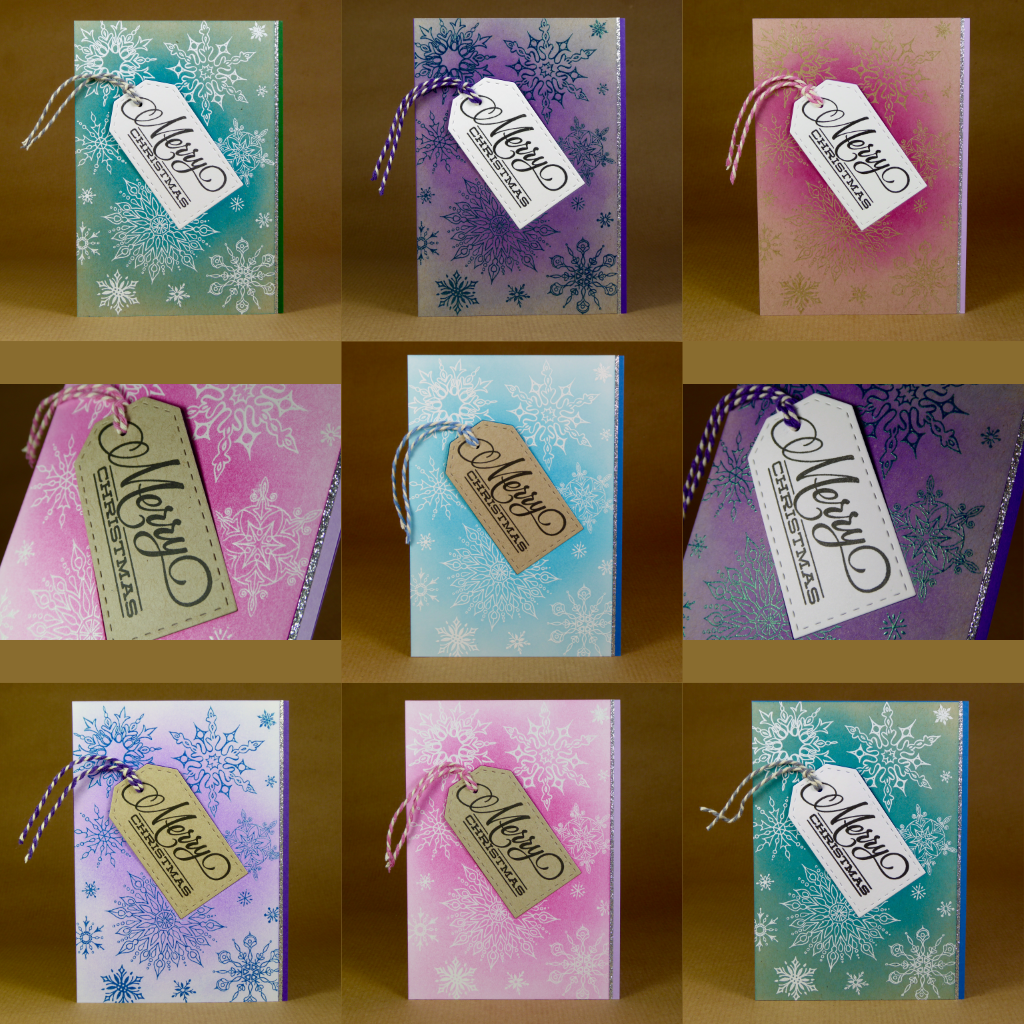
 In an attempt (surprisingly successful this year) to avoid panic-making cards just before Christmas, I usually create a couple of small batches of cards; this was my first for this year. I keep the batches small and swap out the colours so that none of the cards created are identical.
How:
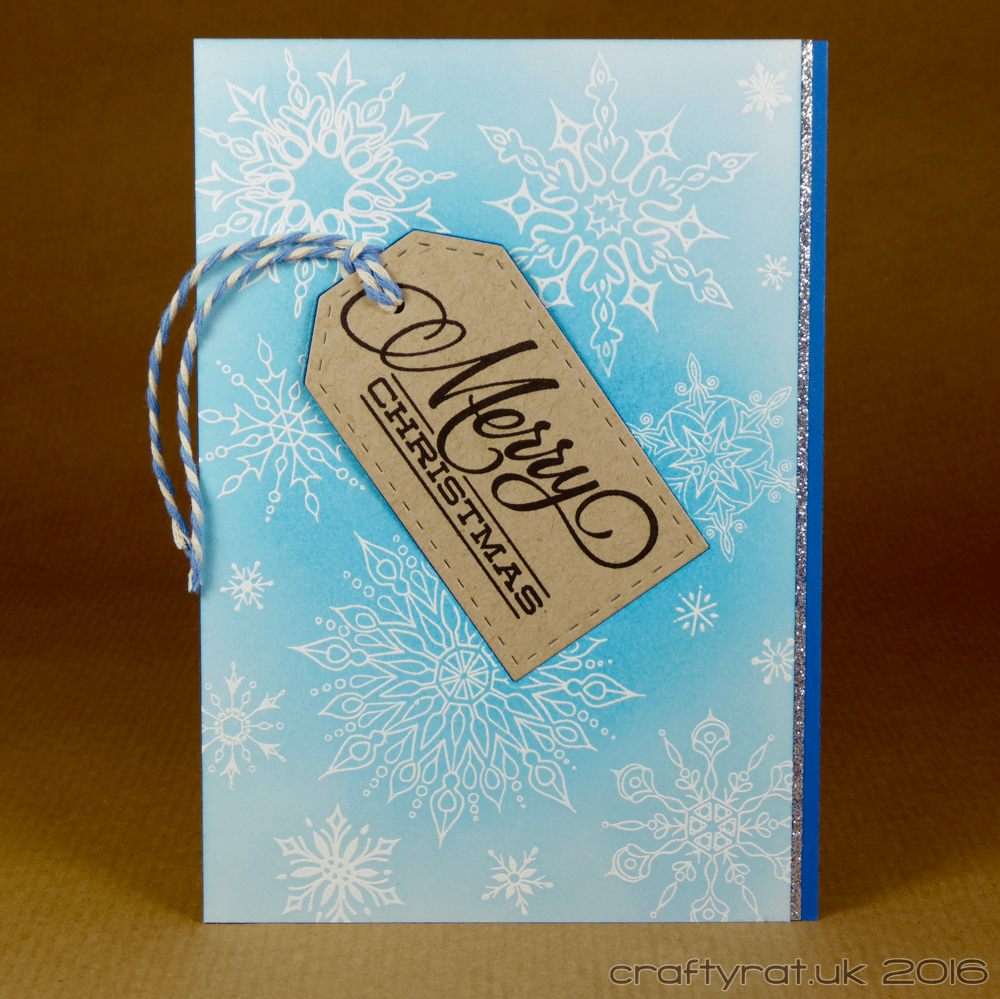
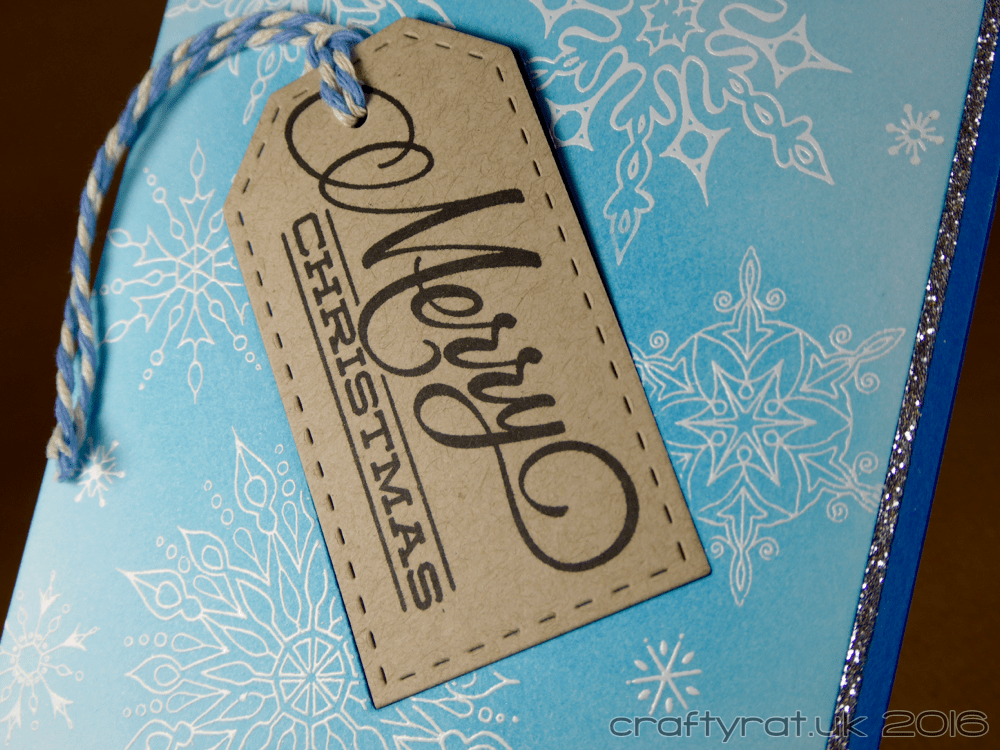
I cut some white and some kraft panels to size, arranged the snowflake stamps to cover them, and used the MISTI to stamp them all in Versamark. I heat embossed them and did some ink blending over the top in different colour palettes.
I die-cut tags in white and kraft, stamped the sentiment in Versafine onyx black, and threaded some baker’s twine through the hole. I also die-cut the tag shape from the snowflake panels.
The cards were assembled by first gluing the panels flat on the card base and then adding a silver glitter border along one side. To give a little dimension on the card, the tags were fixed in place with a strip of tape along the bottom edge and some bits of foam tape at the top.
Supplies:
- stamps:
Hobby Art – winter’s snowflakes
Clearly Besotted – Christmas sparkle (sentiment) - dies:
Waltzingmouse Stamps – stitched tags - inks:
Versafine – onyx black
Versamark - Distress ink:
A. picked raspberry, spun sugar
B. wilted violet, shaded lilac
C. broken china, mermaid lagoon - embossing powder:
Wow! – super fine – clear gloss
Wow! – super fine – bright white
Lindy’s Stamp Gang – hyacinth blue jade - embellishments:
baker’s twine
Papermania – glitterations – border – silver - paper and card:
Neenah – desert storm
Strathmore Bristol 300
Papermill Direct – plain – dark green
Papermill Direct – plain – dark violet
Papermill Direct – plain – azure blue
Papermill Direct – smooth – lilac
This is another catch-up post; these cards were originally made on 10th August 2016.
Discover more from Crafty Rat
Subscribe to get the latest posts sent to your email.

Oh these are so pretty! I love how you applied the tags! Very nice! Thanks for sharing! 🙂
LikeLike