
Series: Stitch Club no.9
Stitch Club from TextileArtist.org
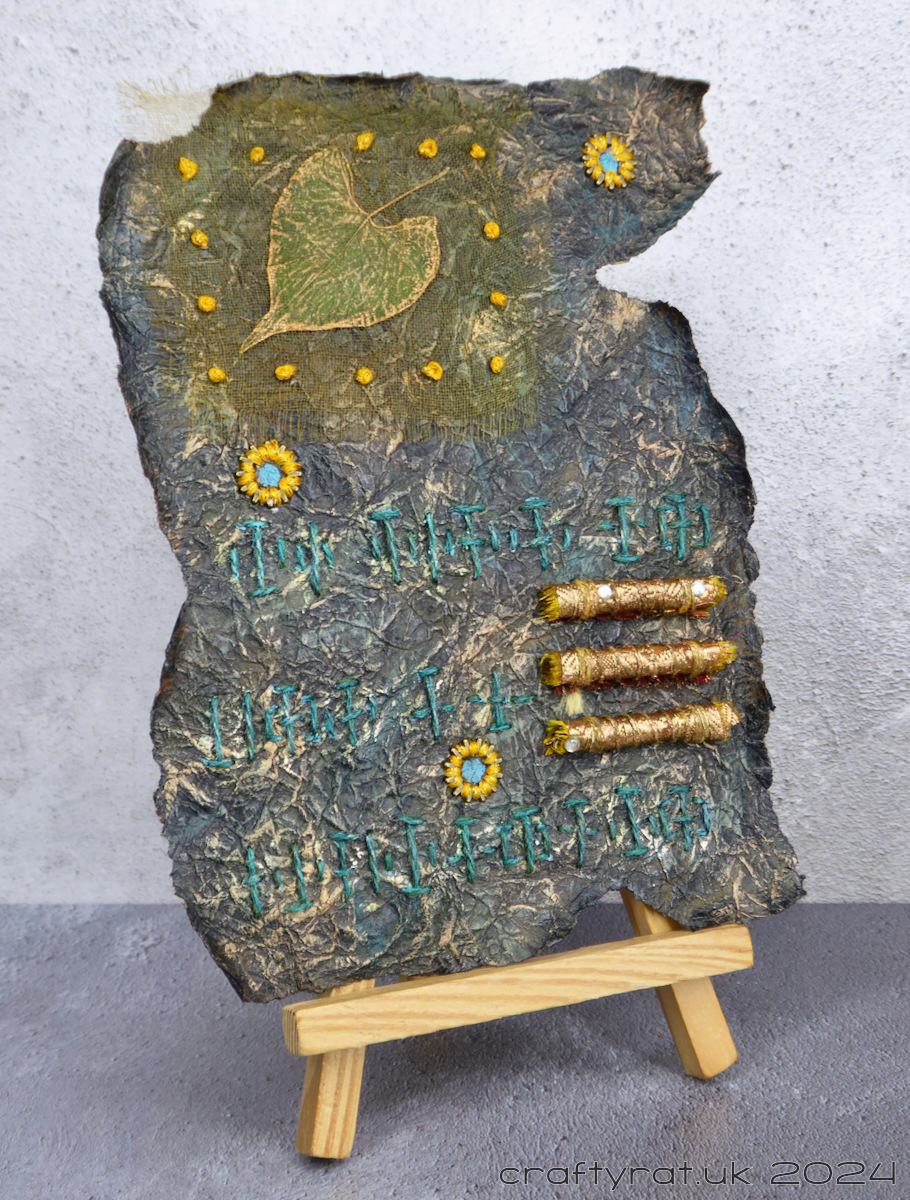
Workshop: Embroidered wish tablet
Host: Mary Beth Schwartzenberger website – Instagram
Aim: To create a wish tablet out of paper, paint and stitch.
The recent wire and wax leaf demonstrated how my accumulated stash comes in handy when trying out random projects. This one, however, is a prime example of how I ended up creating a lot of it.
The host for this workshop uses a particular type of Japanese paper — kyoseishi crinkle — which I wasn’t able to find in the UK. She did give an alternative method of achieving a similar effect by using konnyaku powder, which I could find.
I added a small amount of the powder (I think it was only half a teaspoon) to water and settled back to watch a bit of tv while I stirred it until it had dissolved completely. After leaving it to sit in the fridge overnight to finish thickening up, I set about finding papers to try it on. I ended up doing two batches of paper to use it up as it doesn’t keep for long and I didn’t want to waste any.
After quite a while spent painting the mixture onto the papers, letting them dry a bit, crinkling them a couple of times, flattening them again, and leaving them to dry completely, I ended up with this pile of papers.
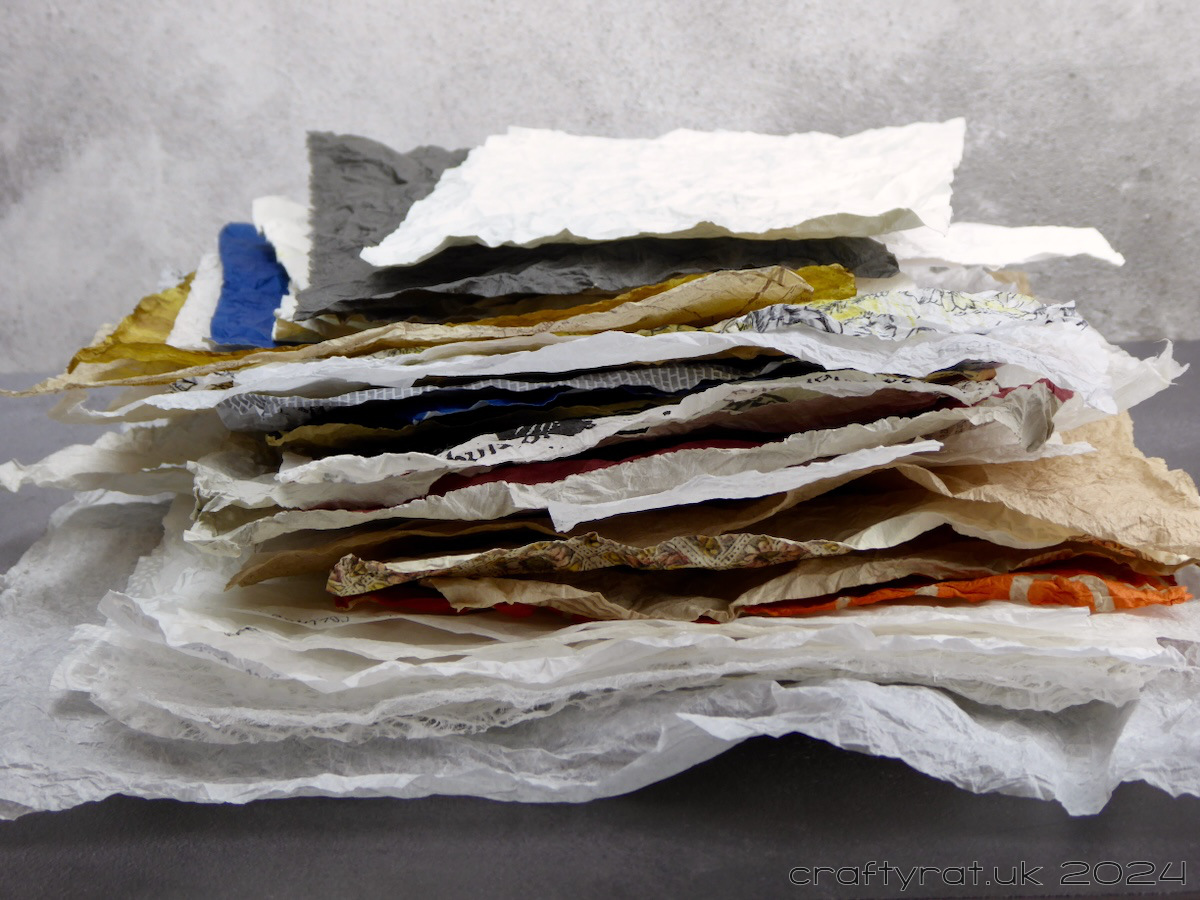
I think there are around thirty sheets in that pile. I basically used a piece of every type of paper I could find in my craft room. And they all worked. Some of the tissue papers were a bit more fragile while they were still wet, but once they’d dried they crinkled as well as any of the sturdier papers. And some of the thicker papers needed coating on both sides to ensure the konnyaku paste was absorbed evenly. But there were no failures.
I used half of one of those pieces as the base for this project. And this is how my stash grows.

To the crinkled paper I added acrylic paint and craft wax for the colour, including on the back so that white paper wouldn’t show around the curled edges.
For the decoration I used:
– a dried pressed leaf held in place with fine mesh fabric and French knots
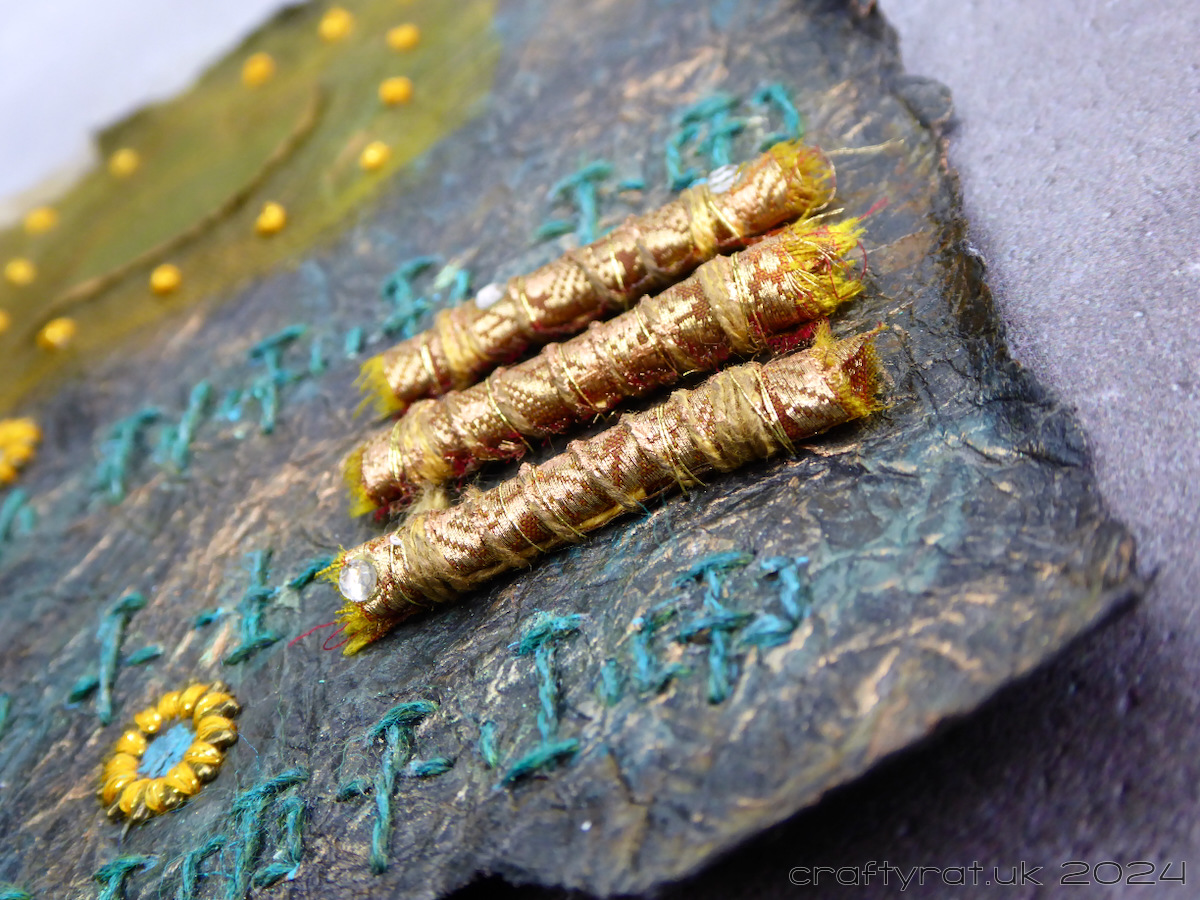
– some strips of sari ribbon rolled into scrolls
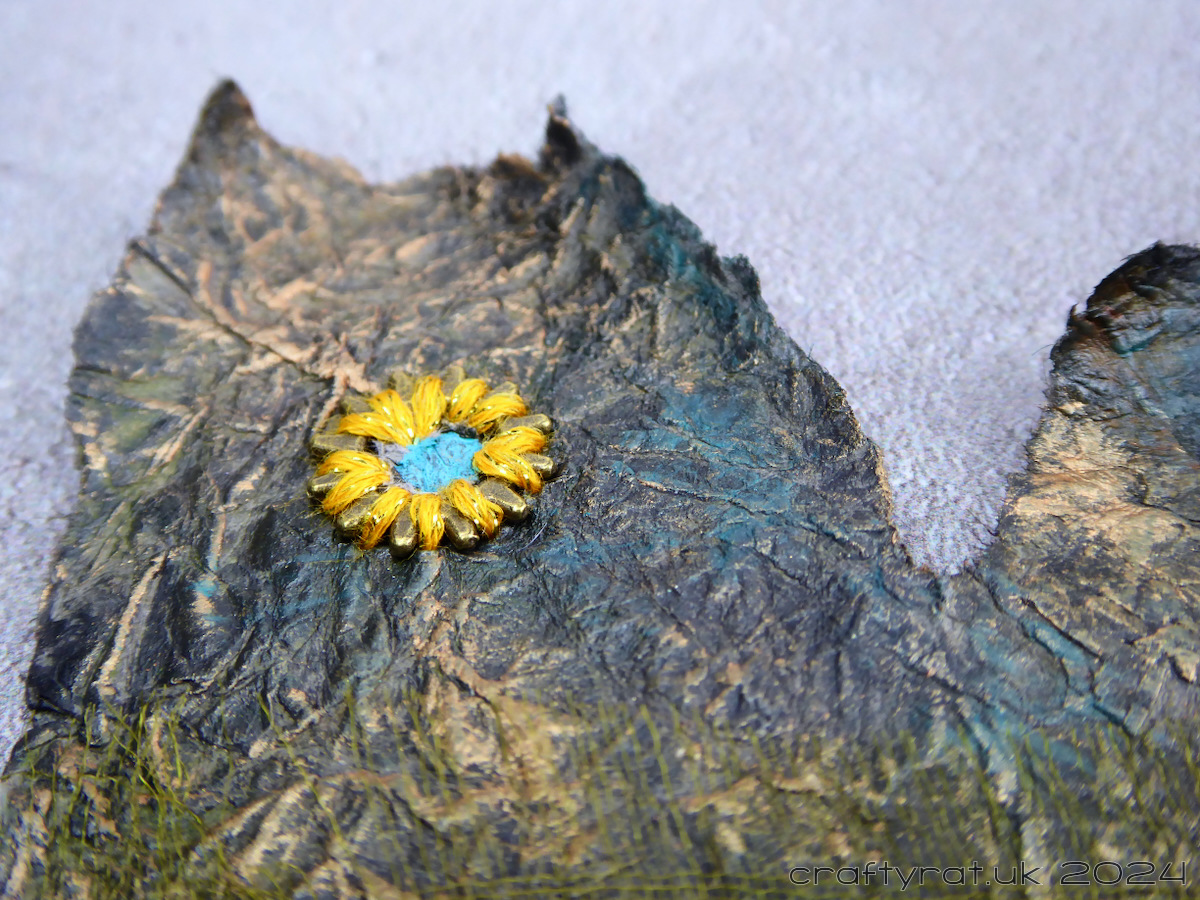
– three open-centred cogs stitched down with embroidery floss
The wish tablet needed some text and that is always something I find difficult; generally, I prefer the design, colour and textures take centre stage than have the focus be on a phase or word. But I needed to add something.
I disappeared down an Internet rabbit hole of scripts looking for one that could be used instead of the usual alphabet while also being simple enough to embroider onto paper. I found a few possibles but eventually settled on Sticks. Omniglot is an absolute wonder of a reference for all things relating to writing systems. The rabbit hole was deep enough that I even created a basic font so that I could plan the layout on the computer…
I struggled with the lettering on the wish tablet. The actual sewing wasn’t a problem but I had picked the wrong colour thread. I hadn’t wanted to use something with too much contrast — going for the aged tablet look — but I went too far in the other direction and it wasn’t visible enough. I tried various things to highlight the letters, including the craft wax I’d used elsewhere, but it didn’t help. Finally I picked a blue fluid acrylic and painted the threads. Next time I will spend more time choosing the right colour thread in the first place. On the plus side, I also added the blue to the centre of the cog flowers, which I really like.
Discover more from Crafty Rat
Subscribe to get the latest posts sent to your email.

What an interesting technique. Thanks for sharing our process!
LikeLiked by 1 person