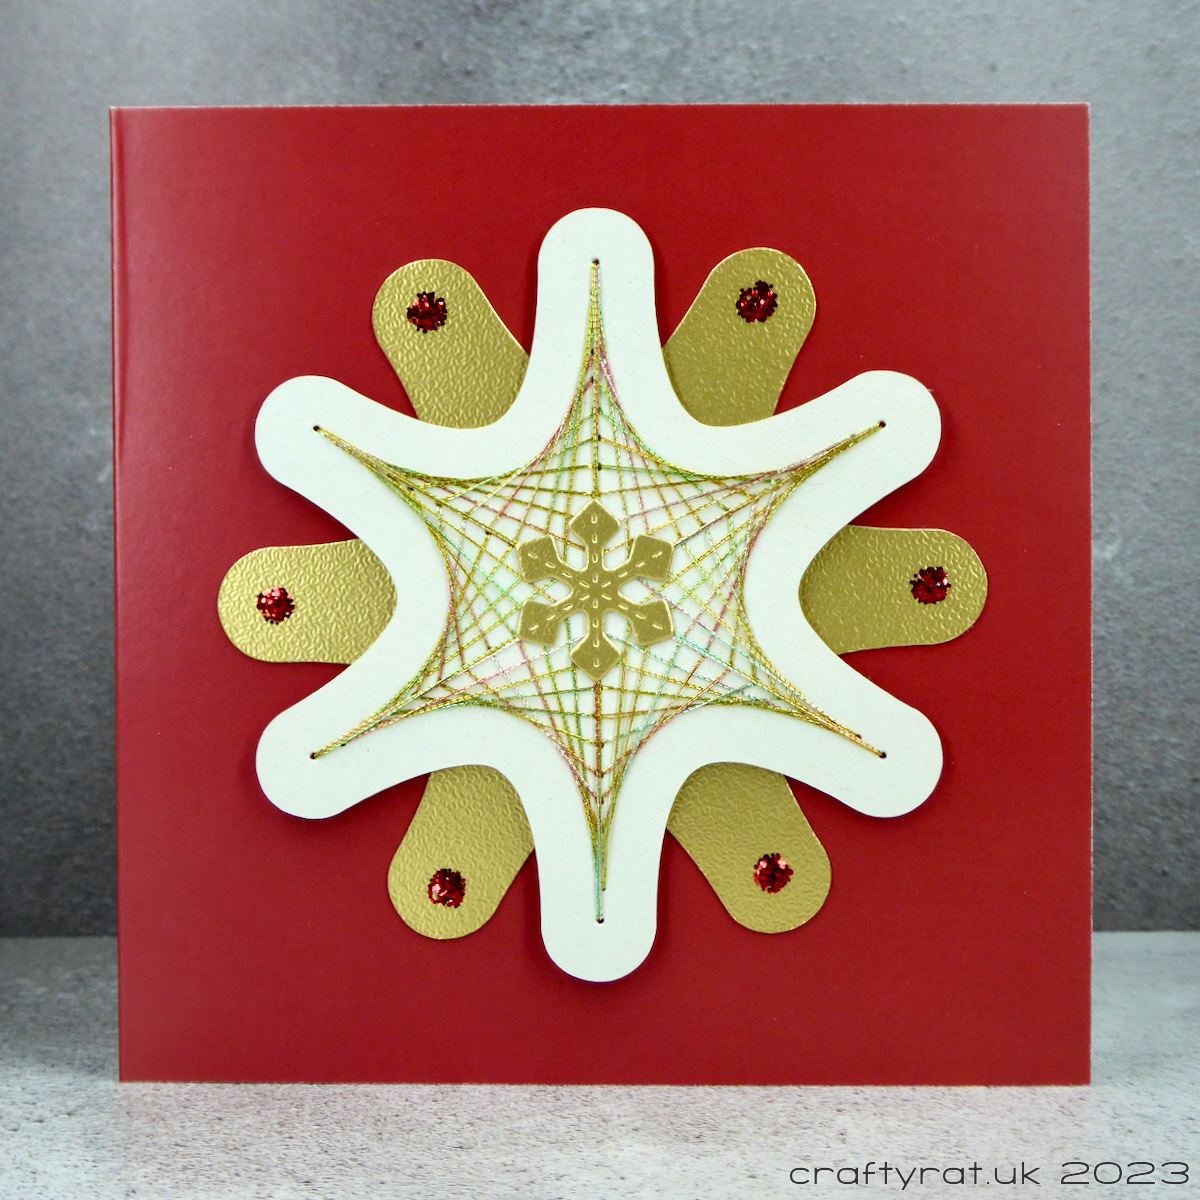
I signed up for the Making Zen online retreat in September and, while I didn’t make anything at the time, I did watch all the videos and make notes of things I wanted to try. One of those things was Parabolic Paper Stitching presented by Clarissa Grandi. It’s not a new idea, but she did show a variety of patterns that could be created with the same base perforated hexagon, and it did stick in my head as something I could do for Christmas.
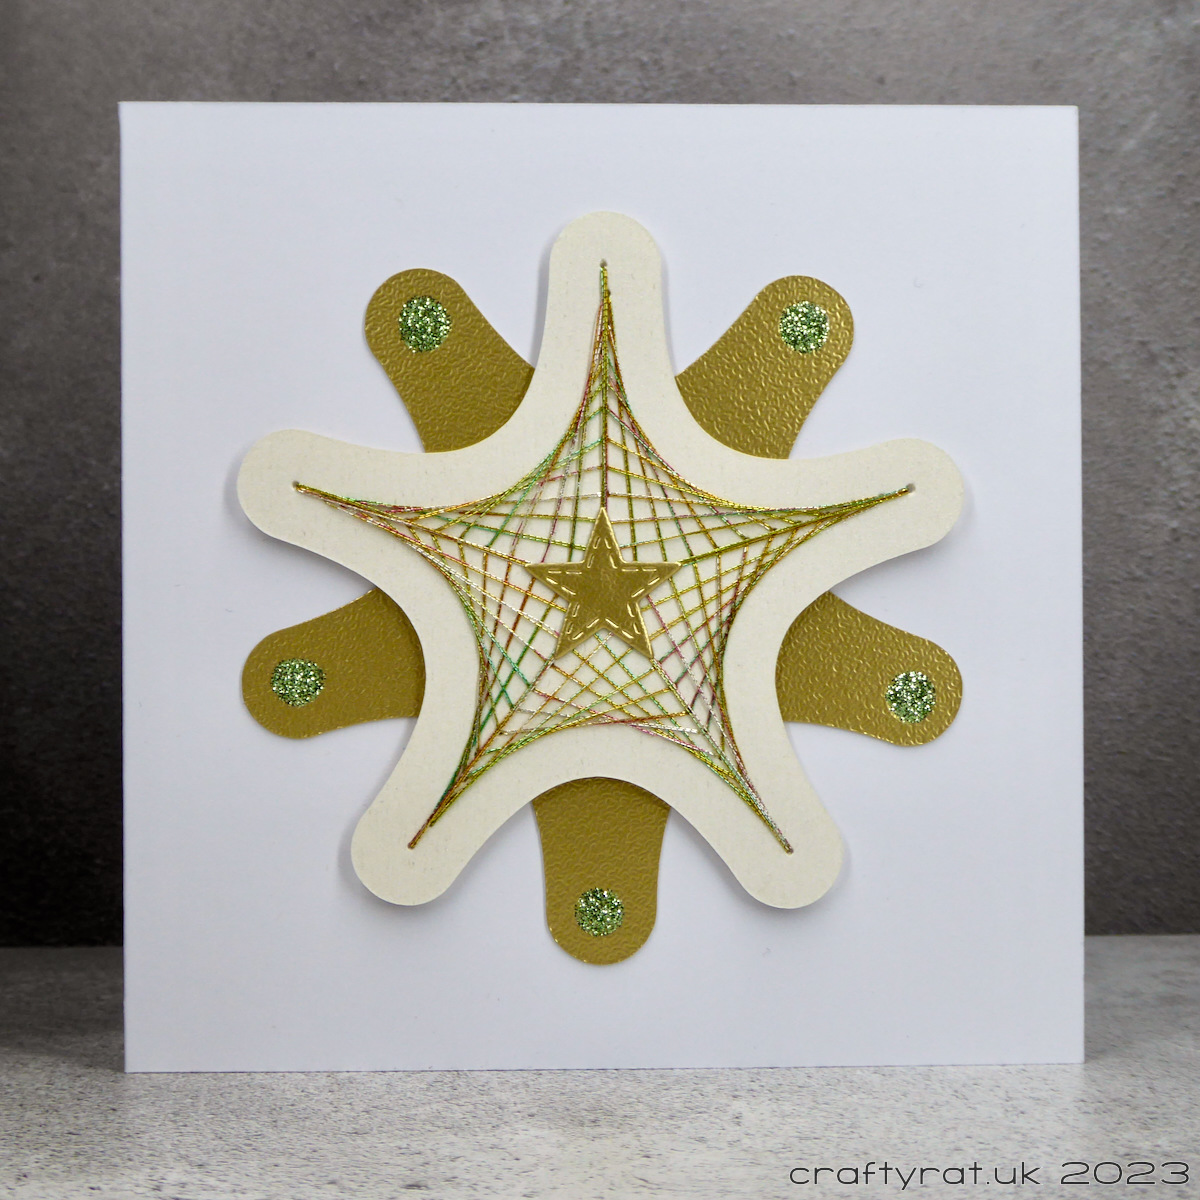
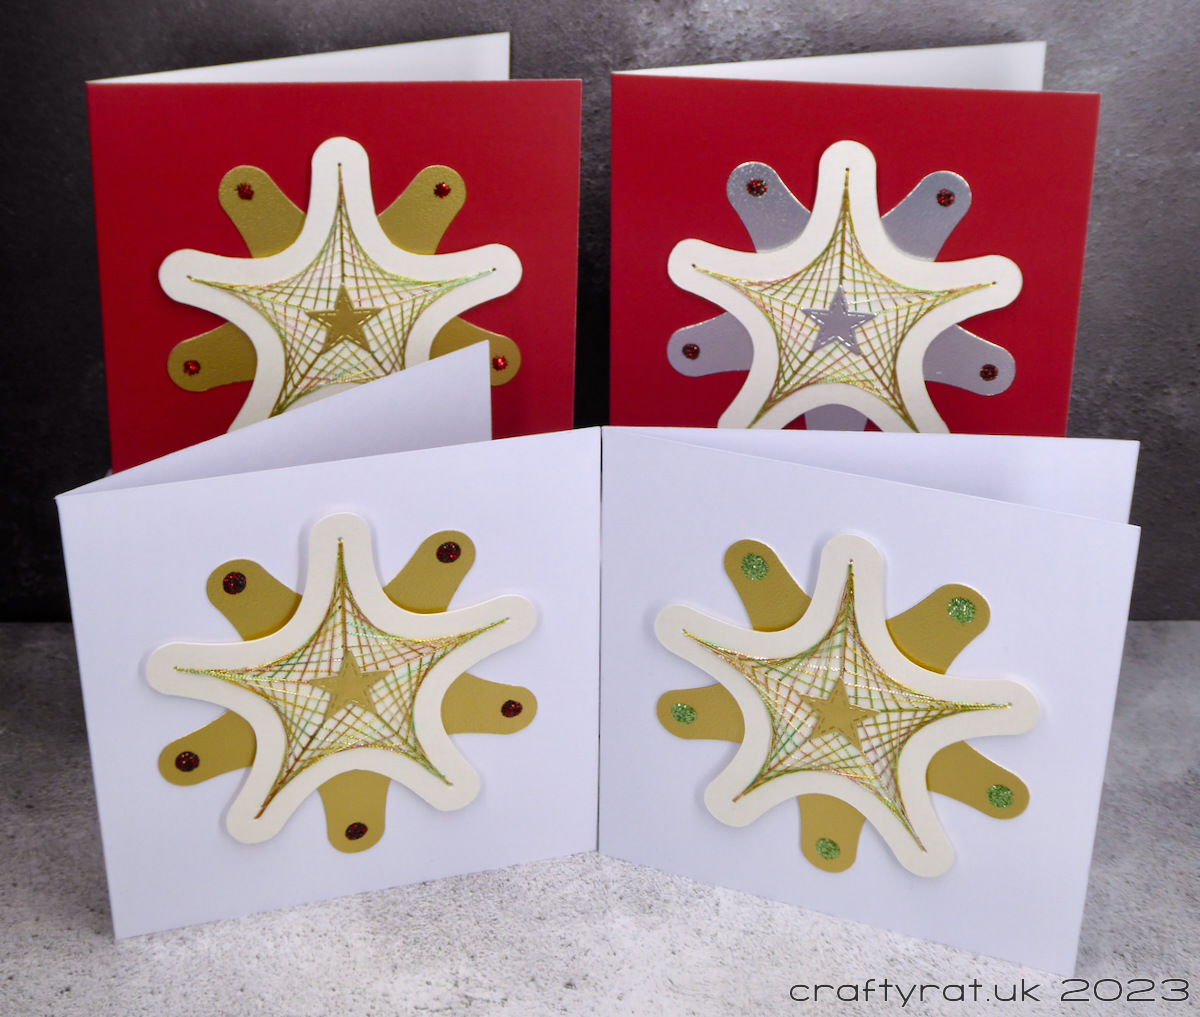
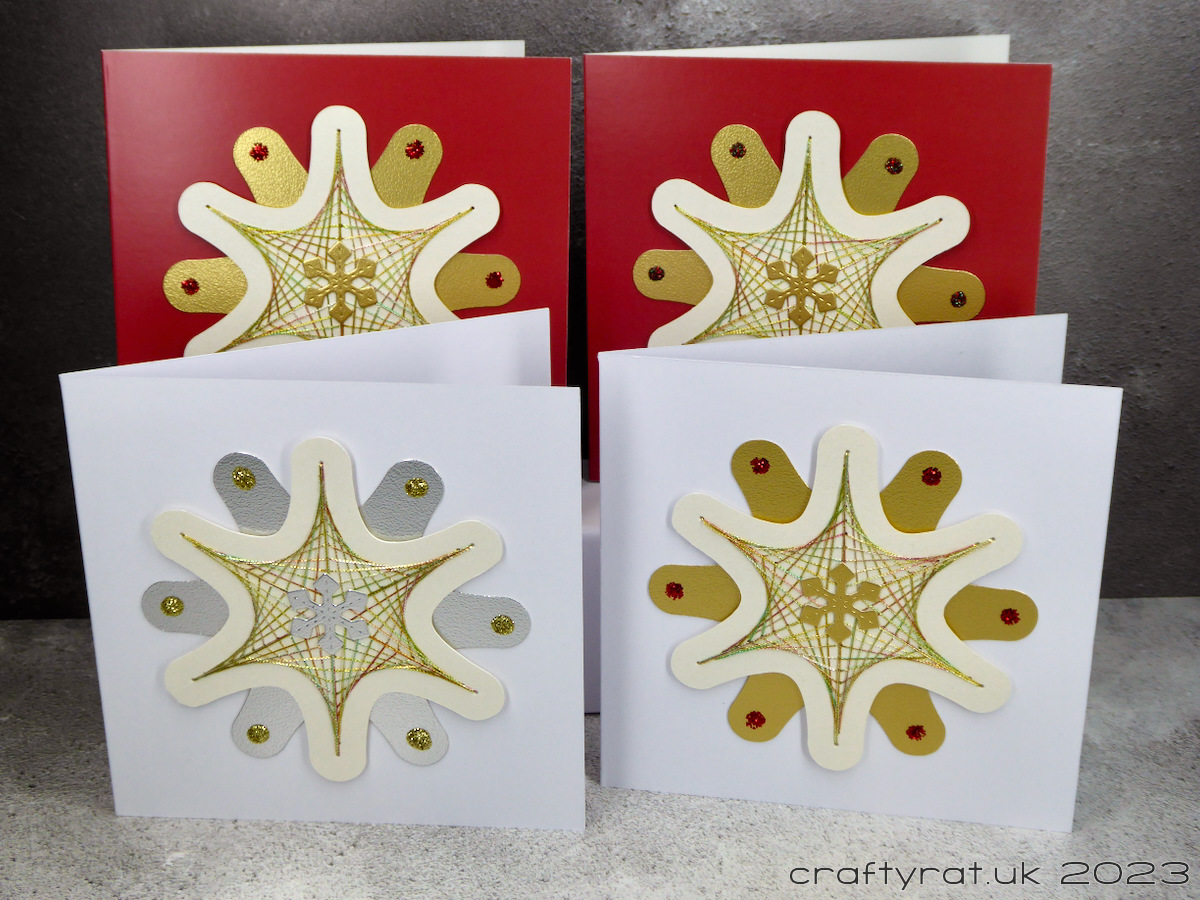
Of course, I had to make my own template and created two in the end: one for a six-pointed star and one for a five-pointed star.
I even did a couple of test samples; those I cut into a simple hexagon and a pentagon and added gilding around the edges. It looked quite nice, but I couldn’t make it look right on a card base. So I decided to cut a border around the stars and layer two shapes together. I made life simpler for myself by creating a cut file and cutting them all out with my Cricut Maker. To be honest, if I had had to cut them out by hand, I would not have made this design. I still had to poke the stitch holes in by hand but that was a simple process.
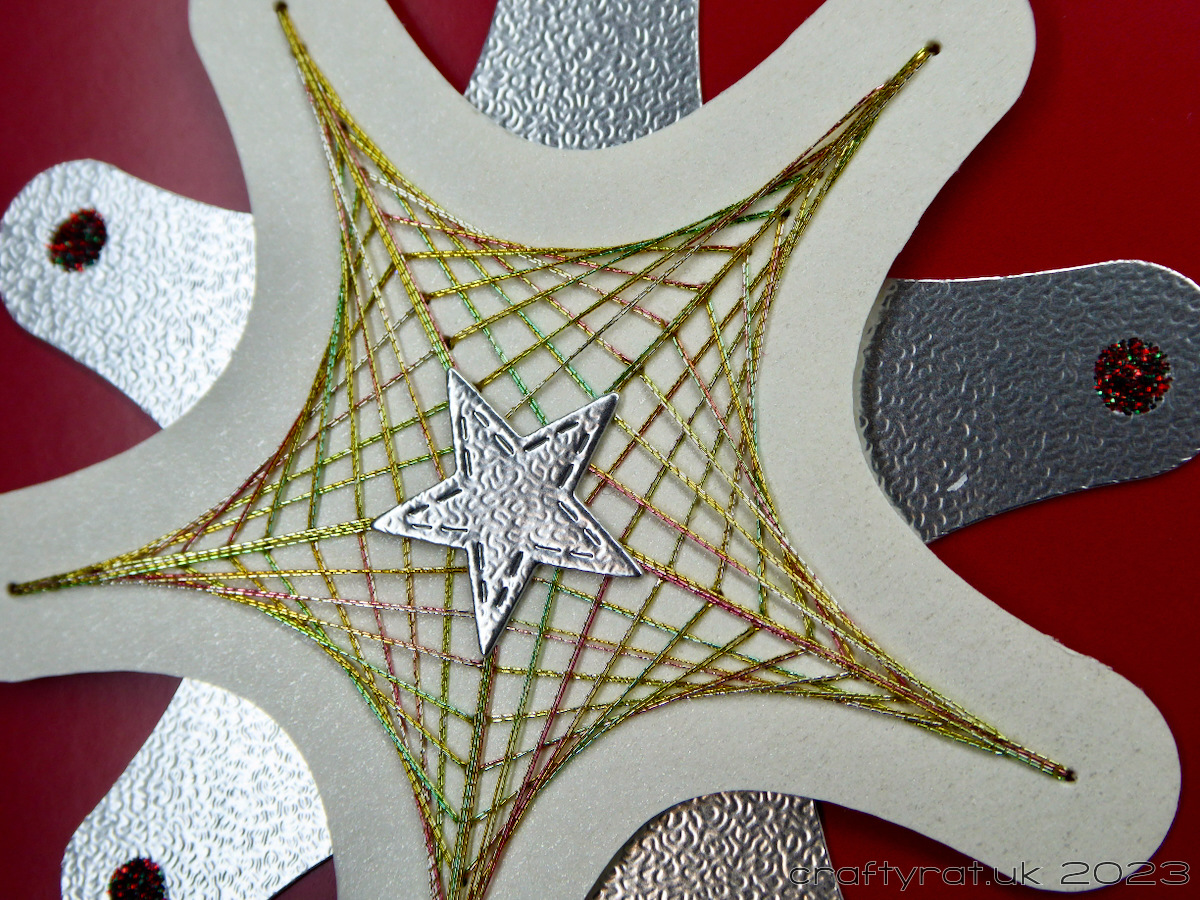
I did most of the stitching sat in front of the tv in the evening. They’re not terribly quick to stitch, but they don’t require a lot of thought. The most annoying thing was the variegated metallic sewing machine thread which I was using doubled up; it did have a frustrating habit of developing little kinks that would then get stuck going through the holes. But it does look pretty.
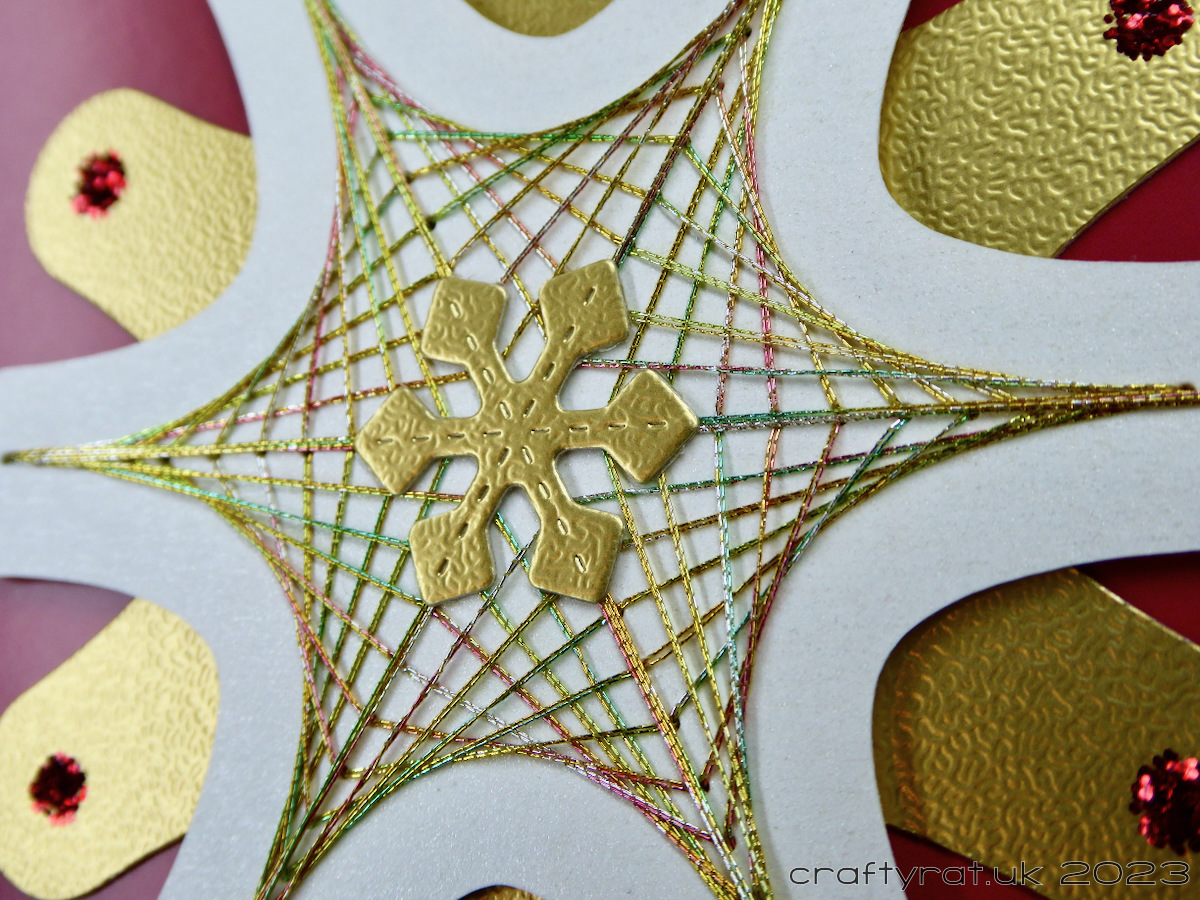
Once all the stitching was done, I started to assemble everything. To help with lining up the two layers, I cut a circle the exact size of the stars out of some card, laid the back layer in the circle and used the edges of the circle to help me centre the top star. I used thin foam tape to stick them together which left room for the stitching on the back of the star.
Next, I added the glittery dots and die-cut small stars and snowflakes from the same silver and gold sandgrain card I’d used for the bottom layer and stuck them in the centre of the stars.
Once everything was dry, I used the cut-out circle again to centre the finished stars on the square card bases (which I had also cut with the Cricut maker after realising that would be quicker than measuring and cutting 8 card bases with the guillotine.)
First batch complete.
Discover more from Crafty Rat
Subscribe to get the latest posts sent to your email.

Very pretty! I have never done any stitching on cards, but someday will! This looks awesome! Thanks for sharing!
LikeLike