
Once again the design for this card was inspired by something I’d seen and wanted to try. Pinterest had served me up this image; I liked the look of the textured squares of fabric outlined in backstitch, but it took me a while before I realised how it was done. Some time later I found Michelle’s Instagram which is full of so many different wonderful stitched creations, including some more examples of the type of stitching that had first caught my eye. Looking more closely at those photos, I finally noticed that the fabric squares were layered under a very fine translucent fabric. Another technique filed away for later use.
The opportunity to use it came when I was thinking of ideas for my sister-in-law’s birthday card this year. The subject was always going to be a bunny — I don’t think I will ever be able to make her a card that doesn’t have a bunny on it — I just had to figure out the actual design.
And so I came up with the idea of cutting out a bunny shape in white felt, layering some net over it and adding the hand embroidery details.

The background is a piece of patterned fabric that I had previously stiffened using Terial Magic. It didn’t need to be stiffened, but it did make it simpler to work with as the fabric (from a charm pack) wasn’t big enough to fit in an embroidery hoop. The pattern was suitably autumnal and gave just enough interest without overwhelming the simplicity of the white bunny.
The bunny shape is part of a free pattern by the same person I bought the tiny bouquet pattern from. I transferred it to the felt and carefully cut it out. Then I used some temporary fabric spray to hold it in position on the background.
I found some net fabric which wouldn’t obscure the background pattern too much and laid it over the bunny before back-stitching carefully around the edge of the felt. I used three strands of embroidery floss for the outline and two strands for the internal details.
With the main element of the design completed, I used double-sided tape to fix it to a card panel slightly smaller than the card base. It was looking good but it definitely needed a frame.
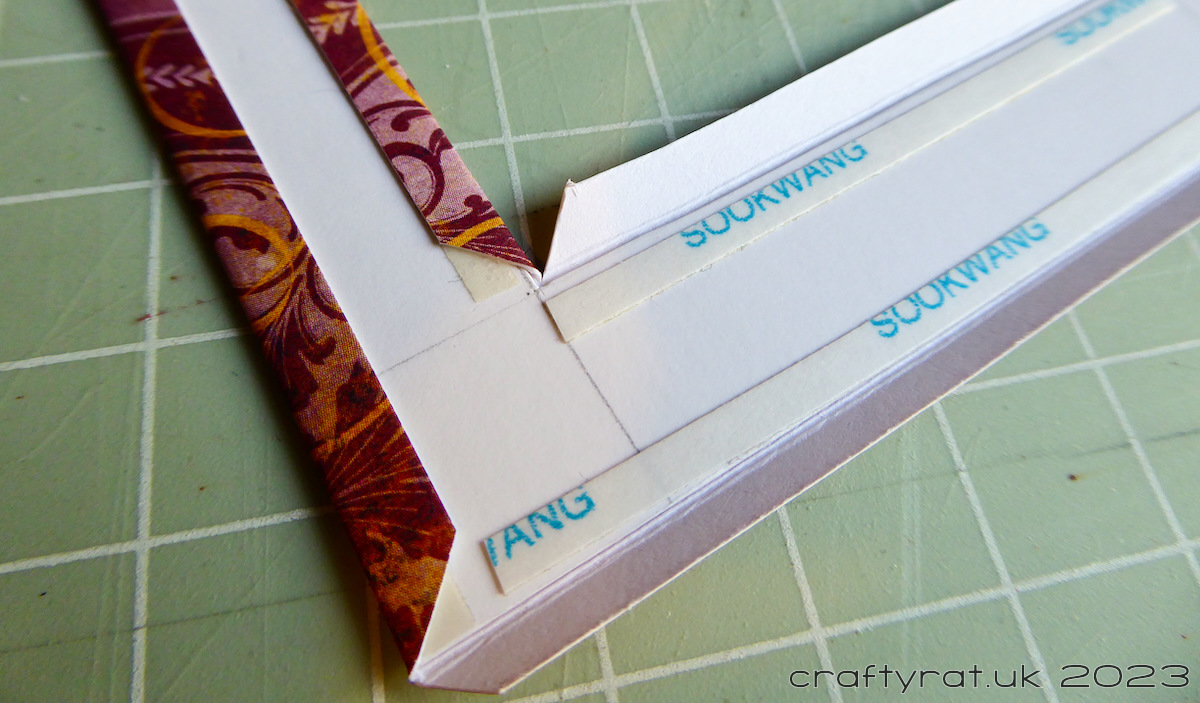
I created a wide frame out of plain card in a matching colour, but it looked a bit uninspiring so I delved into my collection of patterned papers. After much flicking through paper pads, I finally came across this one which was such a good colour match for the background fabric. I wrapped the paper around the card frame; I could have just cut it to the same size as the card frame and layered it on top, but this way all the edges were neatly covered and it looked a lot nicer.
I stuck the bunny panel onto the card base and added the frame on top with some thin foam tape to lift it away from the background. A few wooden stars picked up on the lighter colours in the frame and finished off the card.

Discover more from Crafty Rat
Subscribe to get the latest posts sent to your email.

So cute! I love doing stitching, however, my eyes don’t always let me see the stitches. Love this!
LikeLike