
This is a simple way to create a patterned sheet that can be used as a background panel or for die-cutting sentiments or flowers or butterflies or whatever takes your fancy…
All you need is some kitchen roll, a water spritzer and one or more pigment powders (Brusho, Ken Oliver Colour Burst, PaperArtsy Infusions etc), along with some card and liquid glue to mount it.

Lay a piece of kitchen roll on your craft mat.

Spritz it with water until it’s damp and tap your choice of pigment powders across the paper — I wanted to end up with something that looked like sky so I kept it simple and just used turquoise Brusho.

And spritz again.

You can leave it like that if you’re happy with it, but if you want a more even colour spread you can ball up the kitchen roll and give it a little squeeze, before spreading it out again.
If you do this, it’s a good idea to wear a glove. Unlike me. Apparently I preferred spending five minutes scrubbing pigment off my hand to thirty seconds reaching down and grabbing a glove…

To help speed up the drying process, sandwich it between two more sheets of kitchen roll and press or brayer it to get rid of some excess water.
As an added bonus, this may give you two more usable patterned sheets, depending on how much pigment and water you used.

You can either leave it to air dry or help it on its way with a heat tool.
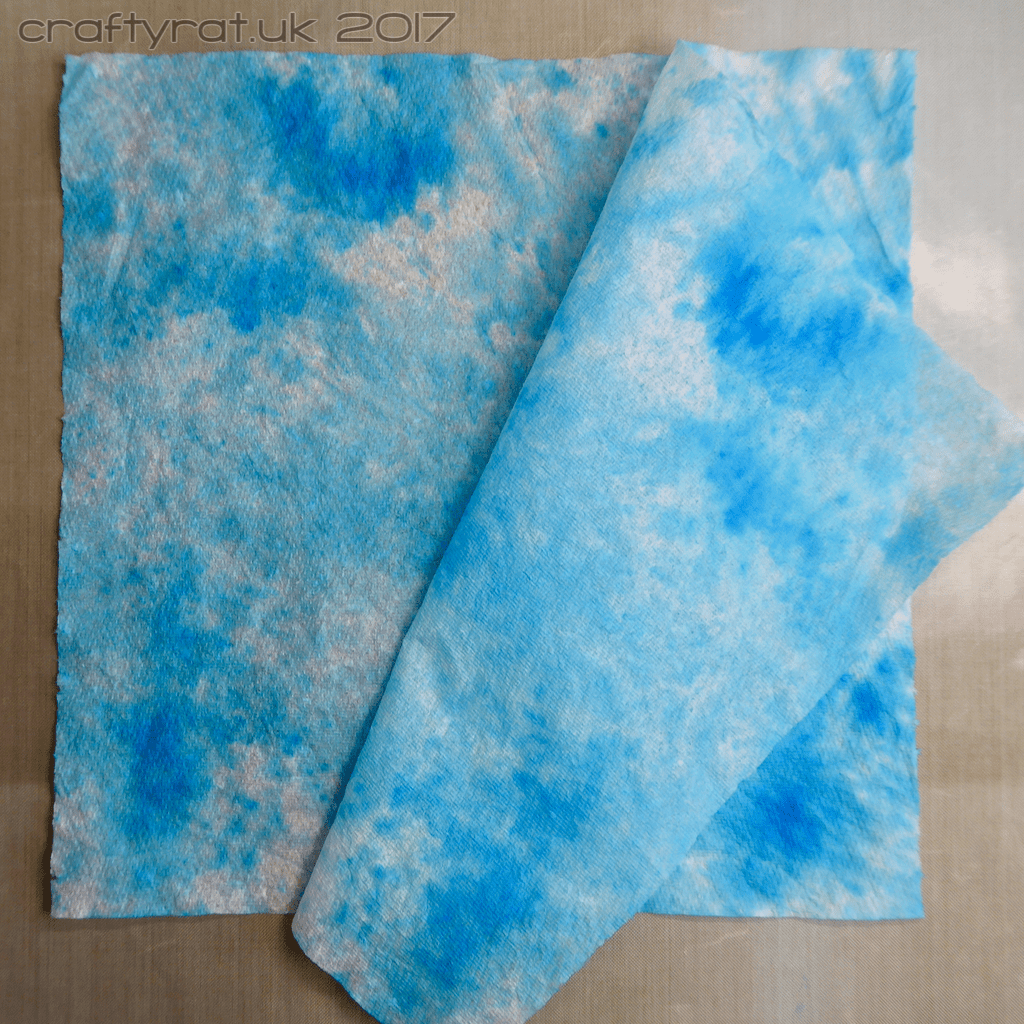
Once it’s dry, separate the layers of the kitchen roll.

Now you can glue the sheets to card or leave them as is, depending on how you plan to use them.
I used Ranger multi-medium matte to glue it down because that’s what I had to hand, but most liquid glues or mediums should work. A brayer comes in handy to press it evenly into the glue.
You can also seal it with a coat of medium over the top if you want, optionally adding some superfine glitter to the still-wet medium if you fancy some shine.

Once the glue is dry, trim off any overhang and you’re ready to use it however you want. I mounted one piece on card and kept the other unmounted.

I die cut a panel from the mounted piece for a card that I’ll show you tomorrow and cut out a couple of smile sentiments as well.
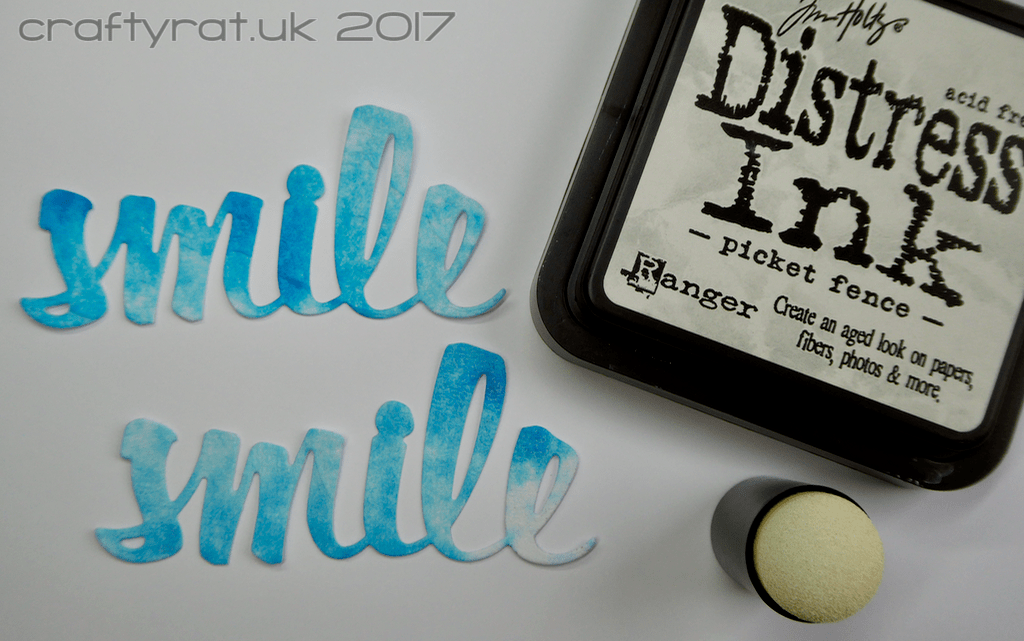
I wasn’t particularly taken with the dark blue and white contrast on the “e” of the second sentiment, so I took my trusty picket fence ink pad and dabbed it all over the die-cut to even out the colour.
You could always use a different colour ink to change the colour of your die-cut. Or you could spritz with glimmer mist for a bit of sparkle. There are lots of ways to add to this, but the basic technique is simple and effective.
Discover more from Crafty Rat
Subscribe to get the latest posts sent to your email.

What an absolutely fabulous idea! It works unbelievably well. The colour is fabulous and you get added texture from the kitchen towel itself.
LikeLiked by 1 person
Oh thank you so much for sharing! I’m definitely going to give this a try! Thanks for the step by step instructions! I’m bookmarking them for future use! 🙂
LikeLiked by 1 person