Series: Stitch Club #6
Stitch Club from TextileArtist.org
Workshop: Layers of paint, ink and stitch
Host: Ruth Norbury website – Instagram
Aim: Use ink or paint to add texture and colour to finished embroideries.
This was very much a project in two halves. The first part involved finding a photo I wanted to recreate and stitching it. This took a while. I had to find a photo that I thought would work well with Ruth’s grungy, distressed style and that would also be simple enough to recreate in stitch.
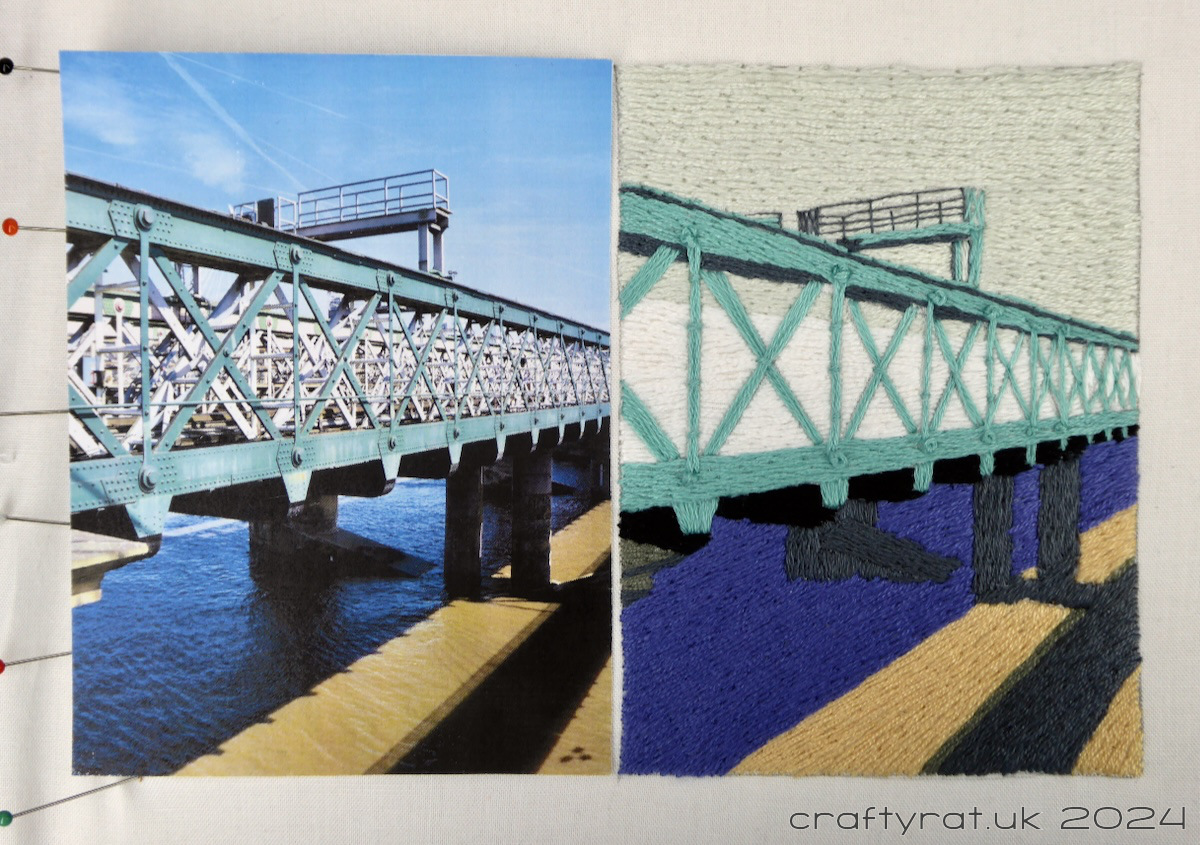
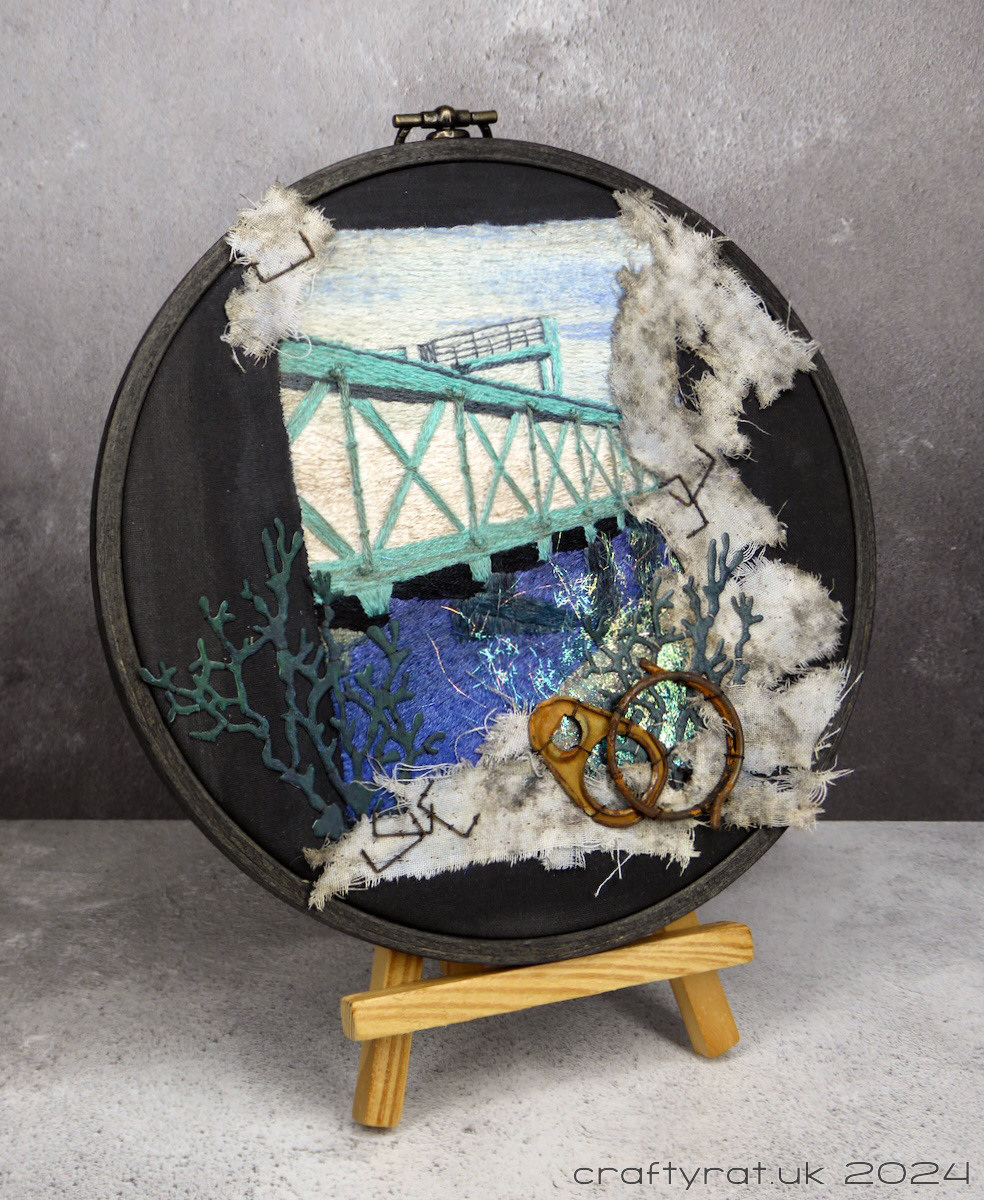
Once I’d picked a photo, I transferred the design to the fabric using a lightbox, sizing it to fit comfortably inside a 6-inch hoop (the image is about 3½ inches wide). Then I set about filling in the design, which was a new experience; I haven’t tried covering large areas with stitch like this before.
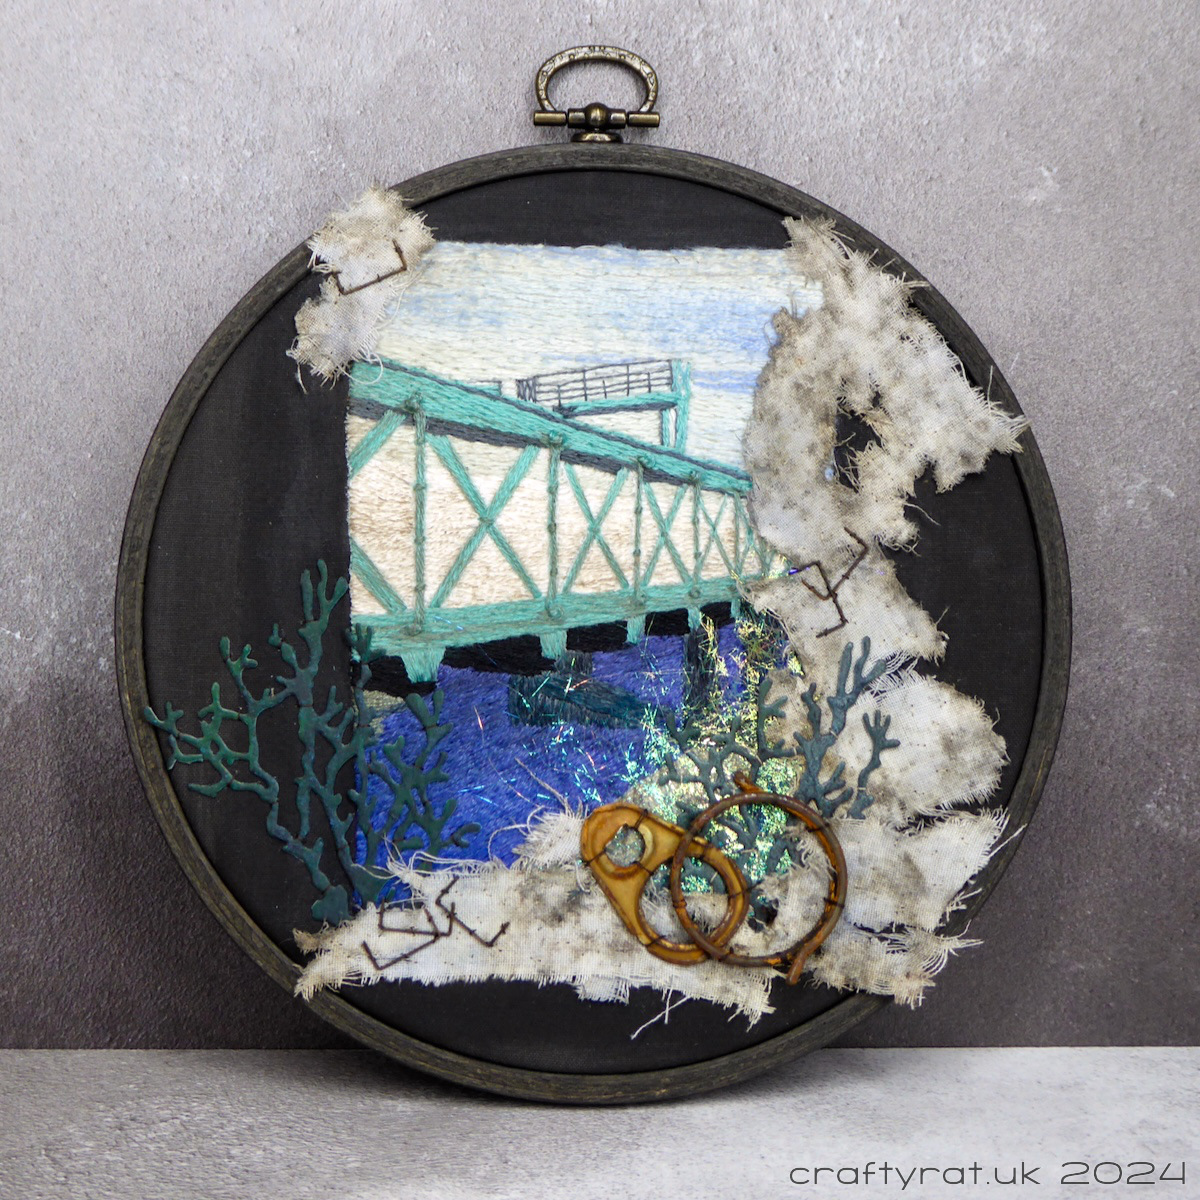
The second half was the really fun bit: adding extra colour to the design and then adding other elements around it. Once I’d got past the concern about “messing up” my neat embroidery, I got to deliberately grunge it up with some walnut ink to add a bit of “dirt” and various acrylic inks to add colour into the sky and water. I also painted the background with black fabric paint.
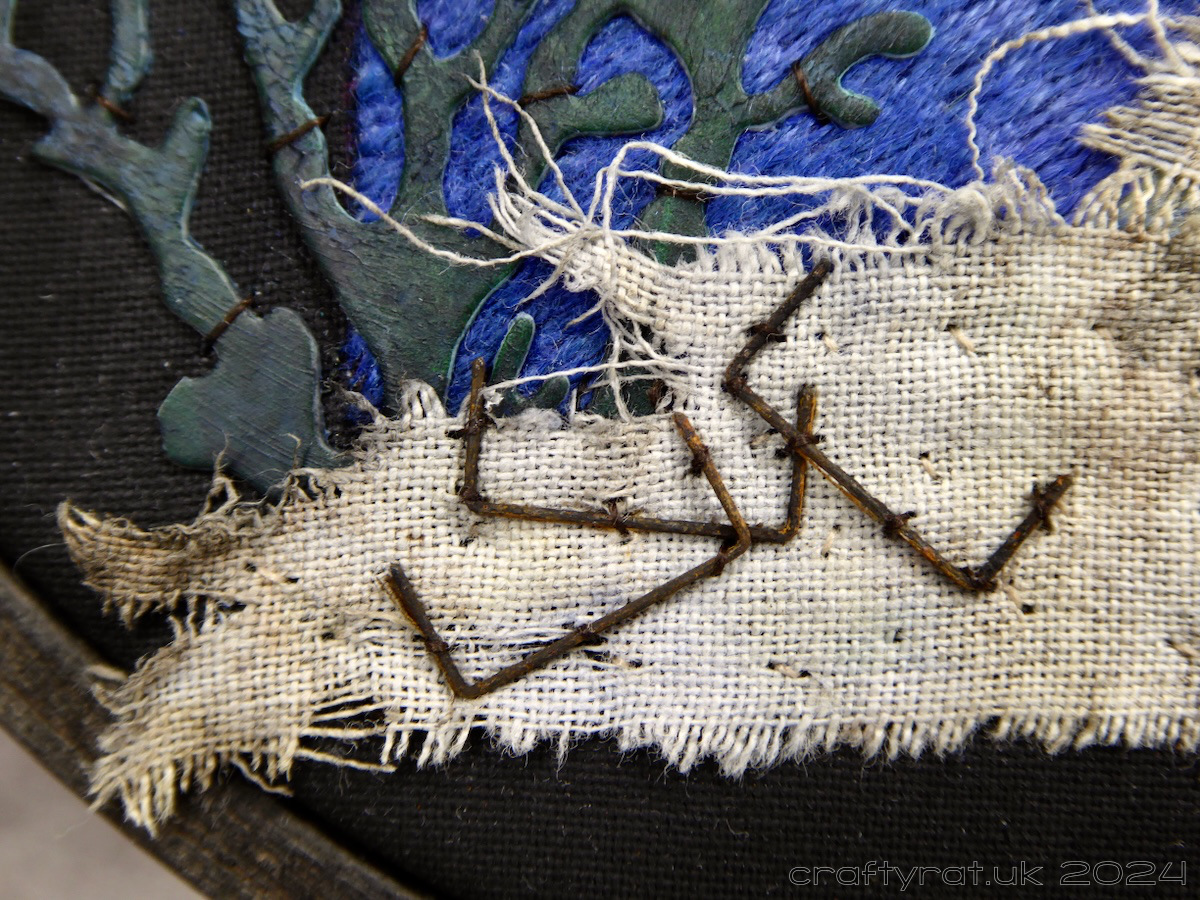
The final stage was to find various “stuff” to frame the image. I ended up using some cotton that I had distressed by burying it in the garden for a few weeks, along with a couple of seaweed die-cuts, a bit of Angelina for sparkle, and some bits of metal that I had left outside to rust.
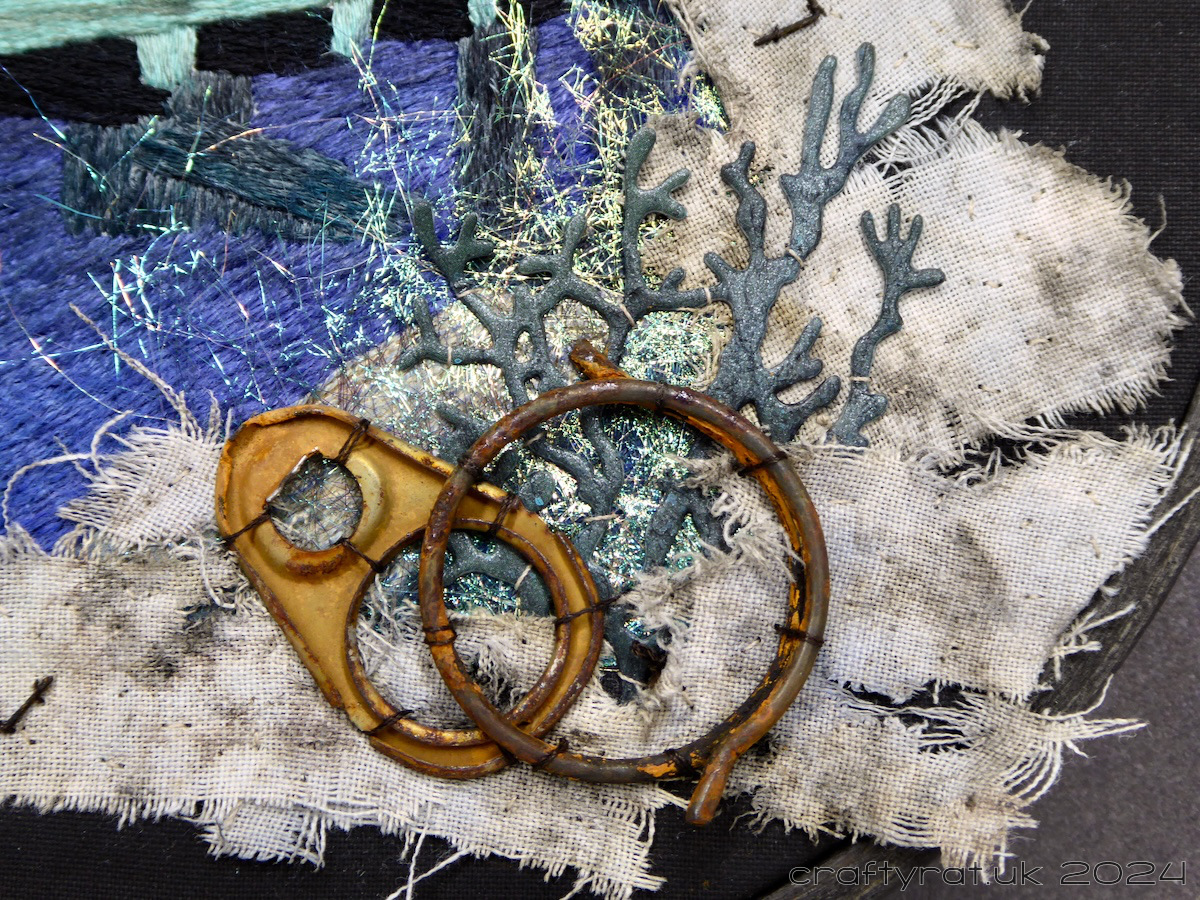
Once they were all arranged and stitched in place, I mounted the finished piece in a display hoop that I had coloured black with India ink.
Discover more from Crafty Rat
Subscribe to get the latest posts sent to your email.

I like this! You nailed the copy of the bridge photo! Thanks for sharing!
LikeLike
I really like this, what a great interpretation of the photo.
LikeLike
Looks beautiful.
LikeLike