It’s a weird time, creatively and generally. I’m not short of things to do and my mojo, surprisingly, hasn’t deserted me, but actually getting up and starting work on something? That’s the tricky part. I have managed to do a few bits, but I have to almost catch myself unawares and just start doing something to overcome the inertia — as soon as I begin to think about it, that’s it, it’s not happening.
I recently came across Laura Boswell, an artist specialising in linocut and woodcut printing, and I’ve been watching her videos about the process she uses. I really enjoyed making my Christmas robin card last year and I want to have a go at maybe trying a two-colour print, but while that idea is bouncing around the back of my brain, I had the idea to use some of my Tom Chalky illustrations to create stamps for mixed media work. The carving block I used had been sitting in a drawer for a while, luckily it was well wrapped and still in good condition, unlike the off-cut from another block that had dried out and cracked (lesson learned: always store your supplies correctly).
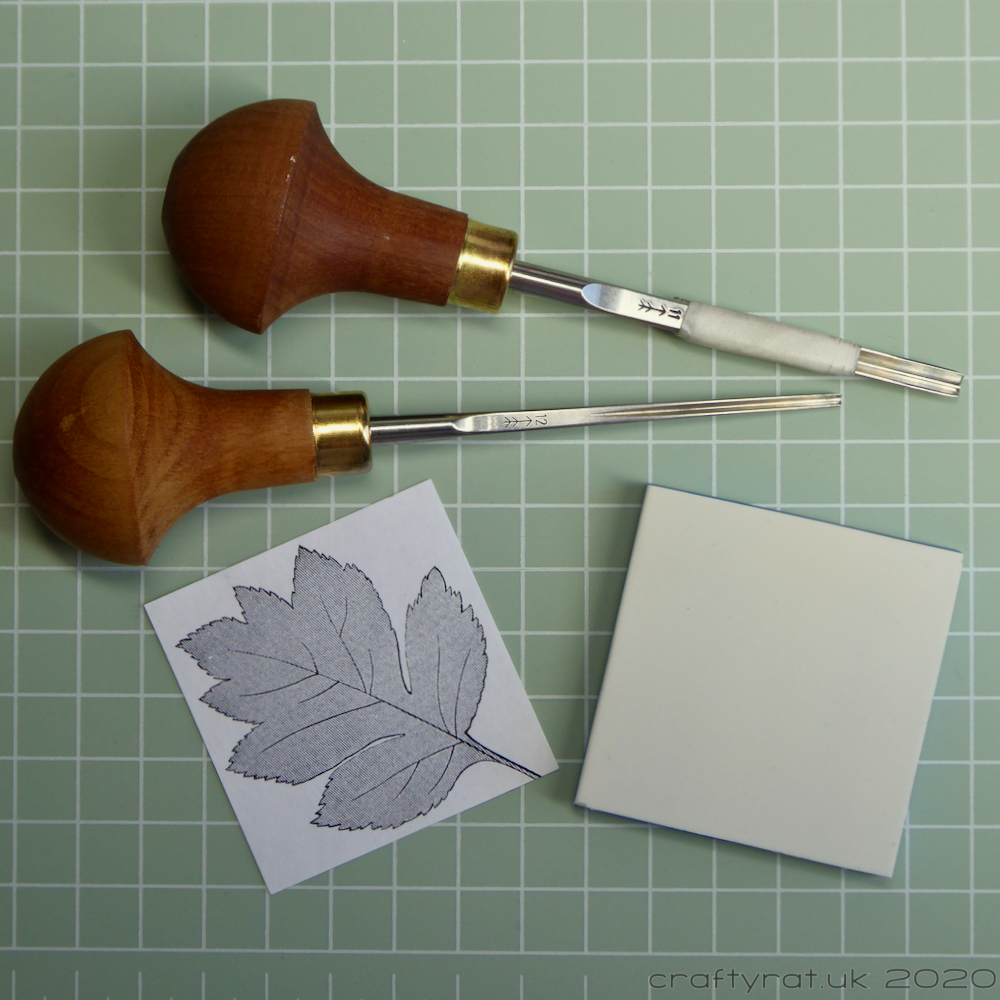
I gathered my supplies: my two Pfeil carving tools (12/1 and 11/2) and a Speedball one with a larger blade, a rubber carving block, Frisk Tracedown to transfer the design, ink to check the carving, and printouts of some images that I thought would work nicely as stamps.
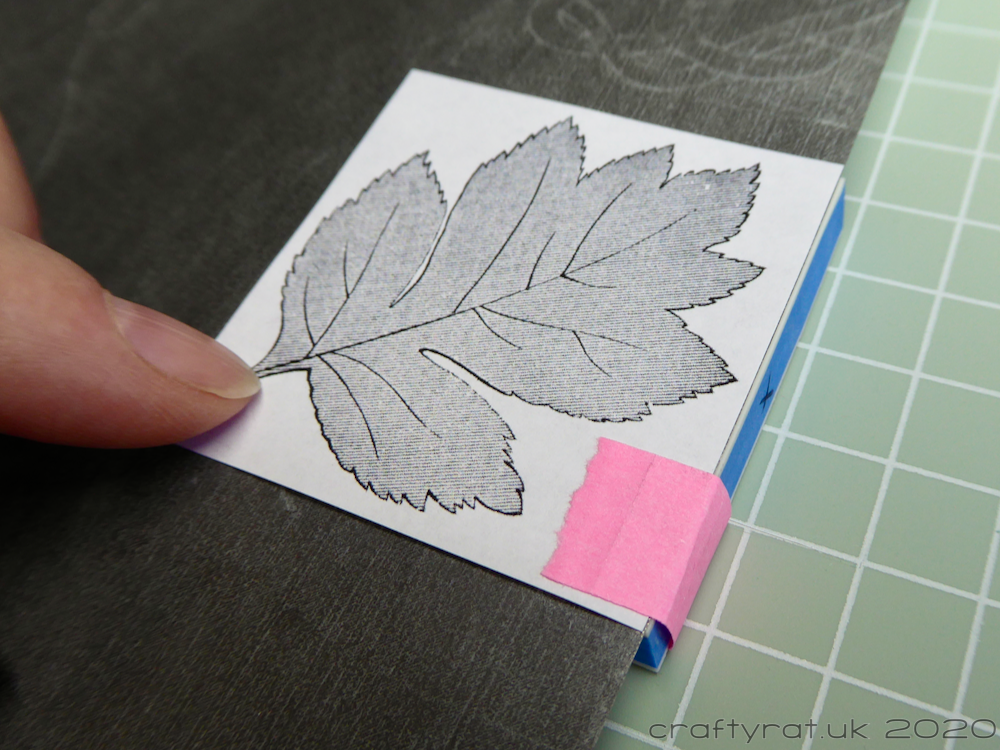
The joy of using digital images as the source is that you can print them at the exact same size as your blocks, in my case 5cm square. I used a bit of tape to hold the image in place on the block — to avoid it slipping while I transferred the design — and placed the tracedown paper between the image and the block (being careful to check that the tracedown paper is the right way up otherwise you just end up with the image on the back of the printout as well… ask me how I know… actually, I think it’s the wrong way up in that photo…)

After successfully tracing the leaf onto the block, it’s time to start carving. Keywords here are slow and steady, and always carve away from your hands — I don’t care how confident or experienced you are, the tools are sharp and all it takes is one slip and you’ve stabbed yourself.
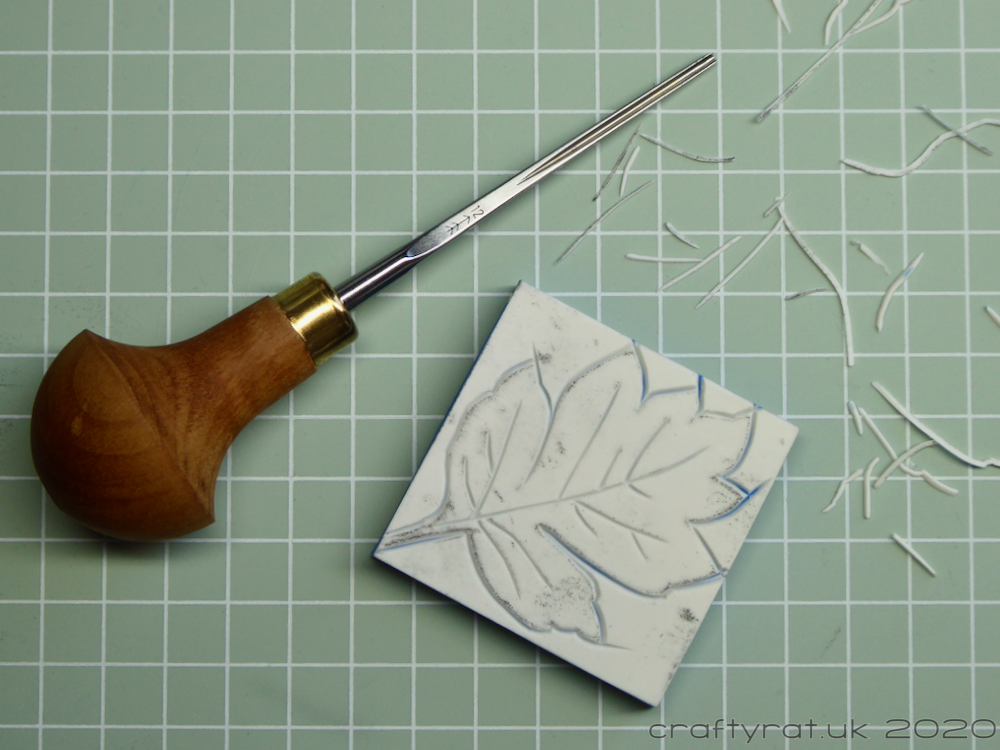
I start by using my smallest tool and carving along the outline. Then I carve any lines inside the design.
Once I’m happy with that, I make the outline cut larger, creating an empty barrier between the stuff I want to keep and the stuff I want to get rid of.
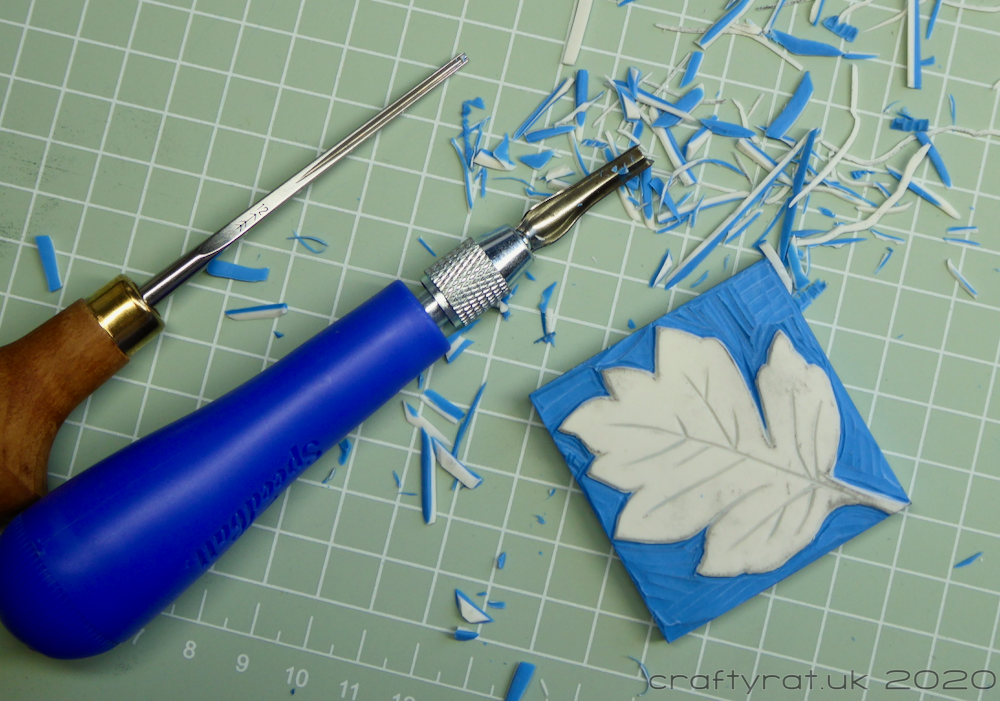
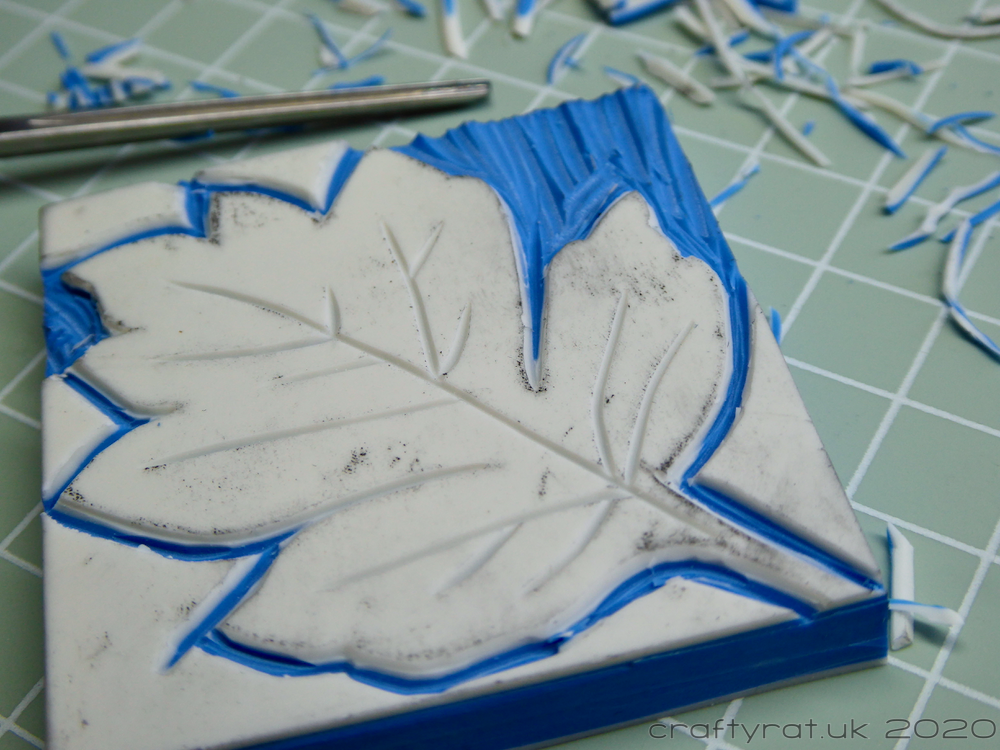
When you start to clear the background, it’s best to work away from the important bit: if you’re not cutting towards it, you can’t slip and cut something you want to keep.
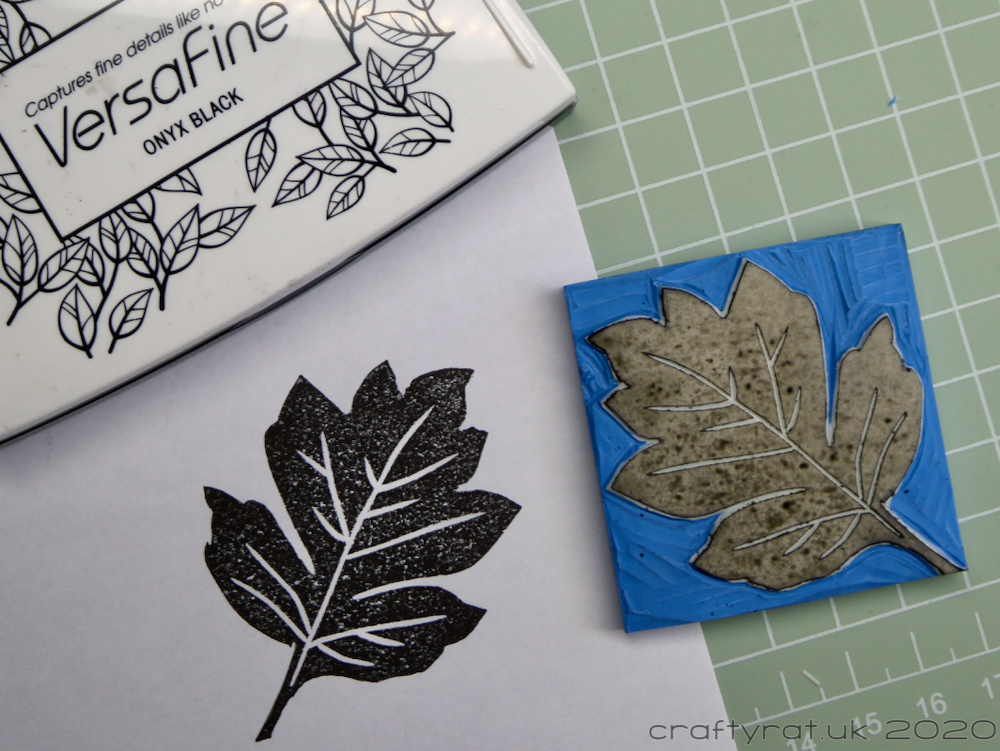
Now it’s time to make a test print to see if there are any bits that need tidying up. Chances are there’ll be a bit of excess rubber either on the background (it’s easy for the edges to catch ink, especially if there’s a large empty area) or right next to the outline cut. I use Versafine onyx black for the test print because it’s a good solid black that covers the rubber really well.
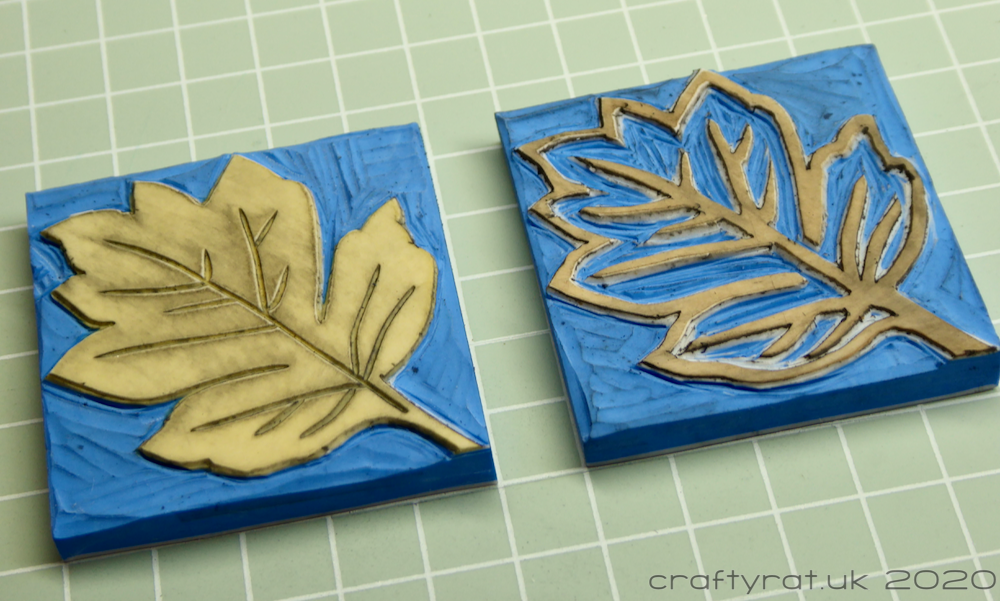
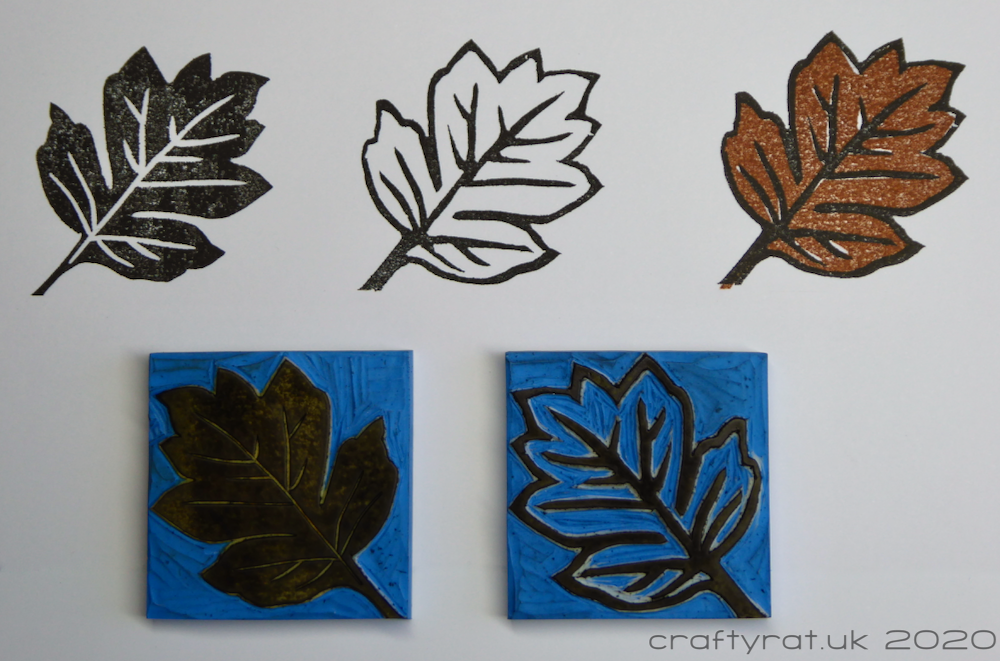
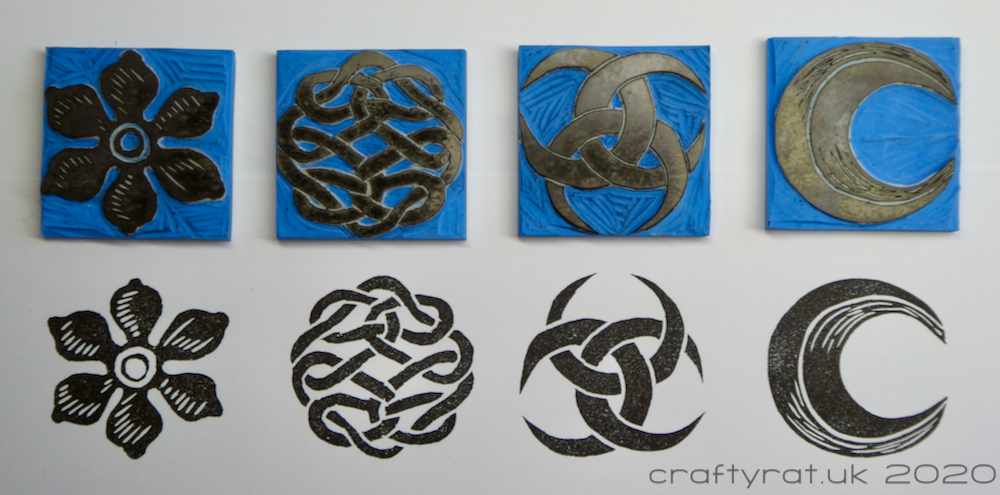
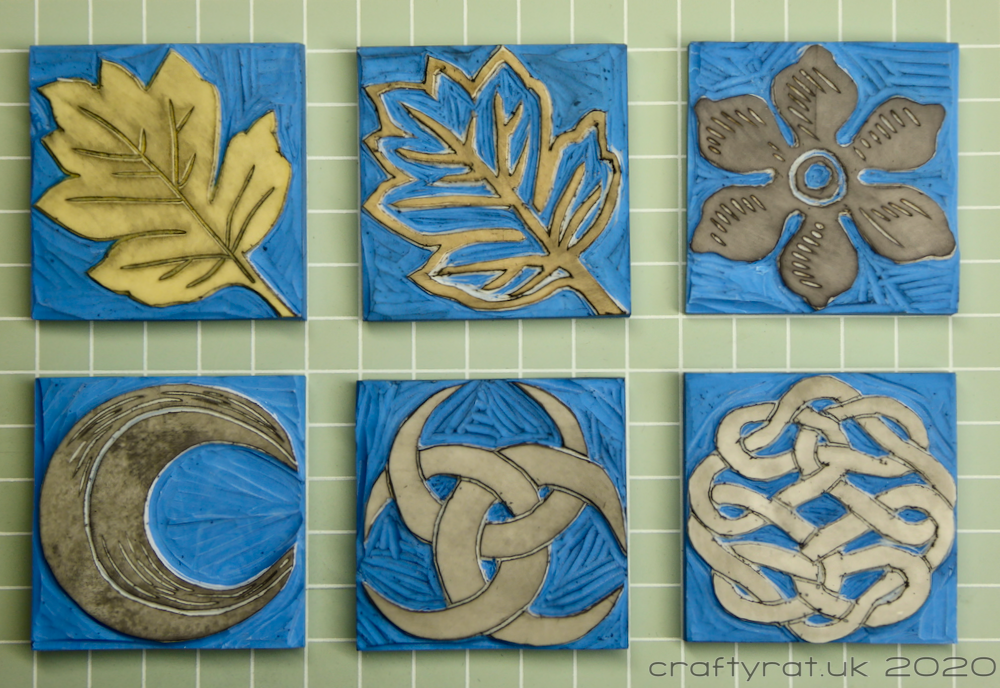
Of course I couldn’t leave it at that. I wanted to see if I could create an outline to go with the solid leaf. It’s far from perfect, but I was aiming for a more rustic feel anyway — and even if it had exactly matched, it’s hard to line up two rubber stamps by hand. This was made in the same way as the first, just with more carving on the inside.
And I couldn’t just leave the rest of the block to sit in a drawer and dry out, so I carved a few more designs for practise.
So that was a productive couple of days and it’s only taken me a week to process the photos and write it up, which is impressive considering the backlog of stuff I have to waiting to go on the blog. Hopefully it won’t take me as long to get around to the next post.
Discover more from Crafty Rat
Subscribe to get the latest posts to your email.

Oh these are great! I have never tried this….not that I need to add another thing to my length list! Thanks for sharing!
LikeLiked by 1 person
Stamp carving is particularly satisfying because I can now use them in mixed media projects or card backgrounds or to make collage papers; it’s tool-making really. And unlike a lot of things, it is pretty cheap to try out – the linocut tools with multiple blades are perfectly good for carving stamps and there are kits that have stamp blanks in them as well. The carving block I used here is more expensive than lino, but I did get six 2″ square stamps put of it.
But I know what you mean about lists… I have lists of things I’ve picked up kits or patterns to try (needle felting, paper sculpture), things I already have the supplies for (acrylic pouring, pergamano), and things I would need to shop for (rag rug, UV resin) etc etc etc… But at least I’ll never be stuck for something to do 🙂
LikeLiked by 1 person
What were you using for a carving block? I remember in junior high art class carving linoleum I did a dog profile. I remember liking this part of art class.
LikeLiked by 1 person
These were done using an unbranded “Colored Sandwich Rubber Stamp Carving Block” that I picked up on Amazon – they’re quite nice because you can clearly see your design as you’re carving it and they’re thick enough to hold and use as stamps. Speedball make “Speedy Carve” which is similar, but is a solid pink. If I want to make prints rather than stamps then I use traditional grey lino.
LikeLiked by 1 person
Thank you for the information.
LikeLiked by 1 person